


MAINTENANCE
7
After sharpening many drill bits, the drill bit grinding dust will accumulate in the
grinding compartment. Grinding particles will promote wear in the three tubes and
chucks, so cleaning on a consistent basis can add life to your machine. Before any
maintenance or cleaning is performed, be sure to unplug your Drill Doctor®.
Cleaning The Drill Doctor®
Unplug the Drill Doctor®. With a dry cloth wipe the inside and outside of the three
tubes to remove any grinding dust that may have accumulated. A standard 1 ⁄” vac-
uum hose works equally well. To empty the drill bit grinding dust remove the black
cover from the top of the machine.
Removing The Wheel Cover
Unplug the Drill Doctor®. Using the narrow end of the wrench provided (or a flat head
screwdriver) insert into the slot on the rear of the machine and use a twisting motion
to pry the cover off. Shake accumulated drill bit grinding dust into a disposable con-
tainer. Remove dust particles around wheel with a small dry brush. Dispose of con-
tainer and drill bit dust in a safe and environmentally approved manner.
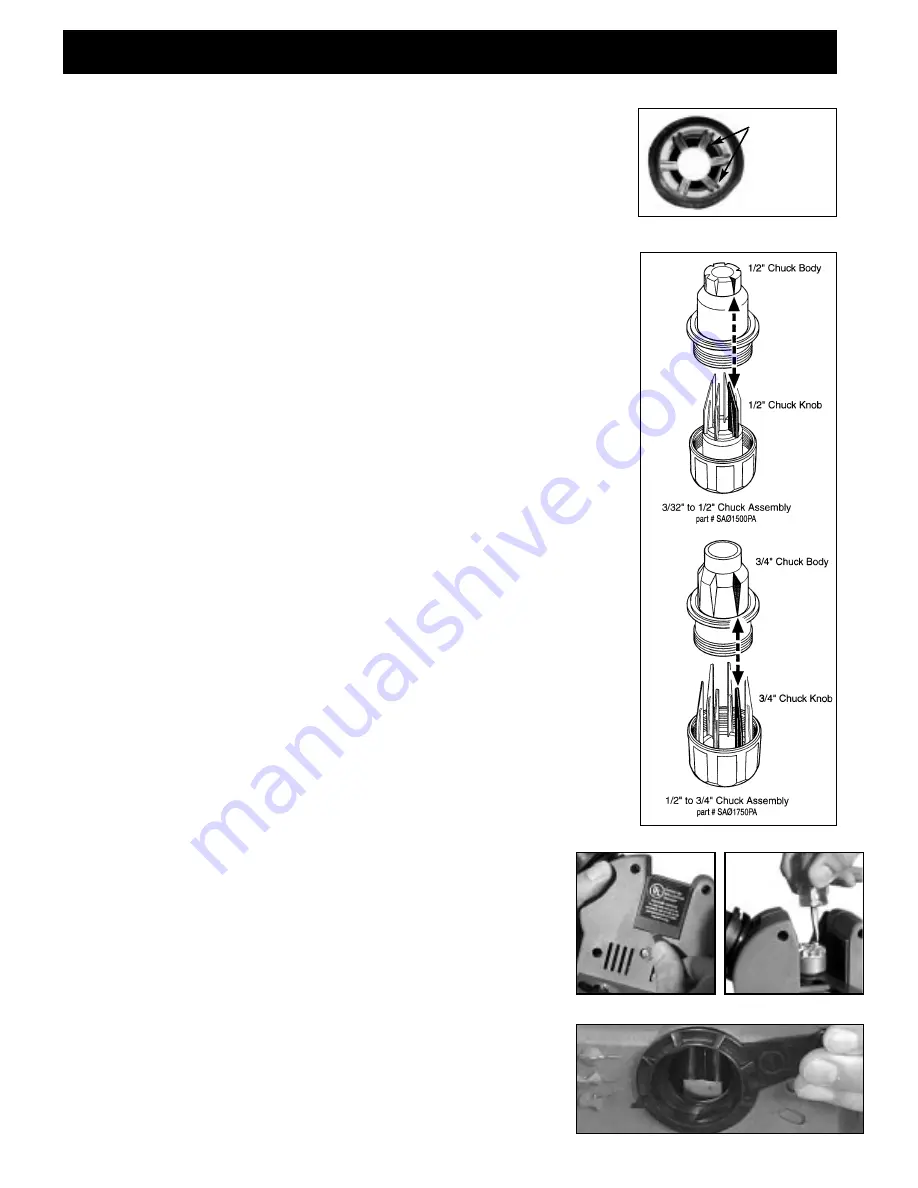
Cleaning The Chucks
With pressurized air, blow the chuck out from the chuck knob end. For further clean-
ing, disassemble the chuck by simply unscrewing the closing knob on the chuck and
removing the chuck body. Clean the inside of the chuck with a dry paint brush. (Do
not remove the springs and jaws from the holder!) Once the inside of the chuck
has been cleaned - slide the chuck body onto the jaws - sighting down the nose make
sure that the jaws go into the grooves inside the chuck body. Rotate the closing
knob clockwise to reassemble the chuck, checking that all of the jaws are in their
respective grooves
(see Figures 21 and 22).
Determining if a Wheel Change is Required
A wheel may need to be changed if:
1. Sharpened drill bits will burn or turn blue no matter how fast or slow you rotate the chuck.
2. Upon inspecting the wheel, by touching it, it feels like there is not any abrasive on
the lower portion.
3. When sharpening the drill bit, it takes too many rotations to sharpen.
The grinding wheel can be reversed to utilize the unused half. If the wheel has
already been reversed, it will need to be replaced. Contact the store or dealer where
you purchased the Drill Doctor® to purchase a replacement wheel
(Part #SA01326GA).
Reversing or Replacing The Diamond Grinding Wheel
Unplug the Drill Doctor®. Remove the wheel cover as described above. The wheel is
attached to the hub with two Phillips head screws and a wheel retainer. Use the wrench
provided by inserting it directly below the wheel onto flats located on the wheel hub.
Remove the screws, wheel retainer and the worn wheel using a twisting motion. Install
the new wheel, wheel retainer and the screws. Do not over tighten the mounting screws
(see Figures 23 and 28).
Cleaning or Replacing the #1 Alignment tube
Grasp the alignment tube handle and pull it forward slightly. This will disengage
the handle from the notches in the front of the housing. Rotate the handle counter-
clockwise until it is almost vertical. Once it is in that position, pull forward and it
will unlock from the front of the housing. Wipe the part off with a dry rag and vac-
uum the front alignment hole to remove any particles from the machine. Reinsert
the alignment tube in the opposite way that it was removed.
DRILL DOCTOR® MAINTENANCE
Remove
Cover
Insert
Wrench
Remove Screws
Chuck Grooves
Fig. 21
Fig. 22
Fig. 23
Fig. 24


