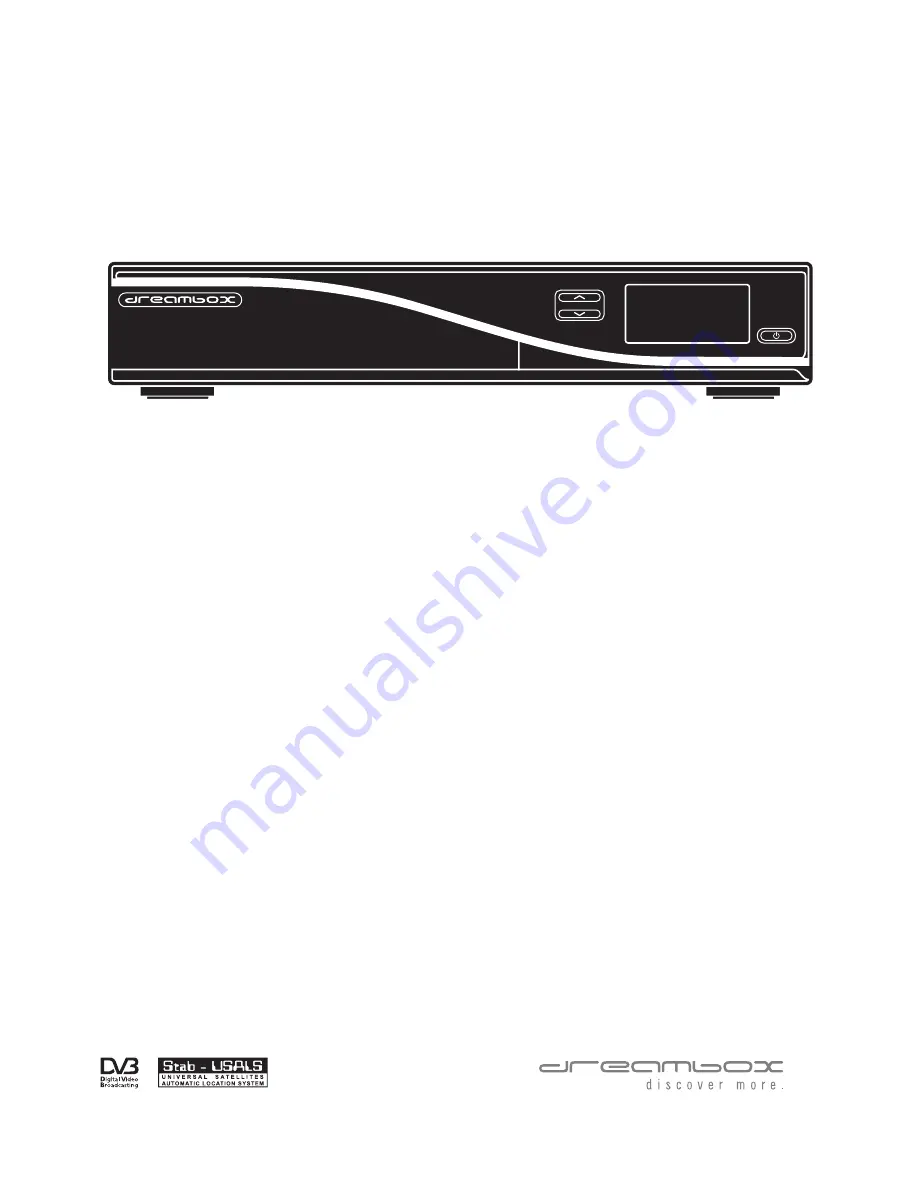
Dreambox DM7020 HD User Manual Download Page 1

dreambox

DM7020 HD

User Manual

Digital satellite receiver for free and encrypted Digital

Video Broadcasting (DVB) with optional digital record-

ing capability.

HDTV

PNP DVB-S2 Tuner

PNP DVB-C/T Hybrid Tuner

Ethernet-Port 10/100 Mbit

contrasty OLED-Display

2x Common Interface

2x Smartcard-Reader Dreamcrypt™

eSATA-Connector

3x USB 2.0

Scart

HDMI

Enigma2 (Linux OS)

Summary of Contents for DM7020 HD

Page 1: ...d Digital Video Broadcasting DVB with optional digital record ing capability HDTV PNP DVB S2 Tuner PNP DVB C T Hybrid Tuner Ethernet Port 10 100 Mbit contrasty OLED Display 2x Common Interface 2x Smar...

Page 2: ...failure in the manual please check if a new version is available in the download section of our website www dreambox de We hope that you take much pleasure in your new dreambox DM7020 HD Your Dream Mu...

Page 3: ...Turning the device on 15 2 3 Start wizard 15 3 Basic operation 17 3 1 Turning your Dreambox on and off 17 3 2 Service selection 18 3 3 Changing channel using the service list 18 3 4 Controlling the v...

Page 4: ...cording 46 5 7 Movielist options 46 6 Setup 48 6 1 Language 48 6 2 Customize 48 6 2 1 Simple Mode 48 6 2 2 Intermediate mode 49 6 3 Timezone 49 6 4 A V Settings 49 6 5 OLED Display 51 6 6 Network 52 6...

Page 5: ...nformation 70 8 1 Service 70 8 2 About Hard and Software 71 9 Updating the software 72 9 1 Backing up your settings 72 9 2 Restoring your settings 72 9 3 Updating a new software 73 9 3 1 using the Dre...

Page 6: ...ace open flame sources such as lit candles on top of the device The device may only be operated in moderate climate Do not remove the cover Risk of electric shock If it is necessary to open the device...

Page 7: ...wer outlet In case the device was exposed to humidity immediately disconnect the device from the power outlet In case you notice any serious damage to the outer shell of the device immediately disconn...

Page 8: ...ing of your waste equipment at the time of disposal will help to conserve natural resources and ensure that it is recycled in a manner that protects human health and the environment For more informati...

Page 9: ...rd reader slots Dreamcrypt is a registered trademark of Dream Multimedia USB 2 0 Port The USB 2 0 port is meant to connect USB 2 0 compliant devices The extend of the supported devices depends on the...

Page 10: ...ountries with 110V mains power as in the USA for example Move the switch to the 110V position to acieve this WARNING Check that the switch is in the right position before switching on your Dreambox Ot...

Page 11: ...of your Dreambox Please use a regular patch cable to connect your Dreambox to your LAN 2 x USB 2 0 port The USB 2 0 Port is designed for devices that support the USB 2 0 standard The amount of support...

Page 12: ...M Mode Button Numeric Keypad Arrow Left Button Mute Button Volume Buttons Navigation Buttons Options Buttons Standby Button TV Mode Button Arrow Right Button EXIT Button Bouquet Buttons TEXT Button RA...

Page 13: ...haracters during text input Options Buttons All possible options are shown by the four colored dots blocks red green yellow blue and can be activated by the Options Buttons Depending on the menu you c...

Page 14: ...ward during playback of a recording TV Button Pressing the TV Button activates the TV Mode RADIO Button Pressing the RADIO Button activates the RADIO Mode TEXT Button The TEXT Button activates the Tel...

Page 15: ...m Multimedia GmbH 110 230V 50 60Hz 15 HDMI Power OFF ON 230 110V 230V L R IN OUT 13 18V LNB IN Dream Multimedia GmbH 2 1 2 Cable connection DVB C Connect the antenna cable via a suitable coax cable to...

Page 16: ...Multimedia GmbH 110 230V 50 60Hz 15 HDMI Power OFF ON 13 18V LNB IN Dream Multimedia GmbH 230 110V 230V L R IN OUT S PDIF optical Connection via Cinch Cable In order to connect your dreambox with your...

Page 17: ...e a second hdmi cable for connecting the hdmi out of your a v receiver to the hdmi input of the tv device HDMI HDMI HDMI HDMI Tuner B Video out Audio out Tuner A Ethernet USB Scart TV S PDIF optical S...

Page 18: ...th the hdmi input of your television HDMI HDMI Tuner B Video out Audio out Tuner A Ethernet USB Scart TV S PDIF optical Service eSATA Dream Multimedia GmbH 110 230V 50 60Hz 15 HDMI Power OFF ON 13 18V...

Page 19: ...ut Audio out Tuner A USB Scart TV S PDIF optical Service eSATA Dream Multimedia GmbH 110 230V 50 60Hz 15 HDMI Power OFF ON 230 110V 230V L R IN OUT 13 18V LNB IN Dream Multimedia GmbH Ethernet Connect...

Page 20: ...ory setting for the video format is CVBS FBAS 2 3 Start wizard If you switch on your Dreambox for the first time you will see the setup wizard The setup wizard will guide you through the first time in...

Page 21: ...therwise you will be asked to perform a service scan Detailed information about the service scan can be found in Chapter 7 4 Automatic scan on page 66 Parental Control Parental control makes it possib...

Page 22: ...ds 2 Press the MENU Button with the Navigation Buttons NH choose the option Standby Restart and press the OK Button With the Navigation Buttons NH choose the option Deep Standby and press the OK Butto...

Page 23: ...able you to skip back and forth between the two most recently watched services This feature is quite useful during commercial breaks since it enables you to watch another channel and quickly check if...

Page 24: ...vice AC3 Downmix Press the red Options Button to toggle AC3 Downmix See Chapter 6 4 A V Settings on page 49 on and off 3 6 Sub Services The green dot on the left side of Sub Services in the Infobar ap...

Page 25: ...reenshot on the left shows you an example of how a subtitle looks Note Keep in mind that not every station offers subtitles If no subtitles are available the subtitle list will stay empty To deactivat...

Page 26: ...Channel name Current time Progress bar Current show Is highlighted yellow as soon as a show is broadcasted encrypted Is highlighted yellow as soon as a show is broadcasted in Dolby Digital Is highligh...

Page 27: ...Channel EPG see Chapter 3 10 Single EPG on page 23 and pressing the blue Options Button activates the Multi EPG see Chapter 3 10 auf Seite 24 The Dreambox automatically searches for similar broadcast...

Page 28: ...th the Navigation Buttons NH choose the option show single service epg and press the OK Button or 2 Press the Navigation Buttons NH to open the services list With the Navigation Buttons NH choose one...

Page 29: ...stomize on page 48 a selection of your bou quets will appear Select the bouquet for which you want the Multi EPG view This view shows the currently airing shows on the ser vices listed in the left col...

Page 30: ...ing hours can be set to 1 5 hours with the Buttons 1 5 on the Numeric Keypad for the chosen bouquet To access the Graphical Multi EPG follow this steps 1 Press the blue Options Button or press hold th...

Page 31: ...number in this mode but it is still possible Press the Mute Button a couple of times to toggle between transparent mode invisible mode and full mode Press the Volume up Button to toggle between double...

Page 32: ...9 Aspect Ratio if the PIG Mode is activated with the Volume down Button Press the OK Button to enable or disable this option The default setting is disabled Note On some older 4 3 TV s these Modes ma...

Page 33: ...Button you can choose between the following options Disable Picture in Picture blue Options Button Choose the option to turn the PiP mode off The little PiP will disappear and only the main TV pictur...

Page 34: ...disabled to deactivate a set sleep timer Press the red Options Button to change the status Sleep timer action Select Deep Standby to completely turn off you Dreambox or Standby to put it into standby...

Page 35: ...tes bouquet will stay untouched This way you can easily add newly found channels from the All list to your favorites bouquet To see how it is done refer to Chapter 4 2 Add a service to favorites on pa...

Page 36: ...rently selected bouquet 1 Press the Navigation Buttons NH to open the channellist 2 Use the Bouquet Buttons to switch to the desired bouquet to which you want to add channels As an alternative you can...

Page 37: ...e the service it at it s new position You can move services as long as the move mode is activated 6 Press the Navigation Buttons NH to open the channellist 7 With the Navigation Buttons NH choose the...

Page 38: ...of services Example ZDF Transponder via satellite This transponder contains the services 3sat Kika ZDF ZDFdokukanal ZDFinfokanal ZDFtheaterkanal Services of ZDF Transponder If you now start a recordin...

Page 39: ...K Button 4 8 Parental control Parental control makes it possible to lock selected channels Follow this steps 1 Press the Menu Button to open the main OSD menu 2 With the Navigation Buttons NH choose t...

Page 40: ...Pincode You have to enter the new pincode twice to ensure you didn t make any typing errors If you already created a pincode earlier you will be prompted to enter the old pincode and afterwards the n...

Page 41: ...re that you are grounded Do not open the device in your living room or in any other rooms with carpeting or any other flooring that can carry an electrostatic charge Remove all connection from the dev...

Page 42: ...l marked on the picture USB Scart TV Tuner B S PDIF optical Video out Audio out Tuner A Ethernet USB Service eSATA Dream Multimedia GmbH 110 230V 50 60Hz 15 HDMI Power OFF ON 13 18V LNB IN IN OUT Drea...

Page 43: ...ard disk into the hard disk cage ensure that the connection port is pointing towards the back of the dreambox Place the hard disk carefully into the plug of the hard disk cage Placing hdd to hard disk...

Page 44: ...age see figure 4 Placing hdd to hard disk cage Fig 4 3 Reassamble your Dreambox by following the guide see Chapter 5 1 Opening the device on page 37 backwards 4 Reattach all necessary cables to your D...

Page 45: ...n Options Button to get back into the harddisk menu 5 2 1 Initialization 1 Press the Menu Button to open the main OSD menu 2 With the Navigation Buttons NH choose the option Setup and press the OK But...

Page 46: ...e Up Down Buttons on your remote control activates the service list The recording continues in the background Once a recording is started no matter if manually or by timer see Chapter 5 3 3 Recording...

Page 47: ...ce of weekday Monday through Friday user defined for each day from Monday through Sunday For all four options you can set a date for the first execution of the timer You can decide what should happen...

Page 48: ...You will be taken to the Timer Editor menu Choose service which you want to record fill text Timereditor 1 Press the Menu Button to open the main OSD menu 2 With the Navigation Buttons NH choose the...

Page 49: ...miss anything ever again if you quickly have to catch a phone call The Timeshift Mode can be exited by pressing the Stop Button To ensure the Timeshift Mode is not stopped by accident you will be ask...

Page 50: ...STOPP Button 2 You will be asked if you want to stop the replay of the recording If you choose Yes you will be taken back to the last channel you were watching Skipping in a recording Button Time But...

Page 51: ...d above and press the 0 on the Numeric Keypad 5 6 Delete a recording 1 Press PVR Button to get to the selection of recordings 2 With the Navigation Buttons NH choose a recording and press the Menu But...

Page 52: ...styles You have the choice between different list styles List style default List style default with ex tended description List style single line List style compact List style compact with de sciption...

Page 53: ...h the Navigation Buttons NH choose the option System and press the OK Button 4 With the Navigation Buttons NH choose the option Language and press the OK Button 5 With the Navigation Buttons NH choose...

Page 54: ...to be the same as in the TV mode Action on long powerbutton press Set your desired option what is supposed to happen if you push the Standby Button for a few seconds The possible options are show shut...

Page 55: ...track Volume control of AC3 signals only works if AC3 downmix is activated Please keep in mind that AC3 downmix will disable the output of real AC3 signals on every audio out even on the S P DIF outp...

Page 56: ...screen and are stretched to fit the width of your screen 16 9 and 16 10 Display 4 3 content as Please see previous page Color format RGB Red Green Blue separated Recommended setting for scart connecti...

Page 57: ...have a DHCP server Disable this option to set a static IP address Manually setting an IP address These settings are only needed if you have selected no on the Use DHCP option before IP Address Enter t...

Page 58: ...re you switch the device on 1 Press the Menu Button to open the main OSD menu 2 With the Navigation Buttons NH choose the option Setup and press the OK Button 3 With the Navigation Buttons NH choose t...

Page 59: ...gs via the Scan wireless networks option the SSID will already be enetred here As an alterative method of entering the SSID you can use the virtual keyboard by pressing the TEXT Button For further inf...

Page 60: ...to discard it Namserver settings Network test Restart network Network wizard For further information on these options refer to chapter 6 6 1 Connection via network cable on page 52 6 7 Common Interfa...

Page 61: ...rts this feature Check the instruction manual of your CI Module for information about this feature The Auto option only works with so called Alphacrypt Modules The Exit Button will quit this menu High...

Page 62: ...and press the OK Button 3 With the Navigation Buttons NH choose the option Factory Reset and press the OK Button You will be asked if you really want to reset all your settings to the factory default...

Page 63: ...ith a Single Universal LNB The coax cable is directly connected from your Dreambox to the LNB Single satellite direct connection Follow this steps 1 Press the Menu Button to open the main OSD menu 2 W...

Page 64: ...he two coax cables form the two LNBs to a so called Toneburst switch and connect the coax cable from the Toneburst switch to your Dreambox Two satellites via Toneburst Follow this steps 1 Press the Me...

Page 65: ...two dishes to achieve this In this case the LNBs are connected to a so called Multiswitch from which the signal is via coax cabled to the satellite receivers Dreamboxes in your household Two satellit...

Page 66: ...t to receive four satellites from one Single Universal or Twin Universal LNB for four or eight parties It does not matter if you use one or two dishes to achieve this In this case the LNBs are connect...

Page 67: ...services in the transponder scan later exchange the mentioned satellites in this list and try again 7 1 5 Stab Positioner using USALS Use this type of configuration if you want to receive many satell...

Page 68: ...se the Numbers 0 9 to enter the coordinates of your residence 10 With the Navigation Buttons NH choose the option Latitude 11 Use the Numbers 0 9 to enter the coordinates of your residence 12 Press th...

Page 69: ...position of the selected satellite which is saved in the positioner by using the Numeric Keypad Refer to the instruction manual or your positioner for the number of the saved position 18 Press the OK...

Page 70: ...h the Navigation Buttons JI choose the option Frequency bands 3 Press the OK Button to save this settings Frequency steps This type of searching scans the set frequencies step by step in a set increme...

Page 71: ...the Navigation Buttons JI choose your region 7 If you have connected an active antenna and you want to run the antenna without it s original power supply set the Enable 5V for active antenna option to...

Page 72: ...se leave the setting to No which results in only new services being added to the channel list In order to find the new services follow this steps 1 Press the Navigation Buttons NH to open the channell...

Page 73: ...see the progress of the scan here The scan is done once you see this menu It shows how many channels were found during the scan Press the OK Button to store the found channels or the EXIT Button to ca...

Page 74: ...Buttons NH choose the option Service searching and press the OK Button 4 With the Navigation Buttons NH choose the option Manual scan and press the OK Button Manual scan With the Navigation Buttons N...

Page 75: ...eps 1 Press the MENU Button in order to open the main menu 2 Navigate to the option Information and press the OK Button The Information menu will open up 3 Navigate to the option Service and press the...

Page 76: ...d Software of your Dreambox Hardware and Software Information Follow this steps 1 Press the MENU Button in order to open the main menu 2 Navigate to the option Information and press the OK Button The...

Page 77: ...uttons NH choose the option Software management and press the OK Button 4 With the Navigation Buttons NH choose the option Backup system settings and press the OK Button 9 2 Restoring your settings 1...

Page 78: ...cable to the service port of your dreambox and the usb connector to your computer 3 Your computer recognizes the dreambox as new hard ware and will ask for a suitable driver The driver can be download...

Page 79: ...x if your PC and Dreambox are connected using a network cable The software update can be done without network sup port but it takes at least 30 minutes 9 Enter your PC s IP under Local IP PC you re yo...

Page 80: ...tware 13 Select the software image and click on the Open button 14 The new software is now being transferred to your Dreambox 15 If the process was successful you will get a Box was flashed successful...

Page 81: ...ve one you have to setup an IP address in the bootloader s serial setup see Chapter 9 3 2 Without DHCP Server on page 77 Power down the Dreambox either using shutdown and by switching off by the power...

Page 82: ...K you don t have an DHCP server That s normal if you don t have a router or configured one by yourself You don t need to install one but you need to connect your Dreambox by a USB cable now and start...

Page 83: ...e Reposition dish so it has a clear view towards the satellite No reception on a channel that was working before Dish aligned incorrectly or faulty Check dish Channel is transmitted in a new slot Star...

Page 84: ...ress the Mute or Volume Button in order to check if the tv device responds to the just entered code If there is no response please try it with the next code from the list according to the steps above...

Page 85: ...be programmed 1 Press the OK Button and the TV Mode Button for 3 seconds 2 Enter 888 with the Numeric Keypad in order to start the Learning function 3 Press the desired button on the dreambox rcu exc...

Page 86: ...eambox rcu instead of the tv device rcu in order to control your tv device Duration of lighting of the Dreambox Symbol You can adjust in seconds the duration of how long the dreambox symbol at the bot...

Page 87: ...ible Ethernet Interface Internal SATA Connector Support for all regular hard disks 3 5 SATA eSATA connector 3x USB 2 0 port 1x front 2x rear Mini USB Service Port OLED Display PNP DVB S2 Tuner PNP DVB...

Page 88: ...x 0 3A 5V Video decoder Video Compression MPEG 2 and MPEG 1 compatible H 246 Videostandard PAL G 25 Hz NTSC Video Formats 4 3 16 9 Letterbox for 4 3 TV Device Audio decoder Audiokompression MPEG 1 MPE...

Page 89: ...400mA LNB shut off at Standby Mode Count of active satellite position DiSEqC 1 0 1 1 1 2 and USALS Rotor Control OLED Display The colored OLED display has an expected lifetime up to 55 000 hours at 50...

Page 90: ...e choice of different views Timer programming manually or by EPG Individually configurable timers e g single or recurring timers PNP Twin Tuner mixable if needed 1 DVB S S2 DVB S S2 2 DVB C DVB C 3 DV...

Page 91: ...fos at www rass tv Parental control Sleeptimer Easy expansion of the base function with the use of Plugins Remote controllable via Web Interface and streaming of the TV Radio stations to any PC connec...

Page 92: ...30 993 You can reach the dealer s hotline from Mo Fr 09 00 am 12 00 pm and 01 00 pm 03 00 pm Technical Hotline Tel 49 0 180 3 44 11 30 990 Fax 49 0 180 3 44 11 30 991 You can reach the technical hotli...

Page 93: ...multimedia tv de Technical Support E Mail support dream multimedia tv de Website Weblink http www dreambox de Support Forum Weblink http www dreambox de board Software Support actual images Weblink D...

Page 94: ...e use or inability to use the software or documentation even if advised of the possibility of such damages License Conditions Enigma2 is property of Dream Multimedia GmbH All copyrights with regard to...

Reviews: