VigorAP 710 User’s Guide
4
1
1
.
.
3
3
H
H
a
a
r
r
d
d
w
w
a
a
r
r
e
e
I
I
n
n
s
s
t
t
a
a
l
l
l
l
a
a
t
t
i
i
o
o
n
n
This section will guide you to install the VigorAP 710 through hardware connection and
configure the device’s settings through web browser.
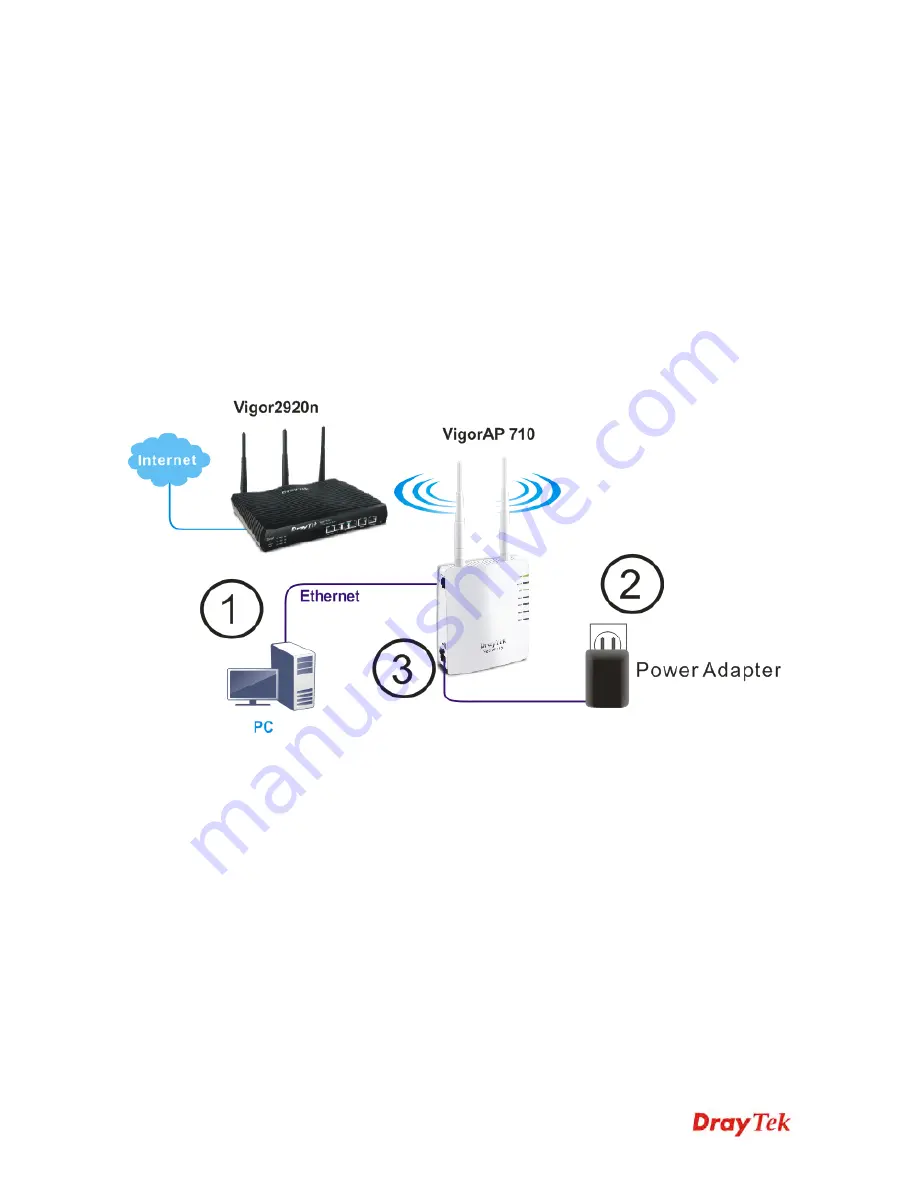
Before starting to configure VigorAP 710, you have to connect your devices correctly.
1.
Connect a computer to VigorAP710.
2.
Connect the A/C power adapter to the wall socket, and then connect it to the PWR
connector of the access point.
3.
Power on VigorAP 710.
4.
Check all LEDs on the front panel.
ACT
LED should be steadily on,
SSID
LEDs
should be on if the access point is correctly connected to the computer.
(For the detailed information of LED status, please refer to section 1.2.)
Summary of Contents for VigorAP 710
Page 1: ...VigorAP 710 User s Guide i ...
Page 2: ...VigorAP 710 User s Guide ii ...
Page 10: ......
Page 32: ...VigorAP 710 User s Guide 22 ...
Page 39: ...VigorAP 710 User s Guide 29 ...
Page 124: ...VigorAP 710 User s Guide 114 ...


