background image

10

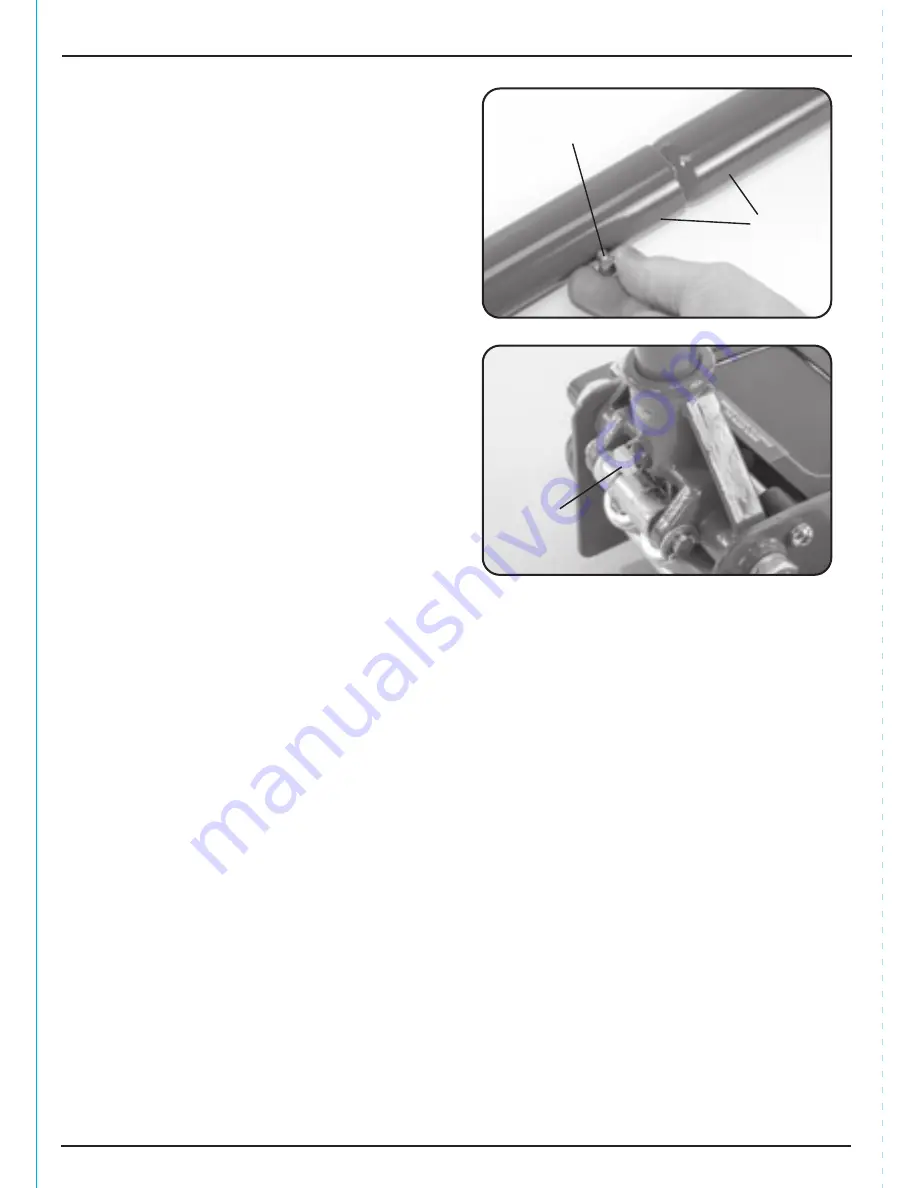
8.1 ASSEMBLY FIGS  1 - 2

Locate the upper and lower part of handles 

together and secure in place with bolt 

provided.

Locate the bottom part of assembled handle 
into the handle sleeve and retain in place by 
tightening bolt 

 provided.

8.   ASSEMBLY

FIG. 1

FIG. 2

Summary of Contents for TJ3HD/C

Page 1: ...of adjustment to the product and prior to any maintenance tasks By following all the general safety instructions contained in this manual it will ensure both product and operator safety together with...

Page 2: ...K 1 3 UNDERSTANDING THIS MANUALS SAFETY CONTENT WARNING Information that draws attention to the risk of injury or death CAUTION Information that draws attention to the risk of damage to the product or...

Page 3: ...H SAFETY INFORMATION 5 1 GENERAL SAFETY INSTRUCTIONS FOR TROLLEY JACK 6 7 6 TECHNICAL DESCRIPTION 6 1 IDENTIFICATION 8 7 UNPACKING CHECKING 7 1 PACKAGING 9 7 2 WHAT S IN THE BOX 9 8 ASSEMBLY 8 1 ASSEM...

Page 4: ...e hired out when the guarantee period is 90 days from the date of purchase The guarantee is extended to 24 months for parts only This guarantee does not apply to normal wear and tear nor does it cover...

Page 5: ...133 465mm Overall size LxWxH 682x344x155mm Weight 30 7kg 4 3 HANDLING STORAGE The environment will have a negative result on its operation if you are not careful If the air is damp components will rus...

Page 6: ...uld never be used to move the vehicle Position the jack under the vehicle manufacturer s recommended lifting point for the vehicle and ensure that it is not corroded dirty or greasy This point should...

Page 7: ...s Draper Stock No 54500 2 CORRECT POSITIONING The jack should be positioned under the approved lifting points for the vehicle Since these points may vary with each vehicle it is important to refer to...

Page 8: ...8 6 TECHNICAL DESCRIPTION 6 1 IDENTIFICATION Pump cylinders Rear castor Handle retention screw Frame Front wheel Radius link Saddle Lifting arm Lift handle sleeve...

Page 9: ...number appears on the Title page and do not attempt to use the jack The packaging material should be retained at least during the guarantee period in case the machine needs to be returned for repair...

Page 10: ...ocate the upper and lower part of handles together and secure in place with bolt provided Locate the bottom part of assembled handle into the handle sleeve and retain in place by tightening bolt provi...

Page 11: ...tribute the hydraulic oil 3 Tighten release valve 4 Check jack lifts and lowers smoothly before use 9 OPERATING THE TROLLEY JACK 9 1 BEFORE USE FIG 3 Check that the saddle is correctly positioned TO R...

Page 12: ...regular basis iii To check oil level fully lower jack on level ground Remove filler plug The correct level is 5mm below filler plug hole If low add oil as needed YOUR JACK WAS FILLED AT THE FACTORY WI...

Page 13: ...STOCK No PART No DESCRIPTION 30881 AS3000R Axle Stands 54500 RWC Wheel Chocks 11 OPTIONAL ACCESSORIES 11 1 OPTIONAL ACCESSORIES 13...

Page 14: ...2 Pump handle 5 10 full strokes and close the release valve Jack will not lift to its full height Jack pump feels unsteady under load The reservoir could be overfilled Low hydraulic oil level Check th...

Page 15: ...NOTES 15...

Page 16: ...K Help Line 023 8049 4344 Sales Desk 023 8049 4333 General Enquiries 023 8026 6355 Service Warranty Repair Agent For aftersales servicing or warranty repairs please contact the Draper Tools Help Line...

Reviews: