background image

5.  HEALTH AND SAFETY INFORMATION

e)  Do not overreach. Keep proper footing and balance at all times. This enables better control 

of the power tool in unexpected situations.

f)  Dress properly. Do not wear loose clothing or jewellery. Keep your hair, clothing and gloves 

away from moving parts. Loose clothes, jewellery or long hair can be caught in moving 
parts.

g)  If devices are provided for the connection of dust extraction and collection facilities, ensure 

these are connected and properly used. Use of these devices can reduce dust-related 
hazards.

4) Power tool use and care

a)  Do not force the power tool. Use the correct power tool for your application. The correct 

power tool will do the job better and safer at the rate for which it was designed.

b)  Do not use the power tool if the switch does not turn it on and off. Any power tool that 

cannot be controlled with the switch is dangerous and must be repaired.

c)  Disconnect the plug from the power source and/or battery pack from the power tool before 

making any adjustments, changing accessories, or storing power tools. Such preventive 
safety measures reduce the risk of starting the power tool accidentally.

d)  Store idle power tools out of the reach of children and do not allow persons unfamiliar with 

the power tool or these instructions to operate the power tool. Power tools are dangerous in 
the hands of untrained users.

e)  Maintain power tools. Check for misalignment or binding of moving parts, breakage of parts 

and any other condition that may affect the power tool’s operation. If damaged, have the 
power tool repaired before use. Many accidents are caused by poorly maintained power 
tools.

f)  Keep cutting tools sharp and clean. Properly maintained cutting tools with sharp cutting 

edges are less likely to bind and are easier to control.

g)  Use the power tool, accessories and tool bits etc. in accordance with these instructions, 

taking into account the working conditions and the work to be performed. Use of the power 
tool for operations different from those intended could result in a hazardous situation.

5) Service

a)  Have your power tool serviced by a qualified repair person using only identical replacement 

parts. This will ensure that the safety of the power tool is maintained.

Important

On products exceeding 2000W it is recommended that the power cable and/or extension cable are 
fully unwound before a connection is made to the power supply. However, ensure the residual 
cable does not pose a trip hazard.

5.2 SPECIFIC SAFETY INSTRUCTIONS FOR 230V LAWN MOWERS

Warning:

 Connect the machine only to a supply circuit protected by a residual current device 

(RCD) with a tripping current of not more than 30 MA.

–  Keep bystanders away.

–  Remove the plug from the socket before carrying  out adjustment, cleaning or maintenance.

–  Read user instructions before operating this machine.

–  The lawn mower shall not be operated without either the entire grass catcher or the guard 

in place.

Warning:

 Do not touch rotating blade.

–  Beware of blades. Blades continue to rotate after the motor is switched off. Remove plug 

from mains before maintenance or if cord is damaged.

- 7 -

Summary of Contents for 56102

Page 1: ...ng the purpose for which the product has been designed and contains all the necessary information to ensure its correct and safe use By following all the general safety instructions contained in this manual it will ensure both product and operator safety together with longer life of the product itself AlI photographs and drawings in this manual are supplied by Draper Tools to help illustrate the o...

Page 2: ...MANUALS SAFETY CONTENT WARNING Information that draws attention to the risk of injury or death CAUTION Information that draws attention to the risk of damage to the product or surroundings 1 4 COPYRIGHT NOTICE Copyright Draper Tools Limited Permission is granted to reproduce this publication for personal and educational use only Commercial copying redistribution hiring or lending is prohibited No ...

Page 3: ... 8 3 Operation 8 4 Maintenance and storage 9 5 3 CONNECTION TO THE POWER SUPPLY 9 6 TECHNICAL DESCRIPTION 6 1 IDENTIFICATION 10 7 UNPACKING AND CHECKING 7 1 PACKAGING 11 7 2 WHAT S IN THE BOX 11 8 ASSEMBLING THE LAWN MOWER 8 1 FRONT REAR WHEEL ASSEMBLY 12 8 2 HANDLE ASSEMBLY 13 8 3 GRASS COLLECTION BOX ASSEMBLY 14 9 OPERATING INSTRUCTIONS 9 1 POWER SUPPLY 15 9 2 SWITCHING ON 15 9 3 CUTTING HEIGHT ...

Page 4: ...out when the guarantee period is 90 days from the date of purchase The guarantee is extended to 24 months for parts only This guarantee does not apply to normal wear and tear nor does it cover any damage caused by misuse careless or unsafe handling alterations accidents or repairs attempted or made by any personnel other than the authorised Draper warranty repair agent Note If the tool is found no...

Page 5: ...B A Single value noise level LWA 96 dB A Weight machine only 11 2kg A weighted sound pressure level in accordance to 2000 14 EC 4 3 HANDLING AND STORAGE Care must still be taken when handling and lifting Dropping this machine will have an effect on the accuracy and may also result in personal injury This machine is not a toy and must be respected The environment will have a negative result on its ...

Page 6: ...eased risk of electric shock if your body is earthed or grounded c Do not expose power tools to rain or wet conditions Water entering a power tool will increase the risk of electric shock d Do not abuse the cord Never use the cord for carrying pulling or unplugging the power tool Keep cord away from heat oil sharp edges or moving parts Damaged or entangled cords increase the risk of electric shock...

Page 7: ...age of parts and any other condition that may affect the power tool s operation If damaged have the power tool repaired before use Many accidents are caused by poorly maintained power tools f Keep cutting tools sharp and clean Properly maintained cutting tools with sharp cutting edges are less likely to bind and are easier to control g Use the power tool accessories and tool bits etc in accordance...

Page 8: ...se the lawn mower if the cords are damaged or worn 3 Operation Warning Do not connect a damaged cord to the supply or touch a damaged cord before it is disconnected from the supply A damaged cord can lead to contact with live parts Mow only in daylight or in good artificial light Avoid operating the appliance in wet grass where feasible Always be sure of your footing on slopes Walk never run For w...

Page 9: ...shock Do not open This appliance is supplied with a moulded 3 pin mains plug for your safety The value of the fuse fitted is marked on the pin face of the plug Should the fuse need replacing ensure the substitute is of the correct rating approved to BS1362 and ASTA or BS Kite marked ASTA BSI The fuse cover is removable with a small plain slot screwdriver Ensure the fuse cover is replaced before at...

Page 10: ...r supply cord Handle folding levers Handle mounting levers Centralised carrying handle Grass comb Front wheels Rotary cutting blade Rear wheels Grass collection box Grass collection box lid Grass collection fill indicator Deflector guard Lower handle section Upper handle section 10 ...

Page 11: ... Some of the packaging materials used may be harmful to children Do not leave any of these materials in the reach of children If any of the packaging is to be thrown away make sure they are disposed of correctly according to local regulations 7 2 WHAT S IN THE BOX The packaging contains several parts and semi assembled elements that require final assembly Lay out the contents and check off the ite...

Page 12: ... the machine to the power supply before the product is completely assembled 8 1 FRONT REAR WHEEL ASSEMBLY STEPS 1 5 The use of a pair of long nose pliers not supplied is recommended when assembling the following front rear wheel components 12 1 2 3 5 4 ...

Page 13: ...8 ASSEMBLING THE LAWN MOWER 8 2 HANDLE ASSEMBLY STEPS 1 8 13 1 2 3 6 4 7 8 5 ...

Page 14: ...8 ASSEMBLING THE LAWN MOWER 14 8 3 GRASS COLLECTION BOX ASSEMBLY STEPS 1 8 1 2 3 6 4 5 ...

Page 15: ...mower from the electrical supply before making any adjustments to the cutting height The front and back wheels have independently sprung locking axles that can adjust the height of the rotary cutting blade to three cutting height positions Important Always check the condition of the rotary blade before using the mower Replace any blunt or damaged blades Warning Always ensure the blade is at a stan...

Page 16: ...ty the collection box when grass trimmings are near to capacity Failure to empty a full grass box will result in less efficient cutting and possible damage to the mower 9 5 GRASS COMB FEATURE This mower comes with protruding fins at the front of the mower that lift the grass before the blade cuts To keep this feature at its most effective ensure any existing grass debris on these fins are removed ...

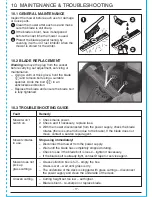
Page 17: ...BLESHOOTING GUIDE Fault Remedy Mower won t switch on 1 Check mains power 2 Check and if necessary replace fuse 3 With the mower disconnected from the power supply check the blade rotates there is some friction due to the brake If the blade does not move contact a service repair agent Mower vibrates in use Stop using immediately Disconnect the mower from the power supply Wait until the blade has co...

Page 18: ...ldlife Warning Read the instruction manual Single value noise marking Maximum declared A Weighted sound power level in decibels 11 1 EXPLANATION OF SYMBOLS Warning Wear suitable foot protection Danger Risk of flying debris Warning Remove plug from power supply before maintenance Warning Keep supply cord away from cutting blade Danger Beware of sharp blades Warning Wear suitable eye face protection...

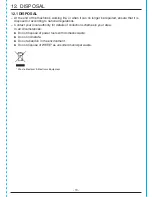
Page 19: ...posed of according to national regulations Contact your local authority for details of collection schemes in your area In all circumstances Do not dispose of power tools with domestic waste Do not incinerate Do not abandon in the environment Do not dispose of WEEE as unsorted municipal waste Waste Electrical Electronic Equipment ...

Page 20: ...Service Warranty Repair Agent For aftersales servicing or warranty repairs please contact the Draper Tools Helpline for details of an agent in your local area YOUR DRAPER STOCKIST RDCH0317 Published by Draper Tools Limited No part of this publication may be reproduced stored in a retrieval system or transmitted in any form or by any means electronic mechanical photocopying recording or otherwise w...

Reviews: