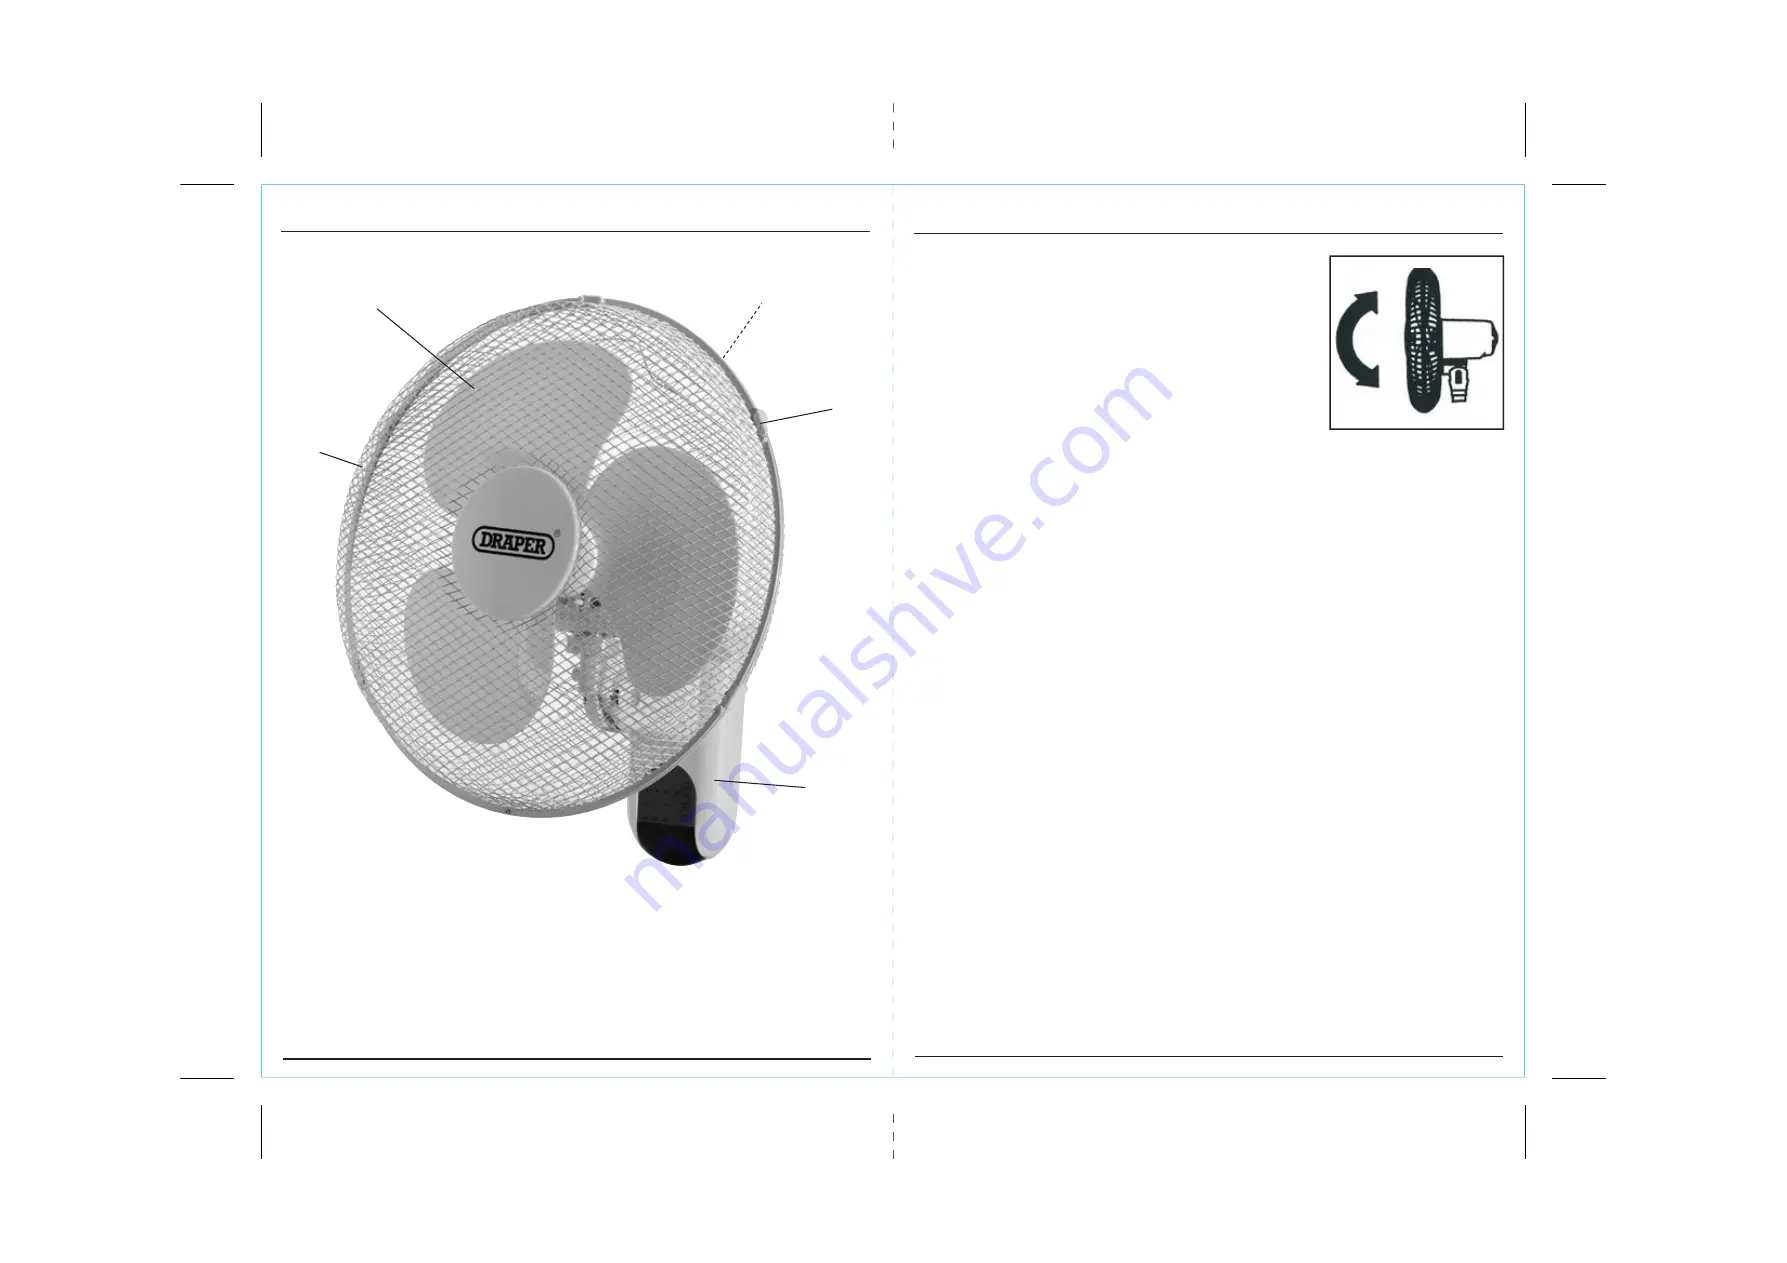
Front grille.
Fan blade.
Rear grille.
Clips.
Fan body.
- 8 -
- 13 -
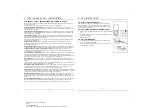
8. ASSEMBLING THE FAN
8.2 TO ADJUST THE FAN ANGLE
Push the guard gently to the desired up or down angle.
6. TECHNICAL DESCRIPTION
6.1 IDENTIFICATION
Page 1: ...the product keep it for the life of the product passing it on to any subsequent holder of the product Read all these instructions before assembling operating or maintaining this product This manual h...
Page 2: ...SAFETY CONTENT WARNING Information that draws attention to the risk of injury or death CAUTION Information that draws attention to the risk of damage to the product or surroundings 1 4 COPYRIGHT NOTIC...
Page 3: ...ILLES 10 12 8 2 TO ADJUST THE FAN ANGLE 13 9 FAN INSTRUCTION 9 1 REMOTE CONTROL OPERATION 14 9 2 USE OF REMOTE CONTROL 15 9 3 REPLACING BATTERIES NOT INCLUDED 15 9 4 BATTERY WARNING 15 10 MAINTENANCE...
Page 4: ...arantee is extended to 24 months for parts only This guarantee does not apply to normal wear and tear nor does it cover any damage caused by misuse careless or unsafe handling alterations accidents or...
Page 5: ...ed on a firm and stable surface Ensure that water and or cleaning detergent does not enter the motor housing or switch mechanism 16 5 10 MAINTENANCE 1 Always unplug the fan from the power supply befor...
Page 6: ...ress properly Loose clothing long hair and jewellery are all dangerous because they can become entangled in moving machinery This can also result in parts of body being pulled into the machine Clothin...
Page 7: ...ned for connection to a Domestic power supply rated at 230V AC It is Class 2 double insulated is designed for connection to a power supply matching that detailed on the rating label and compatible wit...
Page 8: ...Front grille Fan blade Rear grille Clips Fan body 8 13 8 ASSEMBLING THE FAN 8 2 TO ADJUST THE FAN ANGLE Push the guard gently to the desired up or down angle 6 TECHNICAL DESCRIPTION 6 1 IDENTIFICATION...
Page 9: ...ntains several parts and semi assembled elements that require final assembly Lay out the contents and check off the items against those featured below 9 12 8 ASSEMBLING THE FAN Carefully attach the fr...
Page 10: ...en tighten Place the blade into shaft and make sure the rotor shaft pin is fitted into the groove of the blade Turn the fan securing nut anticlockwise to tighten the blade Note Fan clamp nut has a rev...
Page 11: ...en tighten Place the blade into shaft and make sure the rotor shaft pin is fitted into the groove of the blade Turn the fan securing nut anticlockwise to tighten the blade Note Fan clamp nut has a rev...
Page 12: ...ntains several parts and semi assembled elements that require final assembly Lay out the contents and check off the items against those featured below 9 12 8 ASSEMBLING THE FAN Carefully attach the fr...
Page 13: ...Front grille Fan blade Rear grille Clips Fan body 8 13 8 ASSEMBLING THE FAN 8 2 TO ADJUST THE FAN ANGLE Push the guard gently to the desired up or down angle 6 TECHNICAL DESCRIPTION 6 1 IDENTIFICATION...
Page 14: ...ned for connection to a Domestic power supply rated at 230V AC It is Class 2 double insulated is designed for connection to a power supply matching that detailed on the rating label and compatible wit...
Page 15: ...ress properly Loose clothing long hair and jewellery are all dangerous because they can become entangled in moving machinery This can also result in parts of body being pulled into the machine Clothin...
Page 16: ...ed on a firm and stable surface Ensure that water and or cleaning detergent does not enter the motor housing or switch mechanism 16 5 10 MAINTENANCE 1 Always unplug the fan from the power supply befor...
Page 17: ...arantee is extended to 24 months for parts only This guarantee does not apply to normal wear and tear nor does it cover any damage caused by misuse careless or unsafe handling alterations accidents or...
Page 18: ...ILLES 10 12 8 2 TO ADJUST THE FAN ANGLE 13 9 FAN INSTRUCTION 9 1 REMOTE CONTROL OPERATION 14 9 2 USE OF REMOTE CONTROL 15 9 3 REPLACING BATTERIES NOT INCLUDED 15 9 4 BATTERY WARNING 15 10 MAINTENANCE...
Page 19: ...SAFETY CONTENT WARNING Information that draws attention to the risk of injury or death CAUTION Information that draws attention to the risk of damage to the product or surroundings 1 4 COPYRIGHT NOTIC...
Page 20: ...the product keep it for the life of the product passing it on to any subsequent holder of the product Read all these instructions before assembling operating or maintaining this product This manual h...