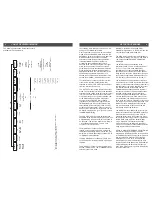
90-260 VAC
DC OUTPUTS X 8
12V GND 5V
IF IN
RF OUT
POWER
44 MHz
IF OUTPUT
SPI L
VDS INPUT
POWER
IF IN
RF OUT
POWER
44 MHz
IF OUTPUT
SPI L
VDS INPUT
POWER
IF IN
RF OUT
POWER
44 MHz
IF OUTPUT
SPI L
VDS INPUT
POWER
IF IN
RF OUT
POWER
44 MHz
IF OUTPUT
SPI L
VDS INPUT
POWER
44 MHz
IF OUTPUT
POWER
13
1
25
14
SPI L
VDS INPUT
GND
+12 V
+5 V
3 REAR PANEL CONNECTIONS
R1
R2
R1 - 44 MHz IF OUTPUT Connector
This is the modulator output. The level is
+30 dBmV.
R2 - 25 Pin SPI LVDS INPUT Connector
This is the MPEG2 transport stream input -
DVB Synchronous Parallel Interface. The levels
comply with low voltage differential signalling
specifications.
R3 - DC Power Connector
This is the power input connector. Connect to a
Drake PS8 or equivalent power supply,
(12 V @ 0 mA, 5 V @ 380 mA for the SPI
input version).
Figure 2 Figure 3
R3
44 MHz
IF OUTPUT
POWER
ASI TRANSPORT
STREAM INPUT
GND
+12 V
+5 V
R4
R5
R6
R4 - 44 MHz IF OUTPUT Connector
This is the modulator output. The level is
+30 dBmV.
R5 - 75 Ohm, Type BNC Connector
This is the MPEG2 transport stream input; ASI
input, asynchronous serial interface.
R6 - DC Power Connector
This is the power input connector. Connect to a
Drake PS8 or equivalent power supply,
(12 V @ 0 mA, 5 V @ 500 mA for the ASI
input version).
INSTALLATION 4
CONNECTIONS AND CONTROLS
All connections to and from each modulator are
made through the rear panel. Refer to Figure 4
for correct cable and wiring connections.
Figure 4
RACK MOUNTING
Adequate ventilation is very important in
multichannel installations. Units should be
spaced apart by at least one panel height
wherever possible, and some air movement is
mandatory in enclosed rack cabinets.
Excessive heat will shorten component life and
modulator performance will be degraded
without proper cooling.
TMQAM OPERATION AND SETUP
The TMQAM provides user access to many
parameters of the modulator so that it can be
setup to precisely match the requirements of
the system.
1) To VIEW parameter settings only – no
adjustment:
Press either the left or right arrow buttons to
scroll through each parameter page. The
parameter is listed on the first line of the display
and the present setting will be displayed on the
second line. After viewing, press the left or right
arrow button again to advance to the next
parameter. After viewing, the display will
time-out and return to the output baud (BD)
rate/symbol rate page.
2) To ADJUST or change parameter settings
or for initial set up, follow these steps:
Press and hold the enter button for 2 to 3
seconds until the display begins to flash. Press
the left or right arrow button to scroll to the
desired parameter. Now press the up or down
arrow button to adjust the parameter value.
Note that no change is made at this point until
the new value is loaded and saved. When the
value is adjusted to the value required, press
the enter button again. This will load and save
the new value until this procedure is repeated.
QAM MODULATOR
UNITS
AC POWER
CORD
TO QAM
DISTRIBUTION
FROM SATELLITE
DEMODULATOR OR
OTHER LVDS DATA
STREAM
DUC550 OR DUC860
UPCONVERTERS
POWER
SUPPLY


