background image

Pre­flight ­ The Helicopter


Check the packing list enclosed with your Draganflyer to ensure that you have 
received all of the necessary components and that none are broken or damaged. 
If anything is amiss, immediately contact Draganfly Innovations. 

Your Draganflyer was fully assembled and test flown before being packed and 
shipped to you.  For this reason, it is possible to take it right out of the box and 
begin flying. This is not recommended unless you are an experienced radio 
control helicopter pilot. 

Instead, we recommend a little disassembly before you begin flying.  Because 
an inadvertent crash could damage or destroy your camera system, we 
recommend taking it off the helicopter until you have enough experience to be 
confident in your flying ability.


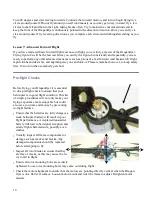
How to remove the camera system:


·

  Disconnect the cable between the video board and the camera. Then 

disconnect the power cable between the main circuit board and the 
video board.


·

  Remove the four nuts, the clear Lexan plate, the 4 nylon vertical riser 

extensions, and the printed circuit board base plate.


·

  Loosen the camera mounting screws and remove the camera.


·

  Replace the camera mounting screws ensuring they are snug but not 

over­tightened.


·

  Install the carbon fiber base plate (with Velcro facing up) in place of 

the video board and fasten in place with the 4 acorn nuts.


* See page 11 for instructions on reinstalling the camera

.


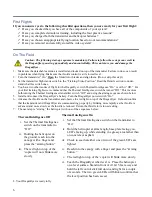
The transmitter for the helicopter has a detachable antenna and it needs to be installed before flying. The 
silver adapter on the antenna twists onto the adapter on the transmitter. When in place you will be able 
to feel and see it lock in place. 

As with most equipment of this type, you will need to charge the batteries for the helicopter and the 
transmitter. Please refer to the “Battery” section in Details for instructions. Initial charging time 16 
hours for the transmitter and 1.5 hours for the helicopter, so this is a good time to carefully read through 
this manual as well as install and use the simulator program to begin the learning process. 

Preflight ­ Flying Conditions


As you learn to fly the Draganflyer SAVS and capture aerial video, you should pay close attention to 
flying conditions.  Perhaps the most ideal location for your initial flights is a large flat open field with no 
nearby obstructions. It would be great if at least a portion of the field is covered in tall grass. This type 
of location is more forgiving of those inevitable bumps you may experience during your first flights. Be­ 
fore your first flight, walk around the area to make sure there are no hidden obstacles, potholes or debris 
that might ruin your experience. 

Paying attention to weather conditions is important. Because of its size, the Draganflyer SAVS can be 
significantly affected by wind.  You can learn best by flying in little or no wind.  Also, because the elec­ 
tronics on the helicopter are extremely sensitive to moisture, it should never be flown outdoors in rainy 
weather.

Summary of Contents for Draganflyer TSU

Page 1: ...1 Draganflyer SAVS Manual Draganfly Innovations Inc 2108 St George Avenue Saskatoon SK S7M0K7 Canada 1 800 979 9794 306 955 9907 www rctoys com info rctoys com...

Page 2: ...hium Polymer battery The same properties that make these batteries extremely powerful and lightweight also make them dangerous if handled incorrectly Please read and understand all information pertain...

Page 3: ...in bodily harm to you or others and can also cause significant property dam age Don t fly over or close to crowds or close to yourself Using incorrect start up or shut down procedures can cause sudden...

Page 4: ...the camera The transmitter for the helicopter has a detachable antenna and it needs to be installed before flying The silver adapter on the antenna twists onto the adapter on the transmitter When in...

Page 5: ...On Off Switch On Board Controls Thermal Intelligence Switch Up Active control Maximum response Down Training Video Dampened control On Off Switch Elevator pitch forward backward Aileron roll right le...

Page 6: ...transmitter switch Off and using the arming sequence shown below 5 Install and connect the Draganflyer s battery Turn the Draganflyer power switch On 6 Advance the throttle on the transmitter and obse...

Page 7: ...flights On the initial flights get a feel for the controls Develop an understanding of what the helicopter is doing and how you should react By not using Thermal Intel ligence the helicopter will be...

Page 8: ...transmit ter Failure to do so could cause the Draganflyer to become air borne and out of control resulting in injury or damage We can not stress this enough Do not fly multiple Draganflyers simultaneo...

Page 9: ...e cable into the four pin receptacle on the front of the balance charger and then connect the small four pin plug on your flight battery to the other end of the charge cable When connected the charge...

Page 10: ...trees walls cars or buildings Interference from certain electronic equipment and 2 4GHz devices can limit the range and quality of the video For best reception position the antennas of the receiver 1...

Page 11: ...securing the baseplate circuit board in place Install the clear Lexan protector plate and four acorn nuts onto the vertical riser extensions Locate the video camera connector and plug it into the 4 pi...

Page 12: ...perating Temperature 14 F to 113 F 20 C to 45 Power Supply 12 volts DC Dimensions L x W x D 1 28 x 1 28 x 1 04 32 mm x 32 mm x 20 mm Lens size 4 mm Diagonal field of view 80 degrees Horizontal field o...

Page 13: ...e 2 ms Processor speed 20 MHz Video output standard composite 1 volt peak to peak Antenna connections SMA style Dimensions L x W x H 5 4 x 7 2 x 1 6 13 5cm x 18 0 cm x 4 0 cm Group Setting 2 Channel S...

Page 14: ...ehind you unless you are trying to develop a dramatic backlit scene While you can fly and shoot alone it is better to have someone watching the incoming video and giv ing you directions Flying is hard...

Page 15: ...will increase in speed causing the helicopter to climb Pulling the control stick backward will decrease the speed of all of the motors and the Draganflyer will descend Yaw Rotating Clockwise Counterc...

Page 16: ...ctice hovering in one spot For this lesson it is best to fly over a flat smooth surface again Stay less than one foot above the ground this will greatly lessen the chances of a crash Remember that if...

Page 17: ...round in front of you Using very gentle movements at first and keeping the front of the Draganflyer away from yourself at all times try to fly from one corner of the square to another along the edges...

Page 18: ...l now be flying higher above the ground the risk is greater if the batteries die unexpectedly Stand well away as you will be passing through your eye level and make sure any spectators are also a safe...

Page 19: ...safety first It s no fun when somebody gets hurt Pre flight Checks Before flying your Draganflyer it is essential to do a preflight check to ensure that your helicopter is in good flight condition Thi...

Page 20: ...ou should disable the thermal intelligence before flying This can be done by simply moving the thermal intelligence switch to the off position and arming the helicopter as described above If one or bo...

Page 21: ...ious bends or cracks Make sure the antenna is screwed completely into the transmitter base Over time and with use it can become loose Check the circuit board to ensure it is firmly retained in the ver...

Page 22: ...ctioning component Call technical support for assistance Low battery voltage in helicopter and or transmitter Check the battery voltage on a volt meter The transmitter should be above 9 6 volts and th...

Page 23: ...Use flathead screw driver to push gray magnet up in mo tor Low helicopter battery voltage Fully charge helicopter battery Draganflyer starts normally but suddenly stops or disarms Red light stays on...

Page 24: ...g the motor with red and black wires going to it Draganflyer tries to flip over The helicopter may be wired in correctly Ensure that the Draganflyer is wired as follows Red to front motor Blue to righ...

Page 25: ...t up in motor The main gear in the drive system may be too tight Slightly loosen the bolt securing the main gear Only do this on the slower turning motors Rotors do not spin at the same RPM The motors...

Page 26: ...ees can confuse the Thermal Intelligence Low transmitter battery voltage Fully charge the transmitter You can check the voltage on a voltmeter it should be about 9 6 volts for flying The circuit board...

Page 27: ...s Replacement parts for your Draganflyer SAVS can be ordered from the Draganfly Innovations Web site or by calling customer service 1 800 979 9794 306 955 9907 Please check the Web site www rctoys com...

Reviews: