


Page 11
39
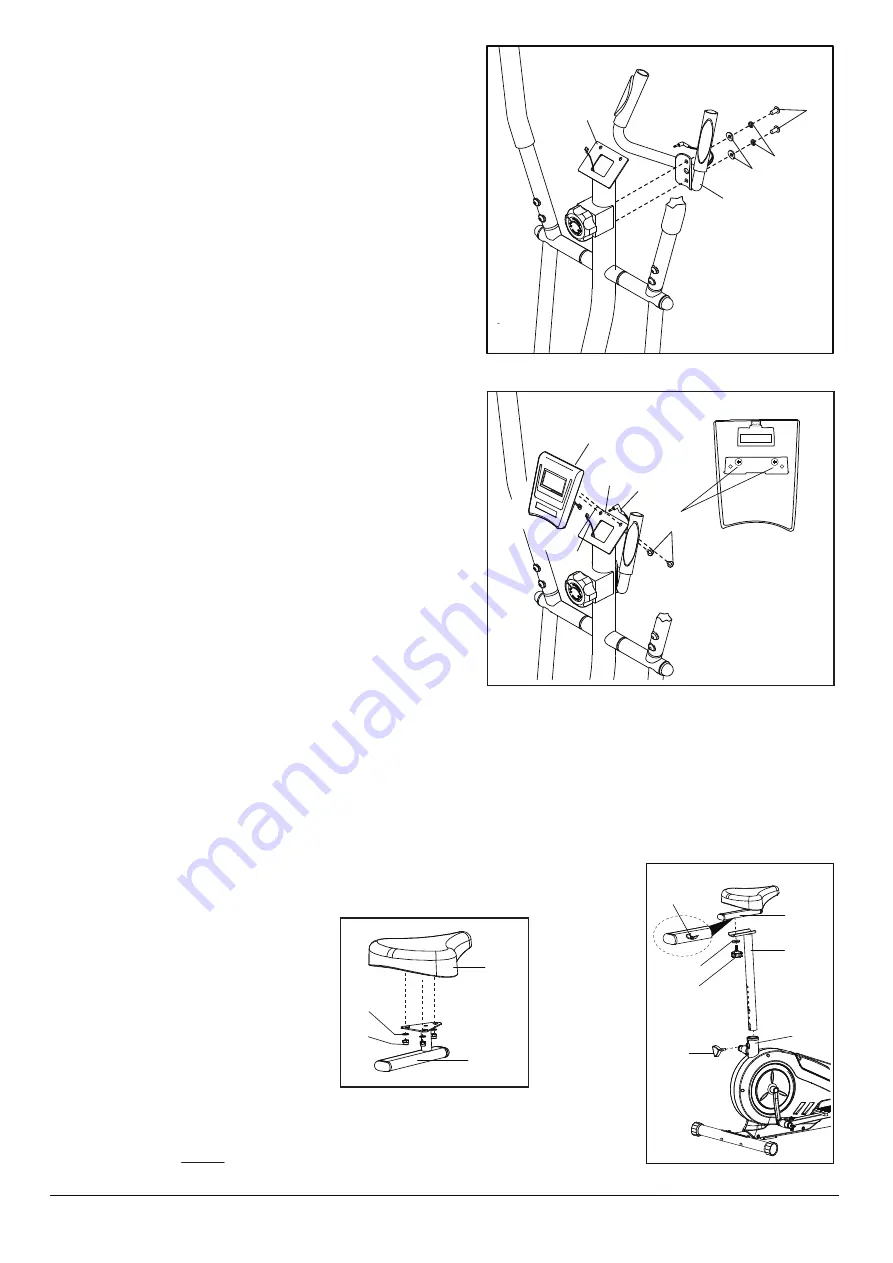
Step 11:
Assemble the seat
105
66
84
102
13
102
99
100
105
1
101
104
Attention:
After Assemble, please tighten all bolts of the above steps.
Especially, when tightening the bolts between the main pipe and frame,
please ensure that
3 to 4
threads are visible outside the nut to avoid any wobbling.
Step 9: Assemble the sensor handlebar
2
6
74
86
65
The screw parts we need now are screwed under the seat(No.105), so before assembling, please unscrew those
three screw nuts and washers first. Also you need to prepare socket wrench(No.94), triangular knob(No.97),
extension pipe(No.99), plum knob(No.100), big M10 washer(No.101), and sliding tube(No.102).
Put the seat cushion on the sliding tube. Screw three screw nuts and washers by using the socket wrench.
Attach the seat to the extension pipe. Screw a plum knob through a big M10 washer to fix them.
Finally, insert the extension pipe into the main frame, adjust to the height you prefer and then twist the triangular
knob to fix.
Attention:
make sure the square nut(No.104) and plum knob are aligned.
Step 10: Assemble the monitor
5
2
75
80
49
+
+
Attach the sensor handlebar(No.6) to the main pipe(No.2).
Screw two M8*16mm Allen bolts(No.74), two M8 split
washers(No.86) and two M8 curved washer(No.65) with
M6 Allen wrench(No.95).
Unscrew two M5*12mm bolts(No.80) from the back of
the monitor(No.5) with the socket wrench(No.94).
Connect the cable of monitor(No.5) to the main pipe.
Attach the monitor to the head of the main pipe. Screw two
M5 bolts back.
Finally, insert the plug of the sensor to the monitor and
install two AAA batteries.


