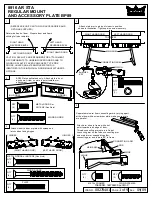
and main arm ar snapped together,
Thread connecting arm onto rod. Adjust
point towards latch edge of door.
Attach arm shoe to door with pivot
at the elbow with a screwdriver while making sure arms
Separate main arm from connecting arm by prying apart
connecting arm so that when connecting arm
connecting arm and rod are 90° to frame.
are parallel.
90°
For additional 15% closing power mount arm shoe
with pivot point towards hinge edge of door.
hinge
MAIN ARM
ARM SHOE
ROD
CONNECTING ARM
5
7
8
6
08279481
4 of 9
09/09
INS NO.
PAGE
Rev.
(2)
QTY
Place tab in cover slot opposite main arm.
Place cover over closer and fasten securely with
screws provided.
TAB
NOTE: LEFT HAND INSTALLATION SHOWN. RIGHT
HAND IS A MIRROR IMAGE.
Adjust according to chart.
ADJUSTER
FULL TURNS
OF SPRING
-4
+4
+9
+13
FULL TURNS
OF SPRING
ADJUSTING NUT
ADJUST SPRING TENSION ACCORDING TO THE FOLLOWING CHART.
8916
CLOSER
ULC LABELED UNITS ONLY
TYPE
200
250
5
6
SIZE
SPRING
DOOR
WEIGHT
150
100
125
MAX.
2
3
4
0
NON-BARRIER-FREE OPENINGS -
4'-0"
3'-6"
3'-0"
2'-6"
EXTERIOR
TYPE
8916
CLOSER
INTERIOR
2'-6"
4'-0"
3'-6"
3'-0"
-
-
+9
+13
0
+4
-4
DOOR WIDTH
5
6
3
4
2
SPRING
SIZE
Take an opening force reading from
the pull on the door. If required, adjust the spring tension
to meet the barrier-free requirement. Maximum number of
adjusted to meet barrier-free forces may not have sufficient
power to reliably close and latch the door.
turns counter clockwise=8. Maximum number of turns
clockwise =14. Depending on opening conditions, a door
BARRIER-FREE OPENINGS -
8916 ONLY
ADJUSTER
Adjust spring tension, if required, using a 1/4" wrench.
8916 supplied with size 3 spring setting.
SPRING TENSION
CRITICAL
NOTE:
+
-
Adjust sweep, latch and backcheck valves.
intensity should be adjusted to insure that the door is
control when extra time is required to pass through
Optional delayed action offers additional closing speed
advances the backcheck range approximately 15°.
backcheck positioning valve (clockwise turns)
the door. All valve adjustments are made with a 3/32"
door and objects behind the door. Closing the
should take a minimum of 1.5 seconds. Backcheck
under control during the opening cycle protecting the
Closing time from 15° to fully closed (latch range)
generally adjusted to take a minimum of 3 seconds.
Closing time from 90° to 15° (sweep range) is
hex key.
LATCH
BACKCHECK OR DELAYED ACTION
NOTE: DELAYED ACTION IS AN OPTIONAL FEATURE.
SWEEP (SPEED)
DECREASE
INCREASE
(SPEED)
(TIME)
BACKCHECK (INTENSITY)
CAUTION: DO NOT REMOVE VALVES.
BACKCHECK RANGE
DELAYED ACTION
RANGE
DELAYED
ACTION
POSITIONING VALVE
SWEEP & LATCH
SWEEP
RANGE
LATCH
RANGE
INCREASE
DECREASE


