background image


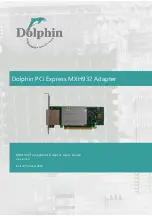
MXH932 

User’s Guide –

 Dolphin Interconnect Solutions   


 Page 9 

Installation 

Step 1 - Unpack board 


The MXH932 card is shipped in an anti-static bag to prevent static electricity damage. The card should only be removed from the 

bag after ensuring that anti-static precautions are taken. Static electricity from your clothes or work environment can 
damage your PCI Express adapter card or your PC.  Always wear a grounded anti-static wrist strap while opening the 
PC and when the MXH932 is removed from the anti-static bag. 
Unpack the MXH932 from the anti-static bag using proper anti-static procedures. 

Step 2 - Change PCIe Bracket if necessary 

The MXH932 package includes a standard and low-profile PCI Express bracket. By default, the standard height bracket is installed 
on the board. If you need to replace the mounted bracket with a low-profile bracket, carefully unscrew the two mounting screws to 
remove the full height bracket. Save the two mounting screws and replace the bracket with the low-profile bracket. Use the two 
mounting screws to install the low-profile bracket. The screws should be carefully tightened, but be careful not to over-tighten. 
Make sure you are properly grounded to avoid static discharges that may destroy the adapter card before performing this 
procedure. 

Step 3 - Configure the Board for Proper Operation 

Set the DIP switch settings for proper operation depends on the firmware. Please refer to the section Configuration and DIP 
Switches on
 page 11 for details. 

Step 4 - Ensure proper Airflow 

Please pay proper attention to ensure the selected server / slot position provides the minimum required airflow.  
 

TIP:

 Immediately after software installation, please use the dis_diag tool to verify the temperature. If the chip temperature 

reported by dis_diag exceeds 95°C, it is strongly recommended to improve the airflow. 

Step 5 - Install the Adapter Card 

Before installing the adapter card, make sure you are properly grounded to avoid static discharges that may 

destroy your computer or the adapter card. Ensure you are properly grounded before opening 
your computer or the anti-static bag containing the MXH932

. Please follow your computer’s 

or 

expansion chassis manual on how to install a PCI Express card. 
 

The MXH932 Adapter card can be installed into any PCI Express x16 slot. The MXH932 supports PCI Express 
Gen1, Gen2, Gen3 and Gen4 signaling. NOTE: A Gen3 slot is recommended as it typically doubles the 
performance compared to a Gen2 slot. The MXH932 is an x16 card, so maximum performance will only be 
attained if the slot provides full electrical x16 signaling. 
The MXH932 supports hosts using either spread spectrum or constant frequency clocking. The card 
implements clock isolation. 

Step 6 - Installing and Removing the Cable 

Installing and removing cables should be done with both host and expansion system powered off. Please 
contact your Dolphin representative if you intend to continuously connect and disconnect the PCI Express 
cables.  

Connecting the Cable 

Please carefully install the cable connector into the connector housing on the MXH932 adapter card. Cable 
port 1 is located at the top of the PCIe bracket, ref  Figure 1 PCIe Bracket to the right. To install the cable, 
match the cable house with the connector on the MXH932 adapter card.  Use even pressure to insert the 

connector until it is secure. Adhere to ESD guidelines when installing the cables to ensure you don’t damage 

the board. Computer cables should always use strain relief to protect the connected equipment from 
excessive force on the cable. This is especially important for cables between racks. Note that for wider than x4 

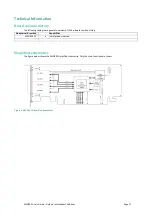
Figure 1 PCIe 

Bracket


Summary of Contents for MXH932

Page 1: ...MXH932 User s Guide Dolphin Interconnect Solutions Page 1 Dolphin PCI Express MXH932 Adapter MXH932 Transparent Adapter Users Guide Version 1 0 Date 6th October 2020...

Page 2: ...MXH932 User s Guide Dolphin Interconnect Solutions Page 2...

Page 3: ...ported cable lengths 10 Disconnecting the Cable 10 STEP 7 VERIFY INSTALLATION LEDS 10 OPERATION 11 CONFIGURATION AND DIP SWITCHES 11 DIP Switches 11 Target Card Clocking Option 11 DIP Switch settings...

Page 4: ...OF USE ARISING OUT OF ANY USE OF DOLPHIN S PRODUCTS SOFTWARE OR SERVICE PROVIDED DOLPHIN S MAXIMUM LIABILITY WILL NOT EXCEED THE TOTAL AMOUNT PAID FOR THE PRODUCT BY THE PURCHASER PCI Express External...

Page 5: ...nics com for more information Host mode The card is installed in a root complex Host PC Lane One PCI Express Lane contains a differential pair for transmission and a differential pair for reception Li...

Page 6: ...O systems auto detection The MXH932 supports transparent connections to IO systems Host and Target operation Quad SFF 8644 cable connector o Durability max total 250 mating cycles Cable port configura...

Page 7: ...ivce edge clock routing and quad edge target Airflow Operating Environment To maximize lifetime for the product and maintain the warranty please honor the specified operating temperature and make sure...

Page 8: ...Functionality The MXH932 firmware release 2 supports the following CMI operations Publishes card and CMI status information in readable memory map Supports sending and receiving CMI reset wake and pow...

Page 9: ...ture If the chip temperature reported by dis_diag exceeds 95 C it is strongly recommended to improve the airflow Step 5 Install the Adapter Card Before installing the adapter card make sure you are pr...

Page 10: ...MXH932 cards can be found in Table 1 below The maximum distance may change when connecting to other PCIe products Cable Speed Max Distance Copper PCIe 4 0 cables Gen4 4 meters 5 meters being qualified...

Page 11: ...ult position Table 3 DIP Switch settings shows all the various DIP switch settings for the MXH932 DIP no Name Description ON OFF Default 1 5 OPT1 5 Configuration selector details below OFF 6 OPT6 CMI...

Page 12: ...IP Switch settings should be considered when configuring the MXH932 for Transparent Host operation Use Case Configuration MXH932 Host DIP ON DIP switch view A D Transparent Host One x16 downstream por...

Page 13: ...rect x16 link to a MXH932 configured for Target operation If you only need a x8 or x4 link please configure according to use case B or C Host card ports Target card ports P1 P1 P2 P2 P3 P3 P4 P4 Table...

Page 14: ...3 port Target card 4 port P1 P1 P2 P1 P3 P1 P4 P1 Table 6 Required x4 cabling Use Case D 1 Host Transparent fan out using MXS924 PCIe x16 The MXH932 is compliant to the MXS924 24 port PCIe switch The...

Page 15: ...Dolphin Host card Then run lspci and identify the card It will show up as something like lspci grep Device 4036 01 00 0 PCI bridge PMC Sierra Inc Device 4036 01 00 1 Bridge PMC Sierra Inc Device 4036...

Page 16: ...0x000000ff 00000255 in decimal Support More information about the product support and software downloads are available at http www dolphinics com mx Please email pci support dolphinics com if you hav...

Page 17: ...ory The following table gives a general overview of the hardware revision history Adapter card revision Capabilities MXH932 CC Initial product version Simplified schematics The figure below shows the...

Page 18: ...ndicate a need for service via the CMI controller CMISDA Management interface data line Used for both initial link setup and sideband messages when used with CMI compliant cables CMISCL Management int...

Page 19: ...MS NC 9 TRST NC 3 3 PWR 10 3 3V aux Standby PWR 3 3 PWR 11 WAKE Wake up PERST Reset 12 NC GND 13 GND REFCLK Ref clock 14 PERp0 REFCLK Ref clock 15 PERn0 GND 16 GND PETp0 17 PRSNT2 PETn0 18 GND GND 19...

Page 20: ...09 in conjunction with ANSI C63 4 2014 CISPR 35 2016 Edition 1 0 CISPR I 412 CDV Korean Harmonized standard KN 35 This does not ensure that it will comply with these standards in any random PC It is t...

Page 21: ...h voltage surges shipping or abnormal working conditions Damages which results from violating the specified operating or storage temperatures and airflow Damages caused by acts of nature e g floods st...

Reviews: