background image


48

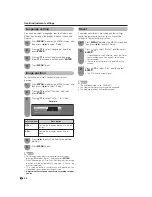
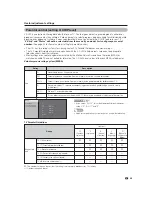
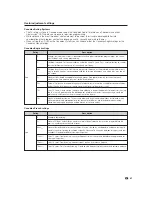
Canadian English ratings

Example

Repeat steps 1 to 4 in 

Canadian English 

ratings

.

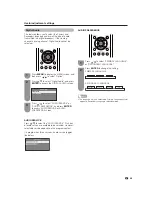
Press 

a

/

b

 to select “Can. French Ratings”, 

and then press 

ENTER

.

Press 

a

/

b

 to adjust the item to your desired 

position. “BLOCK” indicates the item is 
blocked.

•  The setting automatically enters “Block” for any 

ratings below your selection.

•  If Status is not set to “On” the confi guration 

settings will not work. (See page 43.)

Example

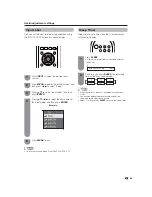
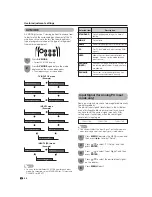
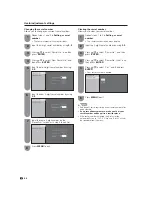
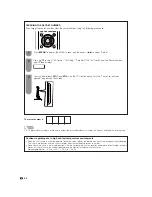
How to temporarily release the 
V-CHIP BLOCK

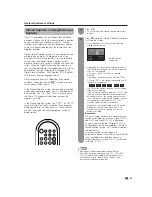
When the V-CHIP BLOCK is working and censors a 
broadcast, “V-CHIP HAS BEEN ACTIVATED.” displays.

Reactivating the temporarily 
released V-CHIP BLOCK

You can reactivate the temporarily released V-CHIP 
BLOCK as shown below.

Method 1: 

  Select “Status” setting from the Parental CTRL menu 

to reactivate BLOCK. (See page 43.)

Method 2:

  Select “V-Chip” setting (“MPAA”, “TV Guidelines”, 

“Can. English Ratings” or “Can. French Ratings”) 
from the Parental CTRL to reactivate BLOCK. (See 
pages 45 and 48.)

Method 3: 

  Switch off the TV power.

•  Performing any of the three above will activate the V-CHIP 

BLOCK.

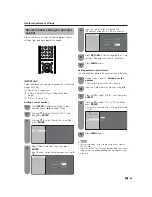
Useful adjustment settings

Canadian French ratings

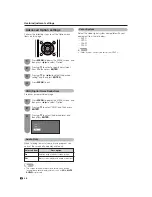
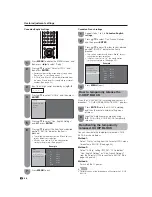
Input the 4-digit secret number by using 

0

9

.

Press 

a

/

b

 to select “Parental CTRL”, and 

then press 

ENTER

.

•  Secret number setting menu displays only when 

“Secret No.” is set. (See page 43.)

•  “V-Chip” and “Status” will not be selectable from 

the menu if you do not fi rst confi gure your secret 
number. (See page 43.)

Press 

a

/

b

 to select “V-Chip”, and then press 

ENTER

.

Press 

MENU

 to display the MENU screen, and 

then press 

c

/

d

 to select “Setup”.

Press 

a

/

b

 to adjust the item to your desired 

position. “BLOCK” indicates the item is 
blocked.

•  The setting automatically enters “Block” for any 

ratings below your selection.

•  If Status is not set to “On” the confi guration 

settings will not work. (See page 43.)

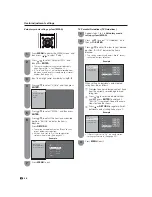
Press 

a

/

b

 to select “Can. English Ratings”, 

and then press 

ENTER

.

Press 

ENTER

 while the V-CHIP is working, 

and then the secret number setting menu 
displays.

Input the 4-digit secret number by using 

0

9

. At this time V-CHIP BLOCK temporarily 

releases.

1

2

3

4

6

V - Chip

V - Chip ( DTV  Only )

Secret No.

Status

MPAA

TV Guidelines

Can. English Ratings

Can. French Ratings

E                 - - - - -  

C                 - - - - -  

C8 +            BLOCK

G                 BLOCK

PG               BLOCK

14 +             BLOCK

NONE

18 +             BLOCK

1

2

3

MPAA

TV Guidelines

Can. English Ratings

Can. French Ratings

E                  - - - - -  

G                 BLOCK

8ans+          BLOCK

13ans+        BLOCK

16ans+        BLOCK

NONE

18ans+        BLOCK

2

Press 

MENU

 to exit.

7

Press 

MENU

 to exit.

4

5

1

Summary of Contents for LC-19SB15U

Page 1: ...AL IMPORTANT To aid reporting in case of loss or theft please record the TV s model and serial numbers in the space provided The numbers are located at the rear of the TV Model No Serial No LIQUID CRYSTAL TELEVISION ENGLISH IMPORTANT INFORMATION ENGLISH ...

Page 2: ...MI logo and High Definition Multimedia Interface are trademarks or registered trademarks of HDMI Licensing LLC IMPORTANT INFORMATION SHARP LIQUID CRYSTAL TELEVISION MODEL LC 19SB15U LC 19SB25U LC 19SB25U W Trademarks Products that have earned the ENERGY STAR are designed to protect the environment through superior energy efficiency ...

Page 3: ...your purchase of the Sharp Liquid Crystal Television To ensure safety and many years of trouble free operation of your product please read the Important Safety Instructions carefully before using this product IMPORTANT SAFETY INSTRUCTIONS ...

Page 4: ...uctions are followed Heat The product should be situated away from heat sources such as radiators heat registers stoves or other products including amplifiers that produce heat The Liquid Crystal panel is a very high technology product with 1 049 088 pixels giving you fine picture details Occasionally a few non active pixels may appear on the screen as a fixed point of blue green or red Please not...

Page 5: ...e placed on the product To prevent fire or shock hazard do not place the AC cord under the TV set or other heavy items Turn off the main power and unplug the AC cord from the wall outlet before handling Use a soft cloth and gently wipe the surface of the display panel Using a hard cloth may scratch the panel surface Use a soft damp cloth to gently wipe the panel when it is really dirty It may scra...

Page 6: ...le watching a program especially on a larger than life flat panel display Care should be taken to place or install the display where it cannot be pushed pulled over or knocked down Care should be taken to route all cords and cables connected to the flat panel display so that they cannot be pulled or grabbed by curious children Note CEA is the preeminent trade association promoting growth in the 16...

Page 7: ...om of the TV 2 Insert and tighten the 3 screws into the 3 holes on the rear of the stand Soft cushion NOTE To detach the stand perform the steps in reverse order Confirm the 3 screws supplied with the TV Before attaching or detaching the stand unplug the AC cord from the AC INPUT terminal Before performing work spread cushioning over the base area to lay the TV on This will prevent it from being d...

Page 8: ...reen up to 2 5 degrees forward or 10 degrees backwards Please adjust the angel so that the LCD TV set can be watched most comfortably AC outlet Place the TV close to the AC outlet and keep the power plug within reach TO PREVENT RISK OF ELECTRIC SHOCK DO NOT TOUCH UN INSULATED PARTS OF ANY CABLES WITH THE AC CORD CONNECTED 1 2 3 4 Ventilation Cleaning Tips Keep your television in a well ventilated ...

Page 9: ... The batteries supplied with this product may have a shorter life expectancy due to storage conditions If you will not be using the remote control unit for an extended period of time remove batteries from it 1 Open the battery cover Place the batteries with their terminals corresponding to the e and f indications in the battery compartment 2 Insert two AA size batteries supplied with the product 3...

Page 10: ...ting 26 Advanced picture settings 27 C M S 27 Color Temperature 27 Film Mode 27 3D Y C 27 Monochrome 27 I P Setting 27 Sound adjustment 28 Power Control 29 Power Management 29 Using external equipment 30 Displaying an external equipment image 30 Displaying an image from HDMI equipment 31 Useful adjustment settings 32 Auto Sync Adjustment for Analog PC input mode only 32 Fine Sync Adjustment 32 Pic...

Page 11: ...ENU button INPUT 3 terminals HDMI HEADPHONE terminal Regarding the headphone jack Use headphones with a stereo mini plug Ø 3 5 mm Be sure to unplug headphones from the jack when they are not in use The speakers do not output volume when headphones are plugged in You can set the volume to different levels for each input source Volume display when headphones are plugged in 20 The illustrations in th...

Page 12: ...y pressing A B C and D 12 SLEEP Set the sleep timer See page 35 13 AV MODE Select an audio or video setting When the input source is TV INPUT 1 or 2 STANDARD MOVIE GAME USER DYNAMIC Fixed DYNAMIC When the input source is INPUT 3 STANDARD MOVIE GAME PC USER DYNAMIC Fixed DYNAMIC When the input source is INPUT 4 STANDARD PC USER See page 40 14 MUTE Mute the sound See page 19 15 AUDIO Selects the MTS...

Page 13: ...ng of internal circuit etc 13 Preparation Using the remote control unit Use the remote control unit by pointing it towards the remote control sensor on the TV Objects between the remote control unit and the remote control sensor may prevent proper operation Cautions regarding the remote control unit Do not expose the remote control unit to shock In addition do not expose the remote control unit to...

Page 14: ...he TV before connecting any external equipment Please read the relevant operation manual Blu ray disc player etc carefully before making connections If your Blu ray disc player offers a choice of output formats please select 720p for use with this TV When using S VIDEO cable commercially available VCR Game console Camcorder When using component cable INPUT 1 Using Digital Audio Output It is possib...

Page 15: ... Frequency VESA Standard Resolution Vertical Frequency Connecting a PC When connecting to a PC with an analog RGB terminal INPUT 4 RGB cable commercially available When using an HDMI DVI conversion cable input the audio signal to AUDIO terminal of INPUT 3 When receiving an incompatible signal such as 1080p the message below appears without the image on the screen For an incompatible video signal N...

Page 16: ...Setup menu Turning off the power Press POWER on the TV or POWER on the remote control unit The TV enters standby and the image on the screen disappears The POWER indicator on the TV turns off If you are not going to use this TV for a long period of time be sure to remove the AC cord from the AC outlet Weak electric power is still consumed even when POWER is turned off Watching TV POWER TV status i...

Page 17: ...C outlet See page 8 Language setting Select from among 3 languages English French and Spanish Press a b to select the desired language listed on the screen and then press ENTER Channel search Channel auto search makes the TV look for all channels viewable in the set area When Air Cable has been selected in Antenna setting and then press ENTER again Example Antenna setting Make sure what kind of co...

Page 18: ...on the remote control unit or on the TV Method 2 1 Press FLASHBACK to switch to the previously tuned channel 2 Press FLASHBACK again to switch back to the currently tuned channel FLASHBACK will not work if no channel has been changed after the TV is turned on Method 3 Using remote control buttons 0 9 DOT to select channels for VHF UHF CATV DIGITAL To select a 1 or 2 digit channel number e g Channe...

Page 19: ... plug 3 5mm Be sure to unplug headphones from the jack when they are not in use The speakers do not output volume when headphones are plugged in Using MUTE on the remote control unit Mutes the current sound output Within 30 minutes of pressing MUTE mute can be canceled by using one of the methods below Mute will cancel if you press VOL k l or MUTE Mute will be canceled after 30 minutes have passed...

Page 20: ... in either MAIN or SAP sound MAIN sound The normal program soundtrack either in mono or stereo SAP sound Listen to a second language supplementary commentary or other information SAP is mono sound If stereo sound is difficult to hear Obtain a clearer sound by manually switching to fixed mono sound mode MTS only operates while in TV mode You can change MTS as shown below to match the television bro...

Page 21: ...eens in the operation manual are for explanation purposes some are enlarged others cropped and may vary slightly from the actual screens Basic adjustment settings Menu operation buttons Use the following buttons on the remote control to operate the menu MENU Press to open or close the menu screen a b c d Press to select a desired item on the screen or adjust a selected item ENTER Press to go to th...

Page 22: ...Page 26 Backlight Page 26 Contrast Page 26 Brightness Page 26 Advanced C M S Page 27 Color Temp Page 27 Monochrome Page 27 Reset Page 26 No Signal Off Page 29 No Operation Off Page 29 No Signal Off Page 29 No Operation Off Page 29 Power Management Page 29 EZ Setup Page 23 CH Setup Pages 23 24 Input Label Page 35 Parental CTRL Pages 43 48 Position Page 34 Rotate Page 33 Language Page 34 Reset Page ...

Page 23: ...ss ENTER to enter the setting Press a b to select Air Cable and then press ENTER Channel search Channel auto search makes the TV look for all channels viewable in the set area Repeat steps 1 to step 4 in Antenna setting in Channel Setup Press a b to select CH Search and then press ENTER If no channel is found confirm the type of connection made with your TV and try channel search again 1 2 3 4 5 1...

Page 24: ...up and then press ENTER Press a b to select CH Memory and then press ENTER Channel memory setting Press MENU to display the MENU screen and then press c d to select Setup 1 2 3 4 5 Press a b to select CH Setup and then press ENTER Press a b to select SIGNAL STRENGTH The signal strength of DIGITAL channel is displayed The signal information is based on the current channel 1 Make sure what kind of c...

Page 25: ...b to select Favorite CH and then press ENTER 2 3 Deleting a favorite channel Repeat steps 2 and 3 in Registering your favorite channel 1 Press a b to select 1 Data Clear and then press ENTER To delete all the favorite channels select All Data Clear and then skip to step 4 2 Press a b c d to select the channel you want to delete and then press ENTER Press c d to select Yes and then press ENTER Pres...

Page 26: ...e adjustments Adjusts the picture to your preference with the following picture settings For resetting all Picture adjustment items to the factory preset values press a b to select Reset press ENTER press a b to select Yes and then press ENTER Select Advanced and then press ENTER to set C M S Color Temp Film Mode 3D Y C or Monochrome I P Setting See page 27 OPC Optical Picture Control setting Pres...

Page 27: ... managed using the six color adjustment setting Press MENU and the MENU screen displays Press c d to select Picture Press a b to select a specific adjustment item among C M S Hue C M S Saturation and C M S Value and then press ENTER Press a b to select Advanced and then press ENTER 1 3 2 4 5 Press c d to adjust the item to your desired position For resetting all adjustment items to factory preset ...

Page 28: ...ry preset values press a b to select Reset press ENTER press a b to select Yes and then press ENTER Basic adjustment settings Press MENU to display the MENU screen and then press c d to select Audio Press a b to select a specific adjustment item 1 2 3 Press MENU to exit 4 Selected item Treble Bass Balance cbutton For weaker treble For weaker bass Decrease audio from the right speaker dbutton For s...

Page 29: ...ts again the TV turns on The TV turns on again by pressing POWER See page 16 29 Power Control Power control setting allows you to save energy No signal off When set to Enable the power will automatically shut down if there is no signal for 15 minutes Disable is the factory preset value When a TV program finishes this function may not operate Disable is the factory preset value No operation off The...

Page 30: ...mote control unit or on the TV See pages 14 and 15 for external equipment connection Press INPUT A list of selectable sources appears Press INPUT again to select the input source An image from the selected source automatically displays Each time INPUT is pressed the input source toggles You can also select the input source by pressing a b 1 2 ...

Page 31: ...etup Press a b to select HDMI Audio select or HDMI Auto View and then press ENTER 1 2 3 Press a b to select the desired item and press ENTER 4 5 Press MENU to exit Refer to your external equipment operation manual for the signal type Digital Analog Enable Disable Select Digital for an audio signal via the HDMI terminal Select Analog for an audio signal via the R AUDIO L terminal Set whether or not...

Page 32: ... Press a b to select PC Setup and then press ENTER 3 Press a b to select Auto Sync and then press ENTER 4 Yes No Input Signal Auto Sync Fine Sync Press MENU and the MENU screen displays 1 Press c d to select Setup 2 Press a b to select Fine Sync and then press ENTER 4 Press a b to select a specific adjustment item among H Pos V Pos Clock and Phase 6 Reset H Pos 90 a b a b a b a b V Pos Clock Phase...

Page 33: ...c d to select Setup Press a b to select the desired mode and then press ENTER 1 2 Press MENU to exit 4 Press a b to select Rotate and then press ENTER 2 UPSIDE DOWN To display upside down images for special uses ROTATE To display rotated images for special uses MIRROR To display mirror images for special uses NORMAL Normal image orientation Normal Mirror Upside Down Rotate 33 ...

Page 34: ...t Language and then press ENTER 1 3 2 Press MENU to exit 4 Press a b to select H Pos or V Pos Press c d to adjust the item to the desired position For resetting adjustments to the factory preset values press a b to select Reset and then press ENTER When connecting a PC to the HDMI terminal the image position will be automatically adjusted It cannot be manually adjusted The screen position variable...

Page 35: ...n press c d to select Setup Press a b to select Input Label and then press ENTER 1 2 3 4 Press MENU to exit 5 Sleep Timer Allows you to set a time when the TV automatically switches to standby 1 2 Sleep Timer Remaining 30 min NOTE When the time has been set countdown automatically starts Five minutes before the preset of time expires the remaining time displays each minute Select Off by pressing S...

Page 36: ...ptions selectable for the type of video signal currently being received Side Bar Suitable for viewing conventional 4 3 programs in their normal format S Stretch Smart stretch Suitable for stretching 4 3 programs to fill the screen Zoom Suitable for viewing wide screen 2 35 1 anamorphic DVDs in full screen 1 2 View Mode for HD Programs Stretch mode is available for HD programs Suitable for viewing ...

Page 37: ...ss VIEW MODE or a b while the View Mode menu is displayed to select a desired item on the menu Example Example Screen size images Input signal Side Bar Stretch Keeps the original aspect ratio in a full screen display An image fully fills the screen 4 3 Detects the resolution of the signal and displays an image with the same number of pixels on the screen An image fully fills the screen 16 9 Input ...

Page 38: ...clearer video image 1 3 2 Press a b to select the desired level and then press ENTER Press MENU to display the MENU screen and then press c d to select Option Press a b to select DNR and then press ENTER Selected item On Off Description Audio is output without screen image Both screen images and audio are output Off High Low Advanced Option settings Perform the following steps to set the Option me...

Page 39: ...cess AUDIO SERVICE or AUDIO PREFERENCE screen AUDIO SERVICE AUDIO PREFERENCE DIGITAL AUDIO If a program has three services audio service toggles like below AUDIO PREFERENCE 1 Press a b to select PRIMARY LANGUAGE or SECONDARY LANGUAGE 2 Press ENTER to change the setting PRIMARY LANGUAGE SECONDARY LANGUAGE 39 Digital Audio This feature allows you to select the Primary and Secondary language and as w...

Page 40: ...V MODE AV MODE gives you 7 viewing options to choose from to best match the surrounding environment of the TV which can vary due to factors like room brightness type of program watched or the type of image input from external equipment Press AV MODE again before the mode displayed on the screen disappears The mode changes as shown below Press AV MODE Current AV MODE displays 1 2 You can select a d...

Page 41: ...ou will see information such as 1 4 displayed 1 4 means the CC1 services is selected Example If a program has three services Digital DTVCC1 CC1 and TEXT1 the closed caption display will toggle in this sequence The CC button keeps a record of the last service selected in its memory If the last closed caption mode e g DTVCC1 you selected is not available for the next program or on another channel th...

Page 42: ...een and then press c d to select Option Press a b to select Digital Caption Setup and then press ENTER 3 5 Useful adjustment settings Press MENU to exit 6 1 2 Selected item Default Type 0 Type 1 Type 2 Type 3 Type 4 Type 5 Type 6 Type 7 Description The font specified by broadcasting station or default font Proportional font used in the MENU screen Monospaced with serifs Proportionally spaced with ...

Page 43: ...mber The secret number setting menu displays Input the 4 digit secret number by using 0 9 Setting parental control status Used to enable or disable the parental control function Press a b to select On or Off and then press ENTER Select On to enable and Off to disable Parental CTRL You can skip steps 1 and 2 above while in the Parental CTRL screen The V Chip DTV Only will only be selectable when a ...

Page 44: ... number is cleared Press a b to select Secret No Clear and then press ENTER Repeat steps 1 and 2 in Setting a secret number The secret number setting menu displays Changing the secret number Allows you to change your current secret number Input the 4 digit secret number by using 0 9 Clearing the secret number Allows you to clear your secret number Repeat steps 1 to 2 in Setting a secret number The...

Page 45: ...d for television The V CHIP can also be set to block MPAA rated movies Voluntary movie rating system MPAA TV Parental Guidelines If you select PG 13 this will automatically block the higher ratings R NC 17 and X Voluntary movie rating system only uses an age based rating Useful adjustment settings Rating Description G PG PG 13 R NC 17 X Age General audiences All ages admitted Parental guidance sug...

Page 46: ...en Secret No is set See page 43 V Chip and Status will not be selectable from the menu if you do not first configure your secret number See page 43 Press a b to select V Chip and then press ENTER Press a b to select MPAA and then press ENTER When setting an individual content based rating item do as follows 1 Press d to access blocked content items from the currently selected age based rating item...

Page 47: ...e physical verbal or emotional Parental Guidance Intended for a general audience but may not be suitable for younger children under the age of 8 because it could contain controversial themes or issues Over 14 Years Could contain themes where violence is one of the dominant elements of the story line but it must be integral to the development of plot or character Language usage could be profane and...

Page 48: ...h ratings Input the 4 digit secret number by using 0 9 Press a b to select Parental CTRL and then press ENTER Secret number setting menu displays only when Secret No is set See page 43 V Chip and Status will not be selectable from the menu if you do not first configure your secret number See page 43 Press a b to select V Chip and then press ENTER Press MENU to display the MENU screen and then pres...

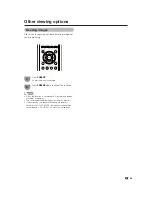
Page 49: ...ou are using the freeze function and a broadcast activates the V CHIP BLOCK the freeze function will be cancelled and a V CHIP BLOCK message will appear Press FREEZE again to cancel the function Other viewing options Freezing images Allows you to capture and freeze a moving image that you are watching Press FREEZE A moving image is captured 1 2 ...

Page 50: ...4 Are screen mode adjustments such as picture size made correctly See pages 36 and 37 Adjust the picture tone See pages 26 to 27 Is the room too bright The picture may look dark in a room that is too bright Check the input signal setting See page 40 Is the sleep timer set See page 35 Check the power control settings See page 29 The unit s internal temperature has increased Remove any objects block...

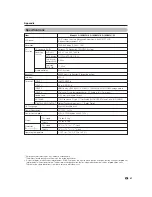
Page 51: ...t Audio out Terminals INPUT 1 INPUT 2 INPUT 3 INPUT 4 ANTENNA DIGITAL AUDIO OUTPUT OSD language Power Requirement Power Consumption Weight Dimension 2 W g H g D Operating temperature 1 049 088 pixels 1 366 g 768 American TV Standard ATSC NTSC System VHF 2 13ch UHF 14 69ch 1 135ch STD HRC IRC 2 69ch BTSC System 60 000 hours at Backlight Standard position COMPONENT in AV in S VIDEO in HDMI in with H...

Page 52: ...etup CH Setup Parental CTRL or Reset and the Secret number input screen displays 1 3 2 The secret number is Cautions regarding use in high and low temperature environments When the unit is used in a low temperature space e g room office the picture may leave trails or appear slightly delayed This is not a malfunction and the unit will recover when the temperature returns to normal Do not leave the...

Page 53: ...components covered by a GNU General Public License hereafter GPL a GNU Lesser General Public License hereafter LGPL or other license agreement Obtaining source code Some of the open source software licensors require the distributor to provide the source code with the executable software components GPL and LGPL include similar requirements For information on obtaining the source code for the open s...

Page 54: ...l be the sole and exclusive remedy available to the purchaser and only for the time periods set forth herein No other representations or promises made by anyone are permitted Correction of defects in the manner and for the period of time described herein shall constitute complete fulfillment of all liabilities and responsibilities of Sharp to the purchaser with respect to the Product and shall con...

Page 55: ...ensional drawings Unit inch mm 10 254 18 3 16 462 12 19 32 320 1 37 64 40 16 7 32 411 8 9 5 32 232 4 14 11 64 360 8 37 64 218 3 15 16 100 3 15 16 100 3 17 64 83 7 63 64 203 2 61 64 75 2 61 64 75 1 59 64 49 ...

Reviews: