


49
Setting the Printer Image Quality
Chap
ter
5
Main
te
nanc
e
Sharpness
Adjusts the sharpness of image outlines. Sharpness is
enhanced when you move the slider to the right (+), and
reduced and smoothened when you move the slider to the
left (–).
Adjusting the Gray Balance
In this unit, the gray balance value measured as being
colorless is set as adjusted value No. 0. The following
procedure is used to adjust the gray balance to a desired
tint.
Note that in some cases the gray balance of the ink ribbon
and the printing paper may be subject to some deviation
due to conditions during transport, etc.
1
Open the Print tab on the administration screen, and
then touch the
button.
2
Touch the
button.
Two patches, A and B, are printed. The gray pattern
from No. 0 to No. 88 is printed in each.
In the case of the 2UPC-C13 series, patch A and patch
B are printed separately on two sheets.
In the case of the 2UPC-C14 series, 2UPC-C15 series
and 2UPC-C48 series, patch A and patch B are printed
on one sheet.
Based on the printed results, decide which patterns,
from among each series of No. 0 to No. 88, provide the
optimal gray balance.
3
Enter the number of the desired pattern from print A in
[A] next to [Gray A - B Print].
To input the number, touch the
button.
4
Similarly, enter the number of the desired pattern from
print B in [B] next to [Gray A - B Print].
5
Touch the [OK] button.
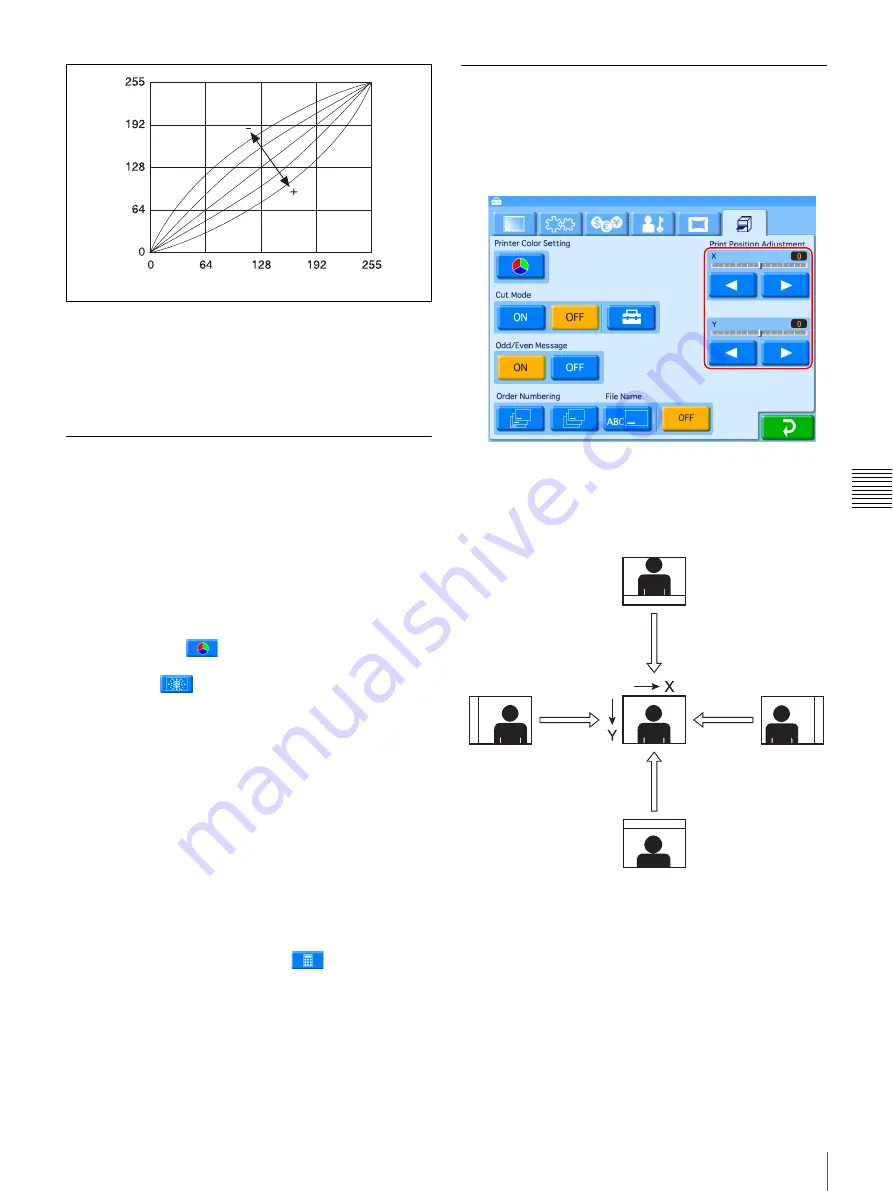
Adjusting the Print Position
Adjust the print position if images are printed off-center on
the paper.
1
Open the Print tab on the administration screen.
2
Adjust the [Print position adjustment] sliders for X
(horizontal) and Y (vertical: direction printouts are
ejected) with the [
b
] and [
B
] buttons.
The adjustment range is ±2 mm for both directions.
Light
Output
Dark
Light
Input
Summary of Contents for DS-SL10
Page 75: ......


