


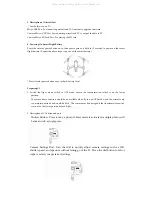

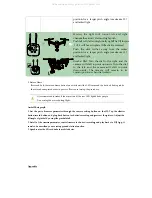

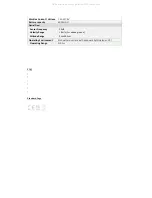
3.
Description
of
Aircraft
Port
(
See
the
location
on
P
)
Micro
‐
USB
Port:
For
connecting
aircraft
and
PC
Assistant
to
upgrade
firmware.
Camera
Micro
‐
USB
Port:
For
connecting
aircraft
and
PC
to
output
the
data
to
PC.
Camera
Micro
‐
SD
Card
Port:
For
placing
the
SD
card.
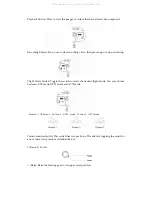
4.
Powering
On
Smart
Flight
Battery
Press
the
circular
power
button
once,
then
press
again
and
hold
for
2
seconds
to
power
on
the
smart
flight
battery.
(Repeat
the
above
steps
to
power
off
the
smart
battery.)
*
Press
circular
power
button
once
to
check
battery
level.
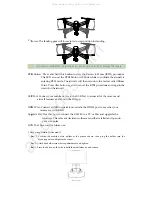
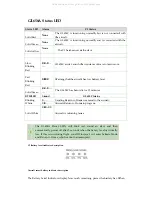
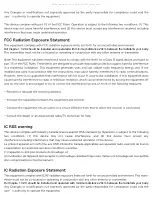
Preparing
C1
1.
Switch
the
flight
mode
switch
to
GPS
mode,
ensure
the
transformation
switch
is
on
the
lower
position.
The
return
home
function
would
be
unavailable
when
fly
in
non
‐
GPS
mode,
and
the
aircraft
only
can
maintain
attitude
and
would
be
drift
;
The
camera
may
be
damaged
if
the
transformation
switch
was
not
on
the
lower
position
before
flight
。
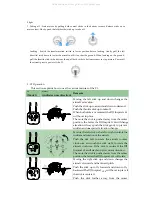
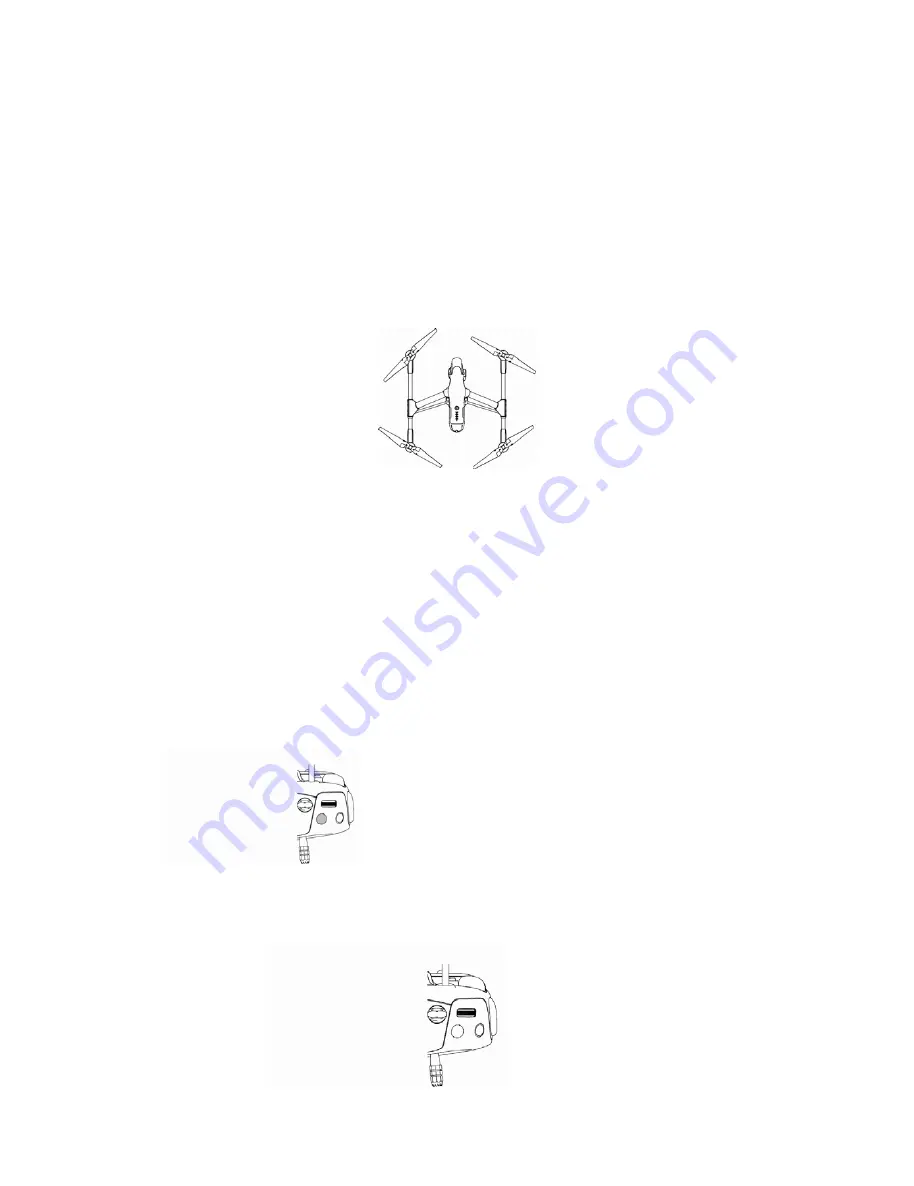
2.
Description
of
C1
button
and
port
Shutter
Button
:
Press
to
take
a
photo.
If
burst
mode
is
activated,
multiple
photos
will
be
taken
with
a
single
press.
Camera
Settings
Dial:
Turn
the
dial
to
quickly
adjust
camera
settings
such
as
ISO,
shutter
speed,
and
aperture
without
letting
go
of
the
C1.
Move
the
dial
button
to
left
or
right
to
select
your
preferred
settings.
All manuals and user guides at all-guides.com


