background image


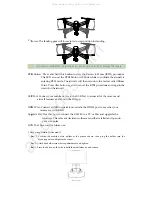
Flight


1.


Taking


off

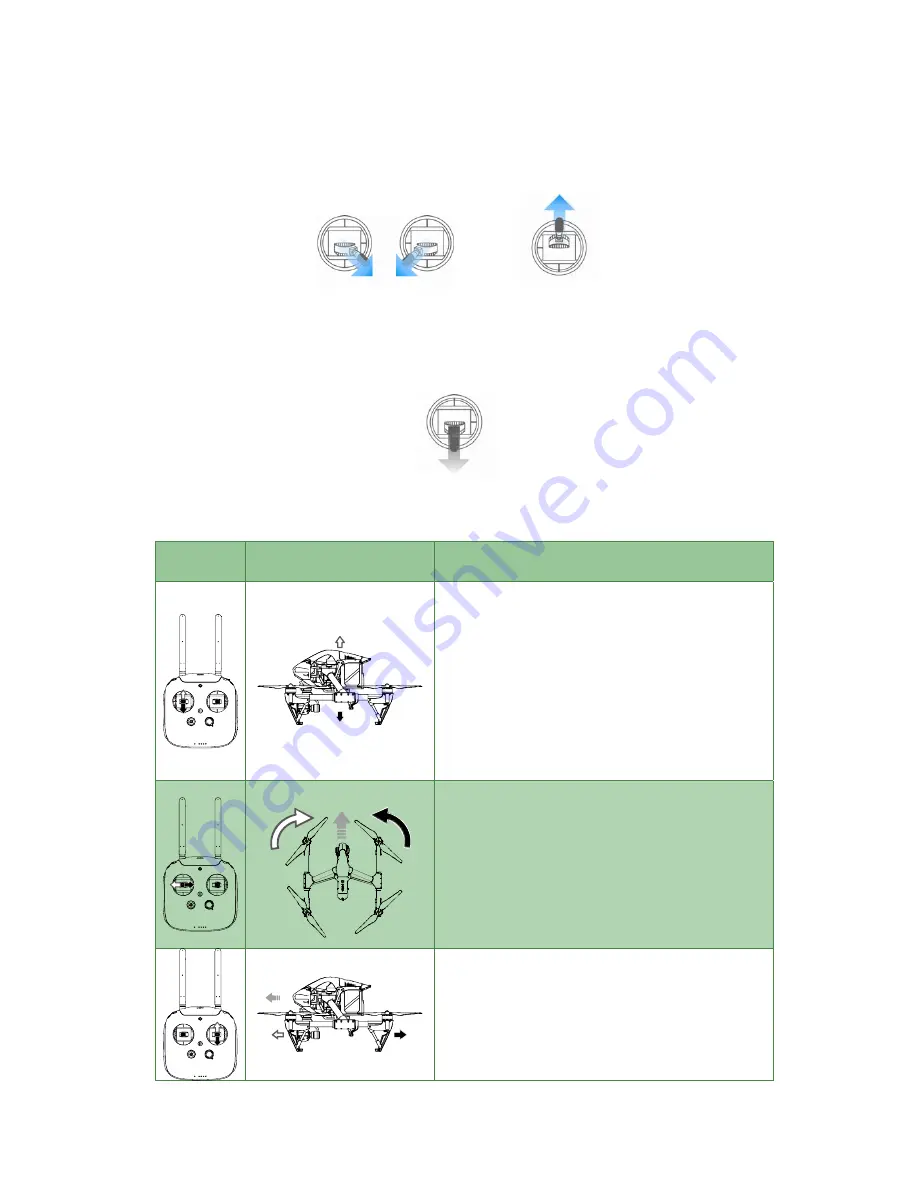
Start


motors


by


pulling


both


control


sticks


to


the


bottom


corners.


Release


sticks


once


motors


start.


Slowly


push


the


left(throttle)


stick


up


to


take


off.


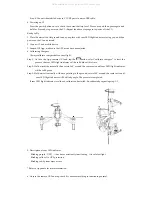
Landing

Switch


the


transformation


switch


to


lower


position


before


landing.


Gently


pull


the


left


(throttle)


stick


down


to


lower


the


aircraft


until


it


touches


the


ground.


When


landing


on


the


ground,


pull


the


throttle


stick


to


the


bottom,


then


pull


both


sticks


to


bottom


corners


to


stop


motors.


Power


off


the


aircraft


prior


to


power


off


the


C1.


2.


C1


Operation


This


section


explains


how


to


use


the


various


features


of


the


C1.


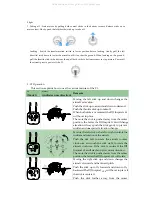
C1


(Mode


2)


Aircraft


(


indicates


nose


direction)

Remarks


Moving


the


left


stick


up


and


down


changes


the


aircraft’s


elevation.


Push


the


stick


up


to


ascend


and


down


to


descend.


Push


the


throttle


stick


up


to


takeoff.


When


both


sticks


are


centered,


the


DJI


Inspire


1


will


hover


in


place.


The


more


the


stick


is


pushed


away


from


the


center


position,


the


faster


the


DJI


Inspire


1


will


change


elevation.


Always


push


the


stick


gently


to


prevent


sudden


and


unexpected


elevation


changes.


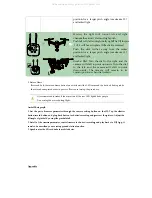
Moving


the


left


stick


to


the


left


or


right


controls


the


rudder


and


rotation


of


the


aircraft.


Push


the


sick


left


to


rotate


the


aircraft


counter


clock

wise,


and


push


the


stick


right


to


rotate


the


aircraft


clockwise.


If


the


stick


is


centered,


the


DJI


Inspire


1


will


stay


facing


its


current


direction.


The


more


the


stick


is


pushed


away


from


the


center


position,


the


faster


the


DJI


Inspire


1


will


rotate.


Moving


the


right


stick


up


and


down


changes


the


aircraft’s


forward


and


backward


pitch.


Push


the


stick


up


to


fly


forward


and


down


to


fly


backward.


The


DJI


Inspire


1


will


hover


in


place


if


the


stick


is


centered.


Push


the


stick


further


away


from


the


center


V2.0

V2.0

V2.0

V2.0

V2.0

All manuals and user guides at all-guides.com

Summary of Contents for Inspire 1

Page 1: ...DJI Inspire 1 V 2 0 User Manual All manuals and user guides at all guides com a l l g u i d e s c o m...

Page 2: ...g items have been included in your package before use If anything is missing please contact your local dealer Index Name Picture Qty 1 DJI Inspire 1 1 2 Propeller 4 3 C1 1 4 Camera with gimbal 1 5 Sma...

Page 3: ...rformance gimbal enables to obtain stable images even when the aircraft is fling in high speed Integrated the advanced flight controller of DJI the DJI Inspire1 has stable performance during flight It...

Page 4: ...amera Sett Playback Bu osition Attachment ion Switch el LEDs n tings Dial utton 1 2 3 4 5 6 7 8 9 10 11 12 13 Built in G Propeller Motor Front LE Landing Frame ar Gimbal DJI Smar Micro US Rear LED Cam...

Page 5: ...follow instructions for iOS version Search DJI on Google Play then follow instructions for Android version Register your e mail address when using the app for the very first time App Store Google Pla...

Page 6: ...ink settings 6 Smart battery information 7 General settings 8 Photo format 9 Video format Recording time 10 Shutter Record switch 11 Shutter Record 12 Play back 13 Camera settings 14 Ground station 15...

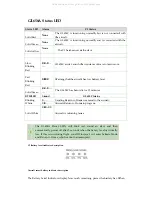
Page 7: ...tion flight record DJI Shop and account information Preparing DJI Inspire 1 1 Mounting the Gimbal Step 1 Remove the Gimbal Cover and the Gimbal Clamp from the gimbal Step 2 Turn the Gimbal Lock to the...

Page 8: ...you are facing the nose of the DJI Inspire 1 until it locks in the position shown in the below Now the gimbal is secured 2 Attaching the Propellers Screw the propellers clockwise for grey nuts and ant...

Page 9: ...tch the flight mode switch to GPS mode ensure the transformation switch is on the lower position The return home function would be unavailable when fly in non GPS mode and the aircraft only can mainta...

Page 10: ...to select the desired flight mode You may choose between GPS mode OPTI mode and ATTI mode Position 1 GPS mode Position 2 OPTI mode Position 3 ATTI mode Transformation Switch This switch has two posit...

Page 11: ...t to connect e relevant A er ture use nd C1 e device hold tighten the scr neck strap atta he side to hold to its lowest nd do not use ton to start H Button wil aircraft will gain to canc to the USB P...

Page 12: ...compass to start the process the rear LED flight indicator will be solid blue at this time Step 2 Hold aircraft horizontally then rotate 360 around the center axis until rear LED flight indicator will...

Page 13: ...to takeoff When both sticks are centered the DJI Inspire1 will hover in place The more the stick is pushed away from the center position the faster the DJI Inspire1 willchange elevation Always push th...

Page 14: ...ter re l amera to shut station functi device n for a large ter flight the right s the aircraft ft toflyleft 1 will hover he stick fu n for a large ter flight Dial Turn will shift to left and th ards T...

Page 15: ...ft Retu Aircraft is ret er LEDs w er off after 3 during flight e which can ription r description rs display h is functioni is functioni s been set as r Launch th t the aircraft has been idl urn to Hom...

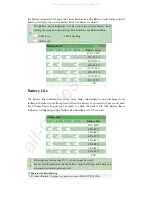
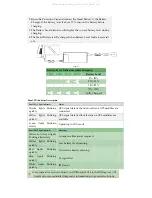
Page 16: ...n about the b e battery tab y er to a powe ower Button level See be ll also show g The indica is flashing D3 LED4 y more time When the b onds to che s described b D3 LED4 can no longe battery laun b e...

Page 17: ...abov ator will dis lly charged w Level Indica LED2 LED n Status GPS signa connected GPS signa available Operating Warnings Compass Low batte Critical low C1 signal IMU error curs conne etailed diagn e...

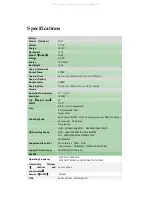
Page 18: ...Anti distortion filter Shooting Mode Single shoot Burst shoot BURST 3 5 7 frames per second AEB 3 5 frames per second 0 7EV Bias Time lapsed HD Recording Mode UHD 4096x2160p24 25 3840x2160p24 25 30 FH...

Page 19: ...H Optical Flow Sensor Frequency Velocity Range Altitude Range 50HZ 8m s 2m above ground 5cm 500cm Operating Environment Rich pattern surface with adequate lighting Lux 15 Operating Range 0 2 5m FAQ St...

Page 20: ...alled and operated with minimum distance 20cm between the radiator your body DJI Inspire 1 V2 0 should be installed and operated with minimum distance 20cm between the radiator your body All manuals a...

Reviews: