TECHNICAL MANUAL
LARGE DISPLAYS DN109/NB - DN119/NB - DN189/NB - DN129/NB
ANNEX II
-
Data Format:
This drop-down menu allows you to change the contents of the
registers to the desired system. It is very useful to enter data in the most comfortable
way possible, if there is already data written, the program converts it automatically.
Example 1:
You wish to write
“HELLO” by MODBUS TCP.
First, the configuration on the web server is configured as follows:
7.
“Global Settings”,
DATA PORT
= ETHERNET.
8.
“Network Settings”, place the right adjustments, in this case
IP Addr
= 10.30.90.11 like
in
“QModMaster”.
9.
“Communication Settings”,
PROTOCOL
= MODBUS
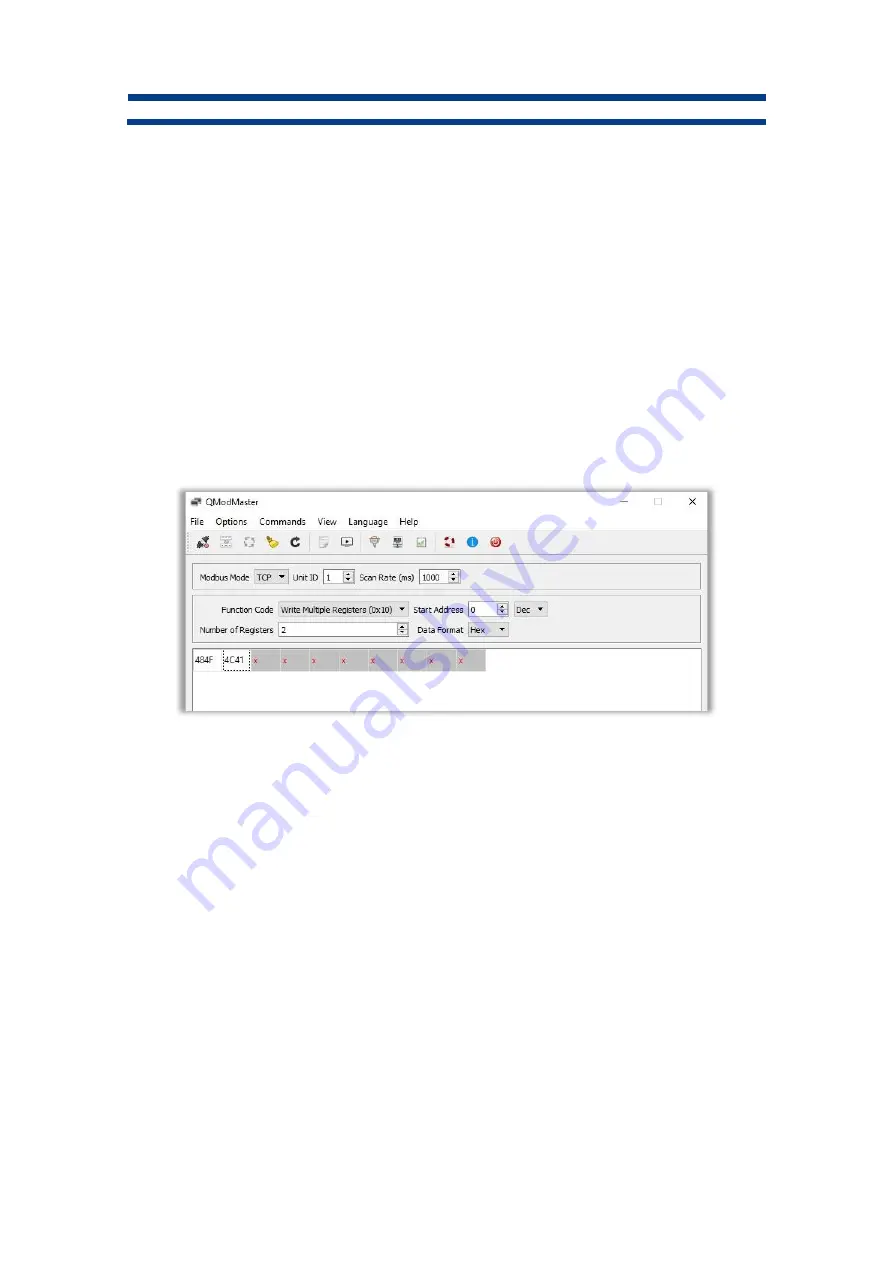
Second, the "Write Multiple Registers" (10h) function is used to write 2 registers with the content
"484Fh 4C41h" starting at address 0.
QModMaster configuration:
Fig. 114: Communication example in QModMaster. Send "HELLO" to the display.
Once the configuration is done, click on the connector button at the top left of the panel. This will
initiate communication with the display.
Finally, clicking the button immediately to the right of the connector will send the frame and show
"HELLO" on the display.
NOTE:
It is very useful to open the “Bus Monitor”, in the “View” tab. Doing so opens a window
showing each of the frames that are sent and received during the communication.
Example 2:
You wish to write
“HELLO” by MODBUS RTU.
Adjust settings like:
5.
“Global Settings” windows,
DATA PORT
= SERIAL.


