background image

17

OPERATION (CONTINUED)

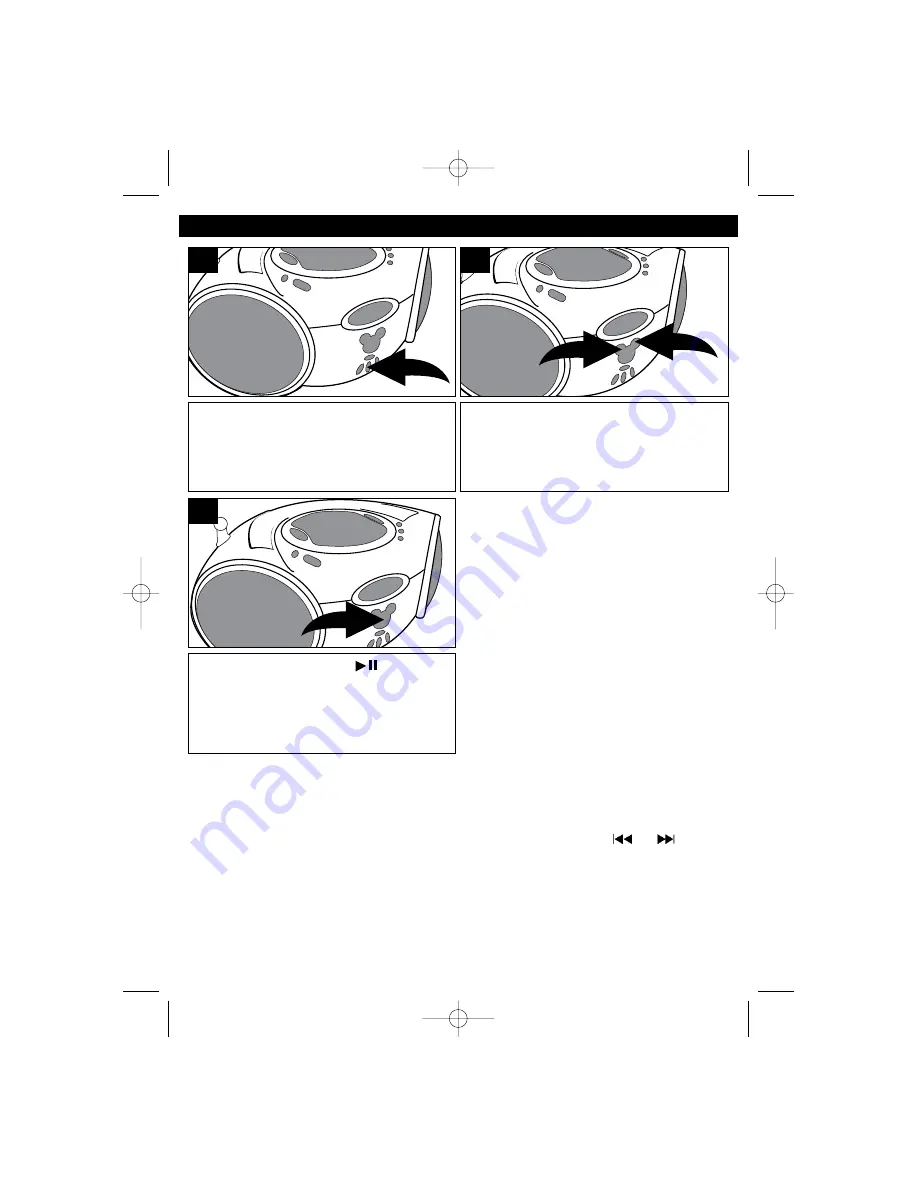
Press the Preset Set/CD Program
button again; the selected track has
now been programmed and counted
as program 1.

5

Repeat steps 4 and 5 to program the
other desired tracks in sequence (up to
16 tracks).

2

1

6

Press the Play/Pause (

) button to

begin playback; the PROGRAM
indicator will appear in the display and
the tracks will play in the order
programmed.

7

NOTES:

Programming is the ability to preselect the order in which a series of tracks will be played.

Each track may be stored in the program memory as many times as desired (up to 16).

As each track is played, its track number will be displayed. You can move forward or
backward through the programmed tracks with the Skip/Search/Tune

or 

button. 

The CD player will stop after all programmed tracks have been played or the Stop (

)

button is pressed. 

To cancel program playback, press the Stop (

) button while in the stop mode, or open

the CD Door.

To check the program, press the Preset Set/CD Program button once more; the display
will show the track numbers in the order they were programmed.

DB3000.O/M.QXD  1/24/03  4:06 PM  Page 17

Summary of Contents for DB3000-C

Page 1: ...BOOMBOX User s Guide DB3000 C DB3000 O M QXD 1 24 03 4 06 PM Page 22...

Page 2: ...reception Plays the CD Selects AM FM band Sets the radio presets Sets the CD program Increases radio preset Selects CD repeat Stops CD playback Advance track Search CD Tune in a radio station Disney...

Page 3: ...ore it is finished 5 Adjust the VOLUME control and Preset EQ button as desired 6 To turn the CD off press the Power button TO REPEATEDLY PLAY BACK ONE TRACK ALL TRACKS 1 Follow steps 1 and 2 in the TO...

Page 4: ...RSONNEL CAUTION RISK OF ELECTRIC SHOCK DO NOT OPEN DANGER Invisible and hazardous laser radiation when open and interlock failed or defeated Avoid direct exposure to beam FCC WARNING This equipment ma...

Page 5: ...ected Consult the dealer or an experienced radio TV technician for help SURGE PROTECTORS It is recommended to use a surge protector for AC connection Lightning and power surges ARE NOT covered under w...

Page 6: ...evels is included for your protection Decibel Level Example 30 Quiet library soft whispers 40 Living room refrigerator bedroom away from traffic 50 Light traffic normal conversation quiet office 60 Ai...

Page 7: ...be blocked by placing the product on a bed sofa rug or other similar surface This product should never be placed near or over a radiator or heat source This product should not be placed in a built in...

Page 8: ...n of any service or repairs to this product ask the service technician to perform safety checks to determine that the product is in proper operating condition 21 WALL OR CEILING MOUNTING The product s...

Page 9: ...se Area 7 Power Button 8 Random Button 9 FM Mode Button 10 Headphone Jack 11 Speaker 12 Skip Search Tune Button 13 Stop Button 14 Battery Compartment Bottom of Unit 15 AC Power Jack Rear of Unit 16 Pr...

Page 10: ...ries not included observing the battery polarity indicated inside the compartment and in figure 2 Replace the Battery Compartment cover BATTERY PRECAUTIONS Follow these precautions when using batterie...

Page 11: ...ease the unit will automatically scan to the next broadcasting station 2 1 3 Adjust the volume using the VOLUME buttons as desired Press the Preset EQ button repeatedly to select one of the Preset EQ...

Page 12: ...reset number will blink in the display 2 Repeatedly press the Preset Up CD Repeat button until the desired preset number appears in the display Press the Preset Set CD Program button again to set the...

Page 13: ...tment door 2 To play a disc from the beginning press the Play Pause button Press the Play Pause button again to pause playback the display will blink 3 Adjust the volume using the VOLUME buttons Press...

Page 14: ...f a disc is inserted incorrectly dirty damaged or not present at all no dISC will appear in the display As each track is played the track number is shown in the display To prevent damage to the disc n...

Page 15: ...e selected track over and over until the Stop button is pressed 2 1 3a TO REPEATEDLY PLAY BACK ALL TRACKS Press the Preset Up CD Repeat button twice the indicator will light and the unit will play all...

Page 16: ...tton to start playback 2 Press the Random button once the indicator will appear in the display and the unit will randomly play all the tracks on the CD 3 TO RANDOMLY PLAY BACK THE TRACKS TO CANCEL RAN...

Page 17: ...tton to select CD and start playback then press the Stop button 2 1 2 Press the Preset Set CD Program button Pr 01 will appear in the display 3 Use the Skip Search Tune or button to select the first t...

Page 18: ...eries of tracks will be played Each track may be stored in the program memory as many times as desired up to 16 As each track is played its track number will be displayed You can move forward or backw...

Page 19: ...r motions This unit is designed to play only compact discs bearing the identification logo as shown here Other discs may not conform to the CD standard and may not play properly Compact discs should b...

Page 20: ...s AM or FM no sound Radio Band button was not Press the Radio band button to pressed select the radio Volume at minimum Increase volume Compact Disc Player CD Player will not play Play button was not...

Page 21: ...mmended for longer life Speaker 2 x 8 Ohms Radio Frequency Range FM 87 9 to 107 9MHz Frequency Range AM 520 to 1710KHz CD Disc Diameter 4 72 120mm 3 15 80mm Single CD Optical Source Semiconductor Lase...

Page 22: ...877 DISNYCE 1 877 347 6923 Please keep all packaging material for at least 90 days in case you need to return this product to your place of purchase or Memcorp For parts and accessories contact Fox In...

Reviews: