24
Firmware Upgrade
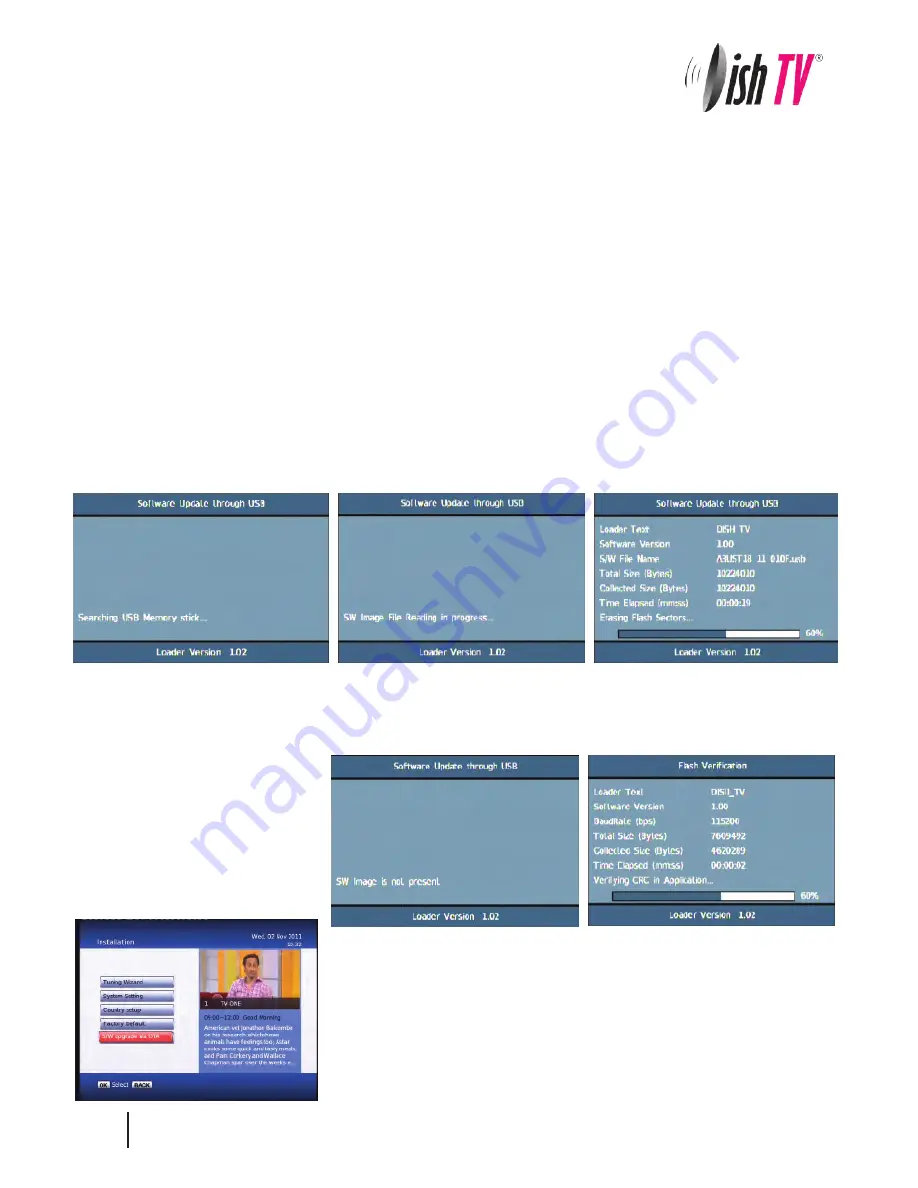
If the firmware upgrade was incorrectly placed on the USB it will also come up with the “Searching USB Memory Stick...”
message, the difference is the next message will say “SW Image is not present” it will then quickly display the Flash
Verification screen which will last only a few seconds.
S/W Upgrade OTA:
This is a Software Upgrade over the air. This will only work if the upgrade is being
broadcast. It can be selected from the
Installation
option in the Main Menu.
If you leave this set to on your unit will automaticly update to new software
when its broadcast.
Via USB:
One way to perform a firmware upgrade on your receiver is via USB using the USB connection in the back of your unit.
To do this just follow the instructions below...
Note: The USB drive must be formatted to FAT32
1. Download updated firmware from
www.dishtv.co.nz
, follow the instructions provided on the website.
2. Turn off power to satBox, insert the flashdrive.
3. Press and hold the
Menu
button on the front of your S7070r while powering on the unit, Keep the menu button held
down until the unit says USB on the front panel.
The receiver will first display
Load
and if done correctly the display on the front will show
USB
after about 3 seconds.
Once
USB
is displayed on the front panel you can release the menu button and leave the unit to do the rest.
On screen at the same time it will present a window headed
Software Update through USB
If the upgrade has been loaded correctly onto the USB flashdrive it will come up with
SW Image File Reading in
progress...
straight after it displays
Searching USB Memory stick...
Then to a couple of loading screens which will take about 4-5 minutes to complete.


