background image

55

EN

EWS3 – Wireless Indoor Siren

6.  Close EWS3 enclosure by putting the cover back (see Fig. No. 3).

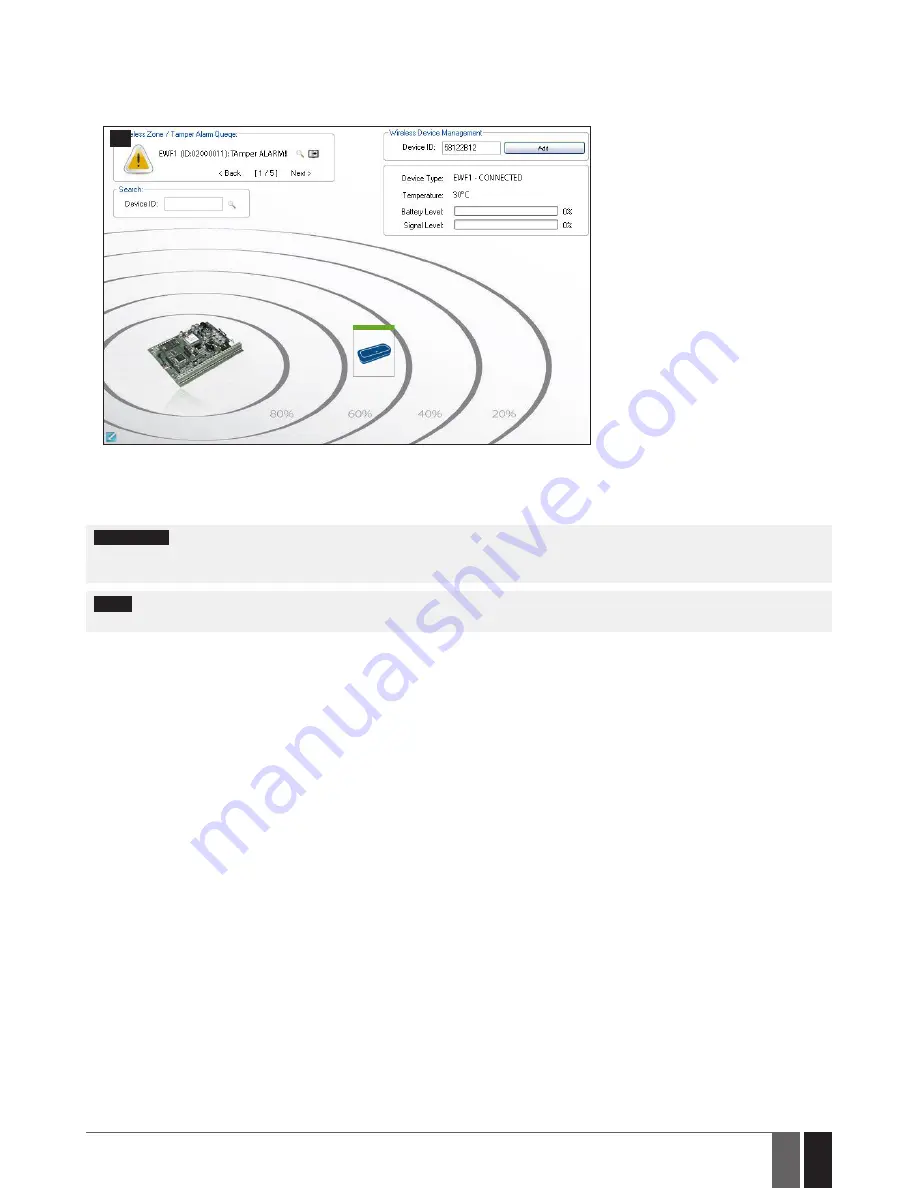
7.  Bind the device to the alarm system using 

ELDES Configuration Tool

 software. Open

 Wireless Device Management

 section and 

enter a 8-digit wireless device ID located on the EWS3 enclosure and press 

Add

 button (see Fig. No.10). The device can also be bind by 

sending a corresponding command via SMS message. For more details, please refer to the software‘s HELP section and ELDES alarm 

system installation manual.


10

8.  Upon the successful binding process, EWS3 device icon becomes visible in 

Wireless Device Management

 section as well as 

Battery 

Level

 and 

Signal Level

. If attempt to bind is unsuccessful, try to move EWS3 closer to the alarm system device and bind anew.

9.  EWS3 siren is ready for use.

ATTENTION: 


Ensure that EWS3 device is properly fixed to the wall and the Mounting Point A portrayed in Fig. No. 4 and Fig. No. 5 is properly 

screwed in. Otherwise, the tamper switch will NOT supervise the back side of EWS3 enclosure (see also 

4. EWS3 ZONE, PGM OUTPUT 

AND TAMPER

). 

NOTE: 


If you are unable to bind the wireless device, please, restore the parameters of the wireless device to default and try again. 

See chapter 

6. RESTORING DEFAULT PARAMETERS

 for more details.

Summary of Contents for EWS3

Page 1: ...EWS3 WIRELESS INDOOR SIREN Тел 7 495 7907870 Моб 7 965 4429948 Skype Discoverytelecom Mail info discoverytelecom ru www discoverytelecom ru ...

Page 2: ...on Tool software or EKB2 EKB3 EKB3W keypad To start using EWS3 it has to be bind to ELDES alarm system by sending a corresponding SMS message or using software ELDES Config uration Tool Upon successful EWS3 binding process the system adds one wireless zone and one wireless PGM output In case of alarm the siren provides a sound alarm for one minute The configuration of this parameter is disabled fo...

Page 3: ...t parameters Battery slots STATUS LED indicator for data transmission indication ALARM blue Blue LED indicators for visual alarm indication ALARM red Red LED indicator for visual alarm indication BUZZER Speakers for audio alarm indication TAMPER Tamper switches FRONT SIDE of ENCLOSURE ALARM blue ALARM blue ALARM red 2 LED indication Description ALARM blue flashing Burglary 24 Hour or tamper alarm ...

Page 4: ...urface and or power lines Wireless device 5 m to 30 m inside the building 0 5 m to 150 m in open areas ELDES alarm system wireless antenna 7 Recommended face the front side of the wireless device towards ELDES alarm system s wire less antenna keep the distance 0 5 m to 30 m inside the building 0 5 m to 150 m in open areas EPIR2 Wireless device 0 5 m to 30 m inside the building 0 5 m to 150 m in op...

Page 5: ...ssful binding process EWS3 device icon becomes visible in Wireless Device Management section as well as Battery Level and Signal Level If attempt to bind is unsuccessful try to move EWS3 closer to the alarm system device and bind anew 9 EWS3 siren is ready for use ATTENTION Ensure that EWS3 device is properly fixed to the wall and the Mounting Point A portrayed in Fig No 4 and Fig No 5 is properly...

Page 6: ...sage contains the violated tamper number and a star character indicating wireless connection loss as a tamper alarm cause ATTENTION The tamper will not operate if the wireless zone is disabled 5 BATTERY REPLACEMENT 1 Open EWS3 enclosure 2 Remove all 4 old batteries from the battery slots 3 Postition the 4 new 1 5V alkaline AA type batteries according to the appropriate battery slot positive negati...

Page 7: ...te The warranty is voided if the system has been exposed to mechanical impact chemicals high humidity fluids corrosive and hazardous environment or other force majeure factors Safety instructions Please read and follow these safety guidelines in order to maintain safety of operators and people around DO NOT use the system where it can be interfere with other devices and cause any potential danger ...

Reviews: