Elite MicroPrint
Setup Guide
14
Step 4
Installation of Elite MicroPrint Autoloader Command Console
The Elite MicroPrint is operated by the ACC (Autoloader Command Console).
To install the ACC (Autoloader Command Console) program double click on the Install
Elite
MicroPrint Autoloader Command Console Program
and choose Open from location. The ACC
will install, please follow the instructions.
NOTE: If at the beginning of the installation the installer cannot locate the Microsoft Dot.Net
Framework, you will need to cancel installation and click on
Install .Net Framework.
Please
follow the instructions and once the .NET Framework is installed, proceed with installation of
the Autoloader Command Console.
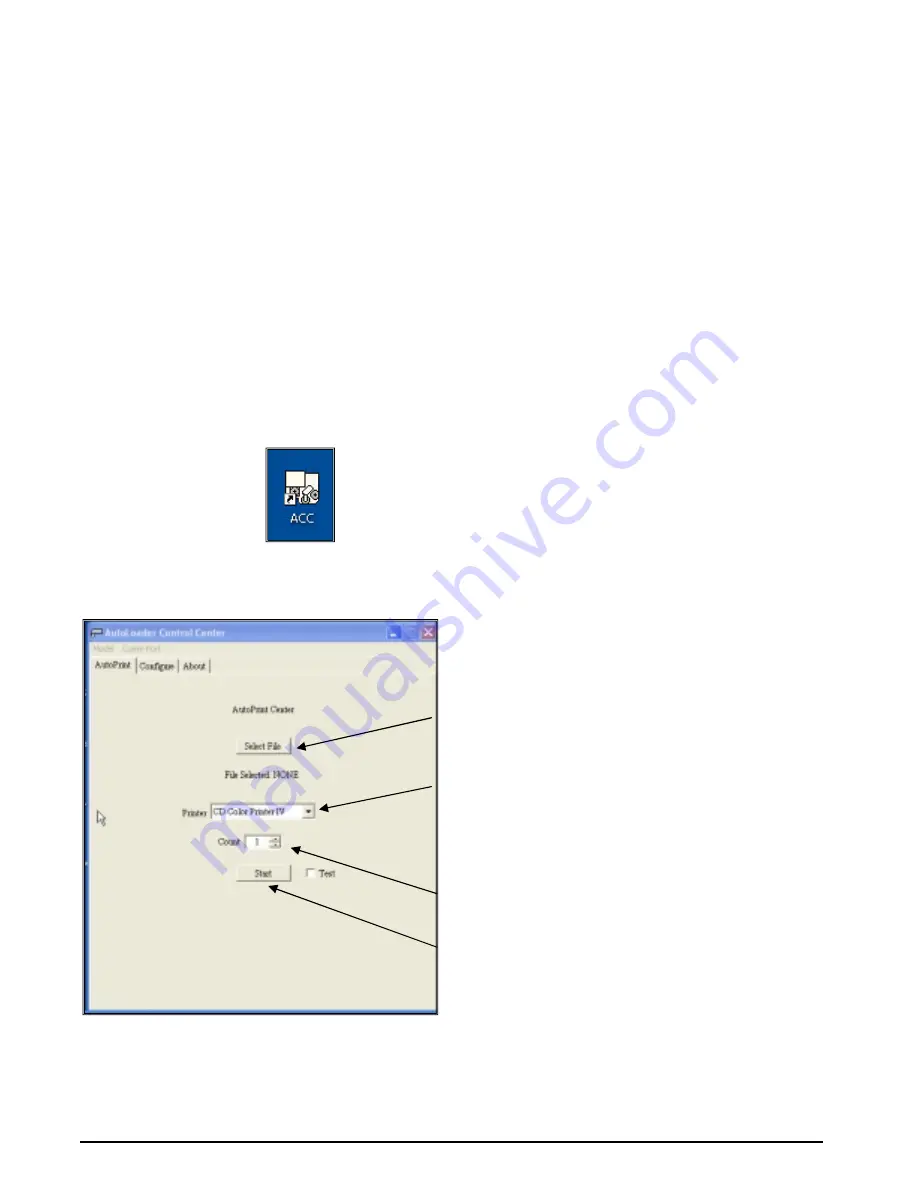
Once the ACC has been installed, the ACC Icon as shown below will be placed onto your
desktop.
Click on this Icon to open the ACC.
When the ACC has opened, this screen is displayed.
This is the AutoPrint operational folder and is the
primary working area for the MicroPrint. There are 3
basic functions that set-up your print only task.
1- Select File. Click on this file and browse for the
xxx.prn (print file) that has been created with the Discus
Labeling software.
2- Select Printer. Click on the arrow and set the correct
printer that is connected to the MicroPrint. (Note: if the
printer is not displayed, you must locate the installation
CD that was provided with the printer and install the
printer driver.)
3- Set the number of discs that are required to be
printed.
4- Click on Start (the loader will begin operation)
The Test option located next to the Start tab can be
used to allow the MicroPrint to perform all functions
except it will not print the image.


