background image


OPERATION 


BEFORE FIRST USE 


Please read these instructions carefully before use and keep them for 
future reference.  


Check your local main voltage whether it is the same as stated on the 
appliance.  


Before using for the first time, remove any protective films or stickers 
from the appliance and ensure the power switch is in the 

“OFF” position. 


ASSEMBLY 

1.


Lift the stand upright. Assemble the motor shaft (6 & 10) onto the metal 
stand (12) by fastening the fixing screw #2 (11).  

2.


Unscrew the rear guard securing nut (4) from the motor shaft (6) by 
turning the nut anti-clockwise.  

3.


Mount the rear guard (5) to the motor unit (7) as aligned with the three 

positioning pins on the motor shaft. Secure the rear guard with securing 
nut (4) by turning it in a clockwise direction.  

4.


Assemble the fan blade (3) to the motor shaft (6) and tighten the fixing 
screw #1 (2). 

IMPORTANT:

 Make sure the fixing screw (2) is tightened 

on the surface of the motor shaft (6).  

5.


Attach the front guard (1) to the rear guard (5) and close all clips and 
lock the safety screw at the bottom of the guard.  


Summary of Contents for DCFF40C

Page 1: ...40cm High Velocity Oscillating Floor Fan Models DCFF40C DCFF40GBLK INSTRUCTION MANUAL PLEASE READ THE INSTRUCTION MANUAL CAREFULLY BEFORE USING THE UNIT...

Page 2: ...TABLE OF CONTENTS WARNINGS AND PRECAUTIONS 1 STRUCTURE 3 OPERATION 4 CLEANING AND MAINTENANCE 6 TECHNICAL REFERENCE DATA 8 WARRANTY 8...

Page 3: ...t hands Doing so may cause electric shock Never insert fingers or objects through the guards when the unit is operating Never use an extension cord Always have a professional technician manufacturer o...

Page 4: ...t at least 1 metre away from electric appliances such as televisions and radios Avoid scratching and damaging the surface Do not use chemical solvents i e Benzene alcohol to clean the surface Place th...

Page 5: ...3 STRUCTURE 1 Front guard 2 Fixing screw 1 3 Fan blade 4 Rear guard securing nut 5 Rear guard 6 Motor shaft 7 Motor 8 Speed switch 9 Oscillation knob 10 Power cord 11 Fixing screw 2 12 Metal stand...

Page 6: ...stand 12 by fastening the fixing screw 2 11 2 Unscrew the rear guard securing nut 4 from the motor shaft 6 by turning the nut anti clockwise 3 Mount the rear guard 5 to the motor unit 7 as aligned wit...

Page 7: ...p or down the motor unit or rear guard NOTE Only adjust the fan head when the unit is OFF Be careful not to insert your fingers through the guard Turn the switch anti clockwise to turn the fan OFF 3 S...

Page 8: ...Mild detergent can be used for any stubborn marks 4 Do not allow the motor or other electrical parts to come in contact with water 5 Do not use abrasive sponges scouring pads or a stiff brush to clean...

Page 9: ...hazardous substances can leak into the ground water polluting the food chain and damaging health and well being MAINTENANCE If the unit fails to operate efficiently is broken or other problems arise...

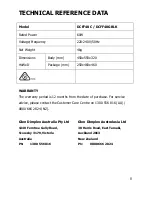
Page 10: ...460 WARRANTY The warranty period is 12 months from the date of purchase For service advice please contact the Customer Care Centre on 1300 556 816 AU 0800 666 2824 NZ Glen Dimplex Australia Pty Ltd Gl...

Reviews: