


10
The “ ” position is for operating the unit with the provided remote
control. When in “ ” position the unit is operated with the ON and
OFF buttons of the remote control
.
When the switch is in the center “
O
”position the unit is off.
B. Heater On/Off Switch
The heater On/Off Switch supplies power to the heater element.
When the switch is in the ON position the heater operates if the
thermostat calls for heat
.
C. Heater Thermostat Control
To adjust the temperature to your individual requirements, turn the
thermostat control clockwise all the way to turn on the heater. When
the room reaches the desired temperature, turn the thermostat knob
counter clockwise until you hear a click. Leave in this position to
maintain the room temperature at this setting. For additional heat, turn
clockwise until you hear the click again and the heater will turn on
.
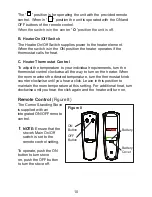
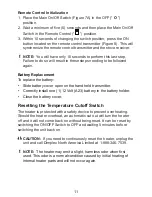
Remote Control
(Figure 8)
The Corner Standing Stove
is supplied with an
integrated ON/OFF remote
control.
!
NOTE:
Ensure that the
stove’s Main On/Off
switch is set to the
remote control setting.
To operate, push the ON
button to turn stove
on, push the OFF button
to turn the stove off
.
ON
Button
Battery
Cover
OFF
Button
Battery
Figure 8


