Dillenger KD218 User Manual Download Page 8

8

Display settings continued

- Wheel

  You can change the wheel size setting to match the wheel size on your bike, so that you get accurate   
  speed and distance readouts.  The default setting is 26”.

-  Speed Limit

  The default value of the speed limit setting depends on the kit or bike you have, but you can change   
  the speed limit setting to suit your needs using this parameter setting. 

-  Battery info

  This display can give more detailled information about the battery, but this is only applicable if the    
  controller in your e-bike or conversion kit conveys this information to the display. Not all controllers    
  are able to convey this kind of information, so this setting might not be useable on your setup.

-   Error Code

  This option shows a history of the error codes that the display has reported, which can be used for    
  diagnostics and fault finding.
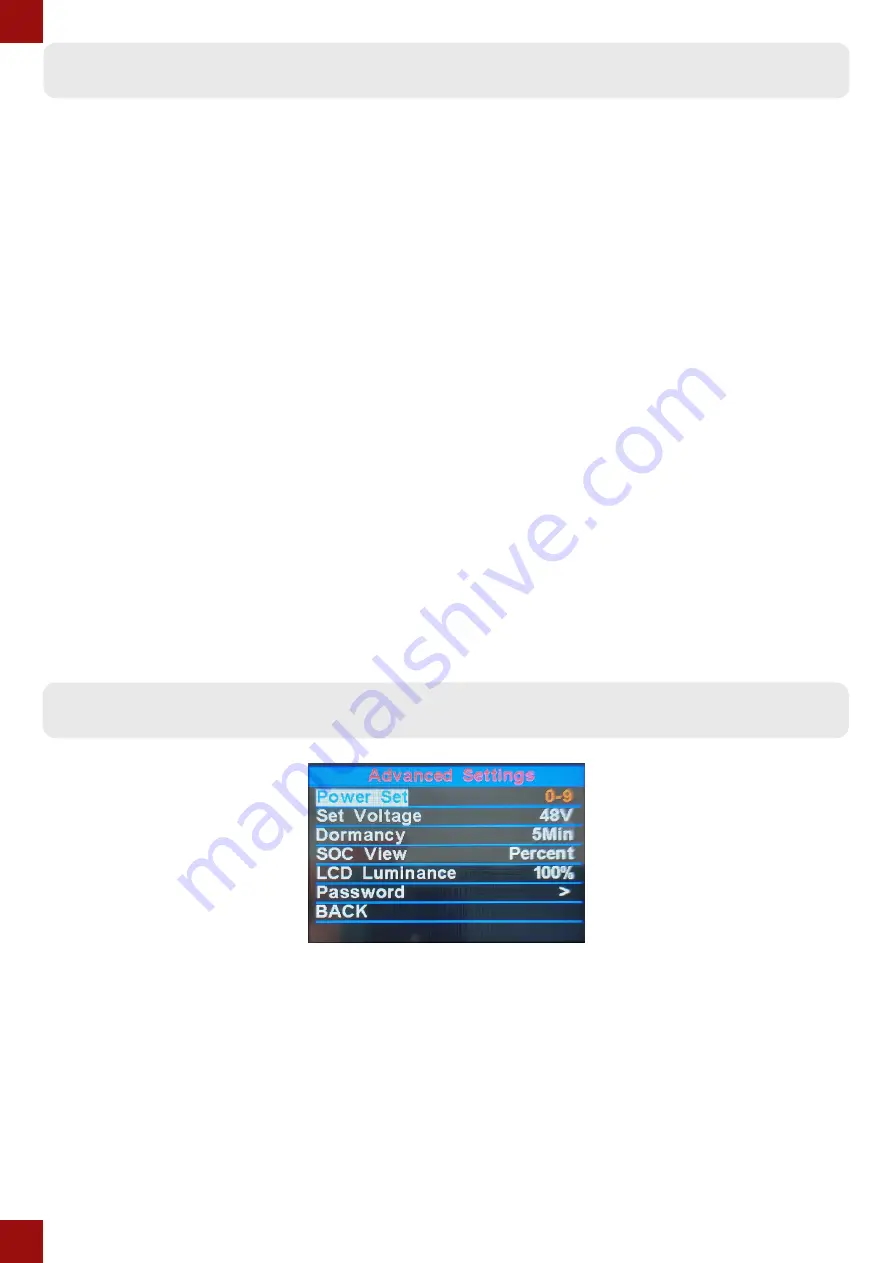
Advanced settings

-  Power Set

  With this setting you can choose the number of PAS levels you would like to use. The default value is    
  0-9, but you can choose from: 0-3, 1-3, 0-5, 1-5, 0-7, 1-7, 0-9, 1-9

-  Set Voltage

  To get an accurate battery level indication you can change the voltage setting here to match the  


  voltage of the battery on your bike.

- Dormancy

  This setting determines after how much time the display will switch off automatically if it’s not been    
  in use. The default setting is 5 minutes.

-  SOC View

  With this setting you can choose the way the battery level indication is represented. The default value  
  is percentage, but you can also change it to a bar representation.

-   LCD Luminance

  This adjusts the brightness of the LCD display. The default setting is 100%, but you can turn the  


  brightness down using this setting. 

-  Password set 

  You can use this to set a password for the display. The set password will have to be put in each time    
  the display turns on, and without the correct password the display will not be operable.  
  To set a password, change Start PassWord to “ON” and the display will prompt you to set a password    
  consisting of 4 digits. You use the + and - buttons to select each number, and shortly press the  


  on/off button to move onto the next number. The password then has to be confirmed for it to   


  be activated, as shown in the graphic below:

  If you do choose to use a password it is very important to take note of it, as the display is inoperable    
  without the correct password. For this reason it’s generally not recommended to set a password, and   
  doing so is at your own risk

Summary of Contents for KD218

Page 1: ...KD218 Please read through carefully before using the display Colour LCD Display User Manual English ...

Page 2: ...ails E bike LCD Display Model KD218 36V 48V Power supply Rated working current 10mA Maximum working current 30mA Off leakage current 1uA Working temperature 20 C 60 C Storage temperature 30 C 70 C Dimensions ...

Page 3: ... adjusment choice of 5 levels Trip meter and odometer Walk assist mode PAS levels choice of 8 different settings 0 3 1 3 0 5 1 5 0 7 1 7 0 9 1 9 Real time display readout including motor output speed and trip distance Password protection option Parameter settings including speed limit and wheel diameter This is the main screen that you will see when you turn on the display and while using your e b...

Page 4: ...controller these can be turned on off by pressing and holding down the button for a few seconds The display will show the light symbol in the top left corner Turning on the walk assist To turn on the walk assist press and keep holding down the button While the walk assist is activated the motor will run at 6km h and the display will show the walk assist symbol Accessing the parameter settings To a...

Page 5: ...odometer power output and battery level indicator To change between the different interfaces press the on off button shortly to cycle through the interfaces below The other readouts that will show are maximum speed average speed trip time These readouts will show on the bottom left of the display ...

Page 6: ...ttery icon on the display represents an indication of the charge level of the e bike battery When the battery icon is full and solid blue it means that the battery is close to full The blue indicator in the battery icon will go down as the battery depletes and will start flashing empty when the battery is close to being depleted Battery level indicator Error codes The components of the e bike are ...

Page 7: ...is not in use You will see the screen shown below and you can select the Display settings or Advanced settings Display settings To toggle between the different options use the and buttons by shortly pressing them To select an option shortly press the on off button TRIP Reset You can use this setting to clear the trip meter Please note that you can only reset the trip meter not the odometer To rese...

Page 8: ...e if the controller in your e bike or conversion kit conveys this information to the display Not all controllers are able to convey this kind of information so this setting might not be useable on your setup Error Code This option shows a history of the error codes that the display has reported which can be used for diagnostics and fault finding Advanced settings Power Set With this setting you ca...

Page 9: ... this to set a password for the display The set password will have to be put in each time the display turns on and without the correct password the display will not be operable To set a password change Start PassWord to ON and the display will prompt you to set a password consisting of 4 digits You use the and buttons to select each number and shortly press the on off button to move onto the next ...

Page 10: ...10 Wiring diagram Error codes ...

Reviews: