4
Front Panel
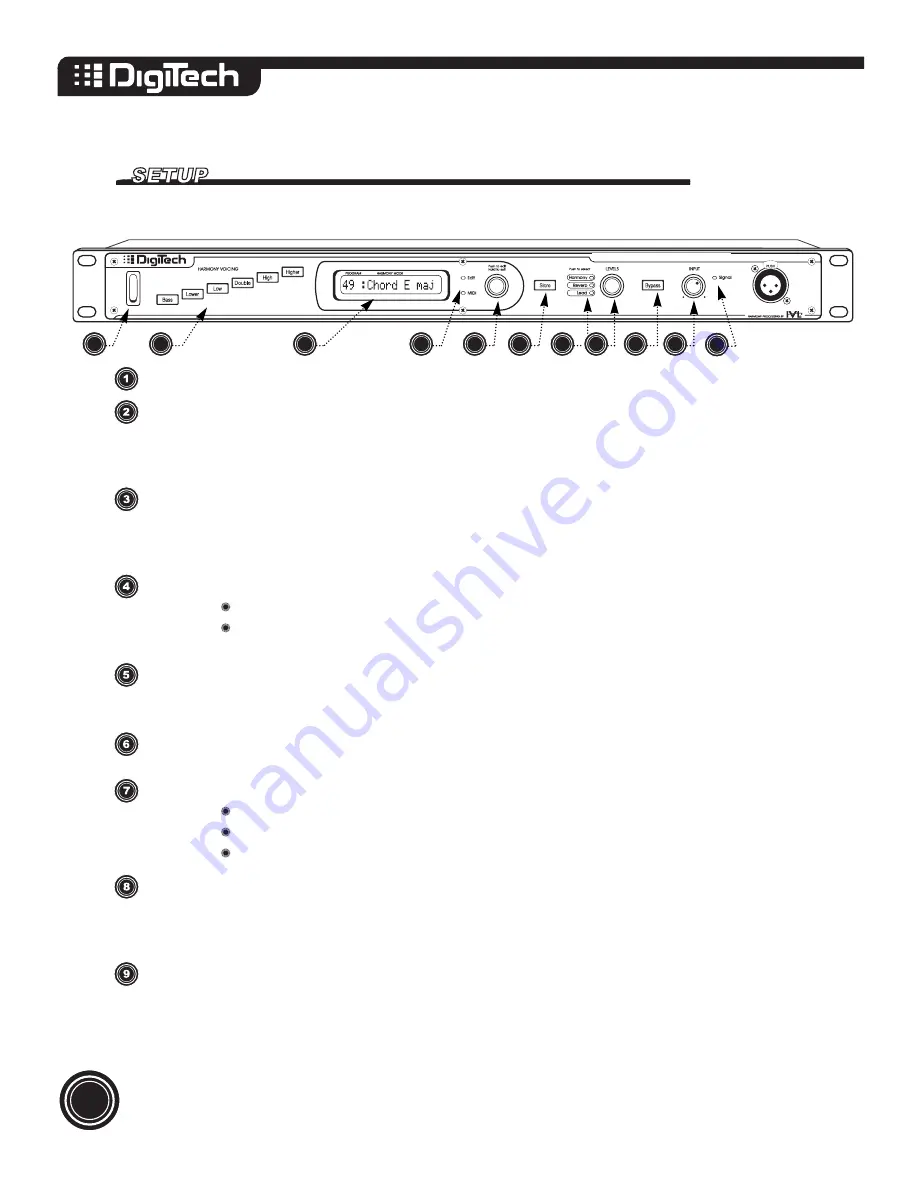
Power Switch
Harmony Voicing Buttons allow you to adjust the voicing of harmonies. The High and
Higher buttons create harmonies above your voice. The Low, Lower and Bass buttons
creates harmonies below your voice. The Double button creates detuned unison copies
of your voice. See page 16 for more detail on Harmony Voicing.
The LCD Display shows preset number and harmony mode information at the initial
level. It is also used to show editing and level information. Note that the “a” after the
preset number is only shown when the optional FS 300 footswitch is connected. See
page 18 for more details.
Data LEDs
Edit LED lights when ACCESS is in Edit mode
MIDI LED lights when ACCESS is receiving MIDI on any channel.
Data Entry Knob/Switch - is it a knob or a switch? It’s both. Turn the knob to select pre-
sets. Push the knob to access the edit screen in the LCD display. This control is used for
editing, and preset selection. For more details see page 8 or 13.
The Store Button allows you to save any changes you’ve made to a preset into user
memory. It also lights to show that you’ve made a change to a program.
Level LEDs (see page 9 for more detail):
Harmony LED lights when the Level Knob/Switch controls harmony level.
Reverb LED lights when the Level Knob/Switch controls reverb level.
Lead LED lights when the Level Knob/Switch controls lead level.
Level Knob/Switch - just like the Data Entry control, the level control is both a knob
and a switch. Use it as a switch to select which level you want to adjust (harmony,
reverb, or lead). Use it as a knob to adjust the level. Visual feedback is provided by the
LCD Display.
Bypass Button mutes the Harmonies from the stereo mix output. If there is Lead Vocal
and/or reverb in the mix they will be uneffected by the bypass button.
1
2
3
4
5
6
7
8
9
10
11
VOCALIST VR
Edit LED lights when VOCALIST VR is in Edit mode
MIDI LED lights when VOCALIST VR is receiving MIDI on any channel.
Summary of Contents for VOCALISTVR
Page 1: ...Vocalist VR...


