DIGITAL YACHT
WL500 Quick Start Guide
3. Driver/Software Installation
It is very important that you do not plug the WL500 in to a USB port of your computer unless you the WL500 Drivers CD-
ROM close to hand. By plugging in the WL500
you will initiate the Windows “Found New Hardware Wizard” which will not
be able to complete correctly without the Driver CD-ROM being present. The installation process varies depending upon
which Operating System your computer has, so please ensure that you follow the correct procedure.
Installation for Windows XP
Insert the WL500 Drivers CD-ROM in to your Windows PC. After the
CD-ROM has been detected by Windows, plug in the WL500 in to a
spare USB port.
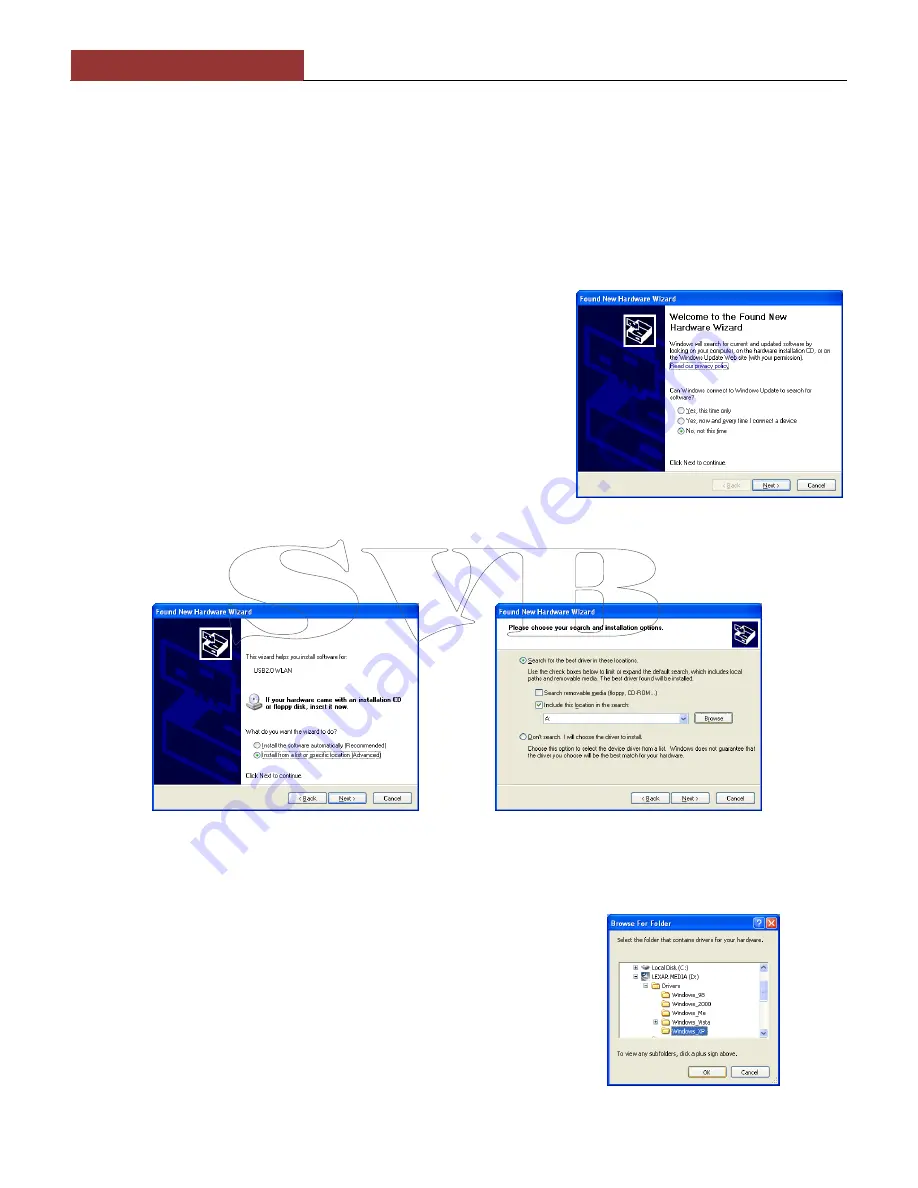
After a few seconds, Windows should detect the WL500 and display
the Found New Hardware Wizard (see Fig 2).
Windows is asking if you wish to search for the driver on-line using
Windows Updater. Click on the “No, not at this time” option and then
click the “Next” button.
Windows will now ask you if you want to install the software automatically (see Fig 3
). Click on the “Install from a list or
specific location (Advanced)” option and then click the “Next” button.
You will now be asked where you want to search for the software (see Fig 4).Click
on the “Include this location in the
search;” option and then click on the “Browse” button .
You will be presented with the normal Windows Browse window (see
Fig 5
). Scroll down the list of locations until you see the “My
Computer” option, double click on this and you should see the CD-
ROM location appear. Double click on this and then double click on
the “Drivers” folder and then click on the “Windows_XP” folder, at
which point the “OK” button, which was greyed out should now be
active. Click on the “OK” button.
Figure 2
Figure 3
Figure 4
Figure 5


