background image


Quick Start Guide for AISNet  V2.01 

TEL + 44 1179 554474   

www.digitalyachtamerica.com


[email protected]


E

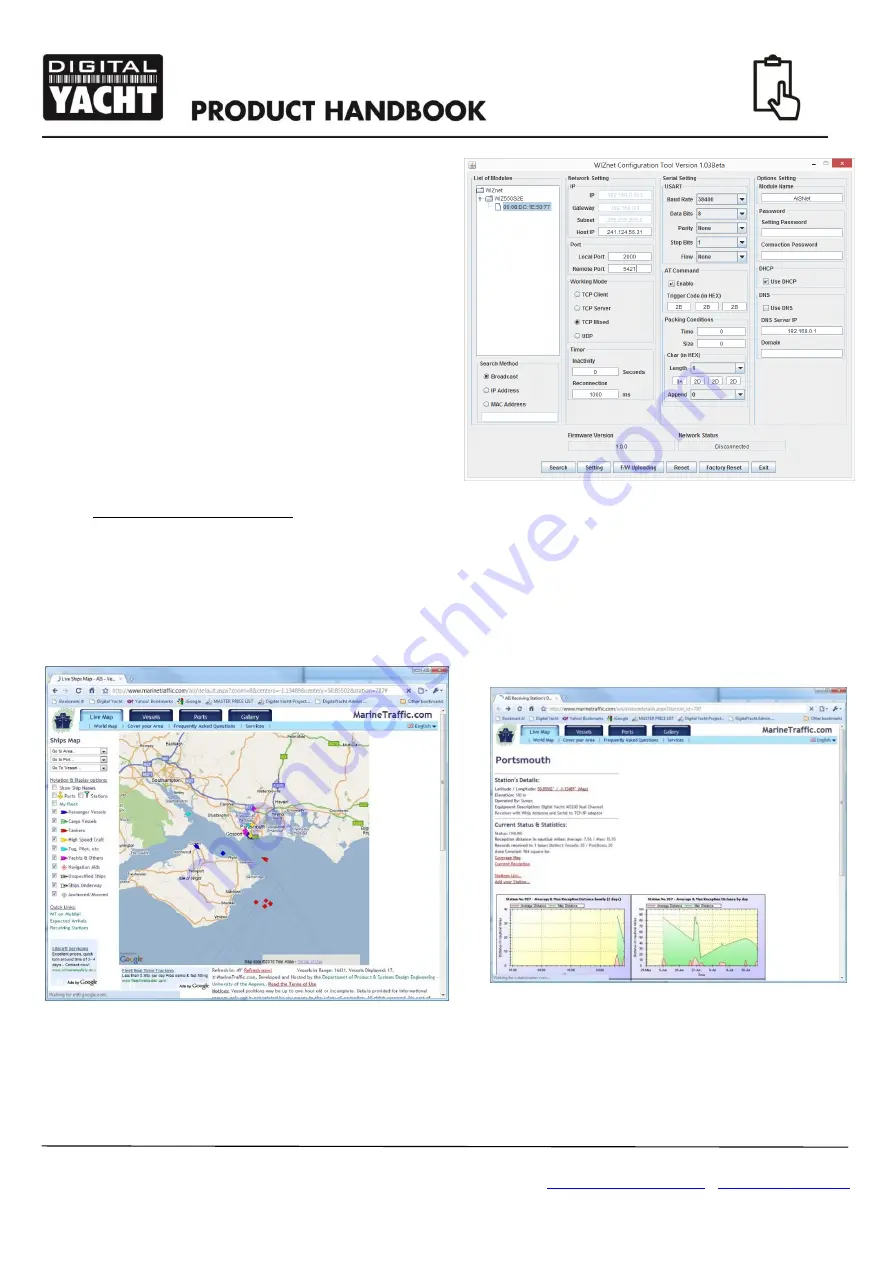
nsure the IP Configuration Method is set to “

DHCP

”, 

operation mode is set to “

TCP


CLIENT

” or “

UDP

” 

which are two protocols that have been tested with 
Marine Traffic and should also work with other online 
AIS services.  
 
Now enter the Host IP address and Remote Port 
given to you by the On-Line AIS service in the 
relevant boxes. These are the unique settings that 
identify to the AIS server that the data is coming from 
you, so it is very important that you get these right. 
The Local port can be any unused Port on your 
network, if in doubt just use the default Local Port of 
2000.  
 
Once you are sure that all of the settings have been 
set correctly, click the “Setting” icon and your settings 
will be copied in to the AISNet Base Station memory. 
 
To apply the settings, you can 

either click the “Reset” 

button (

not the “Factory Reset” button) or power cycle 

the AISNet. Either way after a few seconds the 
AISNet will restart using the new settings. 
 
Now check the website of the on-line AIS service that you wish to send AIS data to. The example below is for Marine 
Traffic but each service should have a page where you can check that your data is being received. 


Figure 3 

Summary of Contents for AISNet+

Page 1: ...Quick Start Guide for AISNet V2 01 TEL 44 1179 554474 www digitalyachtamerica com sales digitalyacht co uk AISNet Internet AIS Receiver Base Station With Built In VHF AIS Splitter ...

Page 2: ...free USB port The AISNet2 configuration program copy on supplied CD Rom Navigation software that can display AIS targets copy of SmarterTrack Lite for Windows on supplied CD Rom 3 Installation Before starting installation select a suitable location for the AISNet Receiver The unit is designed for mounting at home or in an office and is not water resistant It should be installed in a cool dry locat...

Page 3: ...e into the power socket on the AISNet Plug one end of the RJ45 Cat 5 network cable not supplied in to the AISNet and the other end in to a spare network socket LAN on your ethernet network On small home office wireless networks you will probably have to plug straight in to one of the LAN connectors on the back of the wireless router The VHF can be repowered Installation Step 4 In order to display ...

Page 4: ...r plug in the AC Mains Adaptor and the green POWER LED on the front of the AISNet should illuminate Assuming that the AIS VHF antenna is connected and there are AIS targets within the reception range of the AISNet typically 20NM or more the yellow RECEIVE LED on the front of the AISNet should flash each time an AIS target is received If the network interface is powered up and working then the gree...

Page 5: ... i e cable modem ADSL DSL ISDN 3G or even satellite connection The most common setup is for the Router to assign IP addresses to the devices that connect to it using DHCP If this is how your network router operates then the settings detailed in this document will work If your network has static IPs then you will need to allocate an unused IP address for the Base Station Configuring the AISNet Netw...

Page 6: ...it is very important that you get these right The Local port can be any unused Port on your network if in doubt just use the default Local Port of 2000 Once you are sure that all of the settings have been set correctly click the Setting icon and your settings will be copied in to the AISNet Base Station memory To apply the settings you can either click the Reset button not the Factory Reset button...

Reviews: