


2
Congratulations! You are the proud owner of a MemoryVue
tm
Digital Frame. Boasting
high-quality image resolution the MemoryVue
tm
is the perfect product for displaying your
favorite digital photos. With its ease of use and configuration, you can now display all your
favorite pictures, even with background music, or video clips
for everyone to see!
Package Contents
Before using the MemoryVue
tm
, be sure to check all the accessories contained in the
package. MemoryVue
tm
comes with the following items:
1.
MemoryVue
tm
unit with removable desktop stand
2.
A.C. Power Adapter
3.
USB Cable
4.
User Manual
Features
High resolution 10.4” TFT display
Plays images in slideshow format
Plays MP3 audio
Plays MPEG Video
Plays Audio Slideshow
Built-in multi format card reader CF/MMC/SD/XD
Generous 256MB internal memory
USB Port for PC connection
USB Port for device connection – thumb drive, camera, etc.
Connections
Use the guide below for power connection and media insertion
.
1.
Plug one end of the AC Adapter into the Digital Photo Frame and plug the other
end into a standard AC electrical outlet.
2. Insert a memory card into the appropriate slot.
3. Slide the Power Switch to the ON position.
4. A slideshow will automatically play from the inserted media. If there is no media,
the unit will play from the internal memory*.
*
First time users may be asked by the unit to set the date and time.
CF
7
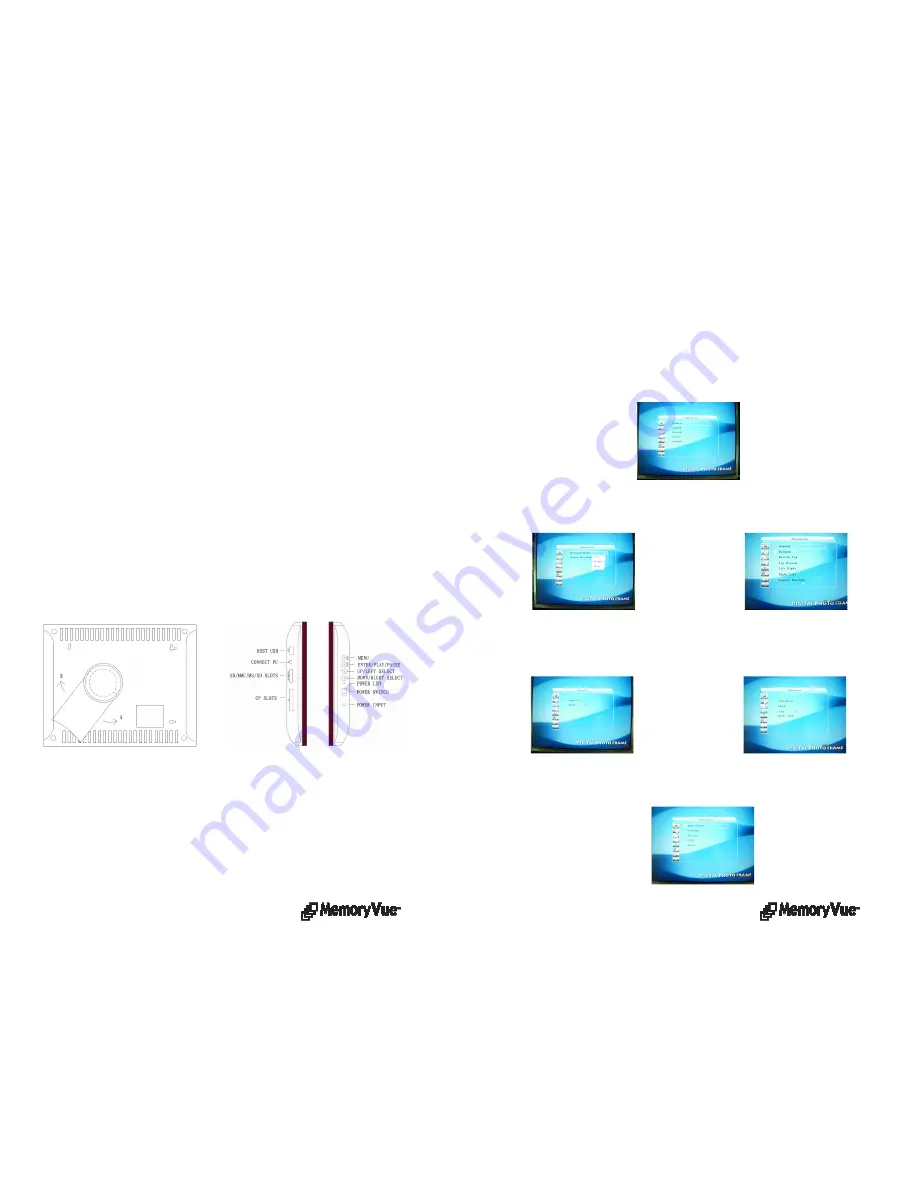
Setup
This function is used to setup operational parameters for personalization. Functions
include Language, Slideshow management, Clock settings, Alarm settings, Startup
control settings, Video Settings, Default settings. Use the Up/Down buttons to the
desired control and use the Enter button to select. A second screen is displayed with
the controls. Use the navigation buttons to the desired control. The Enter button will
select the desired parameter.
Language – Once in “Language use the navigation buttons to select the desired
language.
Picture Set – Once in “Picture Set” use the navigation buttons to select either
“Slideshow Mode” (Display Rate) or “Picture Play” Mode (Transitions).
Clock/Alarm Set – Once in either mode use the navigation buttons to change the
times as desired.
Start Up Set – Used to select the Startup Mode. When “Mode Select” is selected, the
Main Menu is displayed at Power On. When any other function is selected, external
media is played first. If no external media, plays from internal memory.


