


Introduction
XR20 User’s Guide
3
A B C
D
E
F
G H I
J K L
V WX
M N O
P Q R
S T U
Y Z
COMMAND
9
0
1
2
3
4
5
6
7
8
R
ABC PRINTING
F R I 2 : 51 AM
A
R
M
E
D
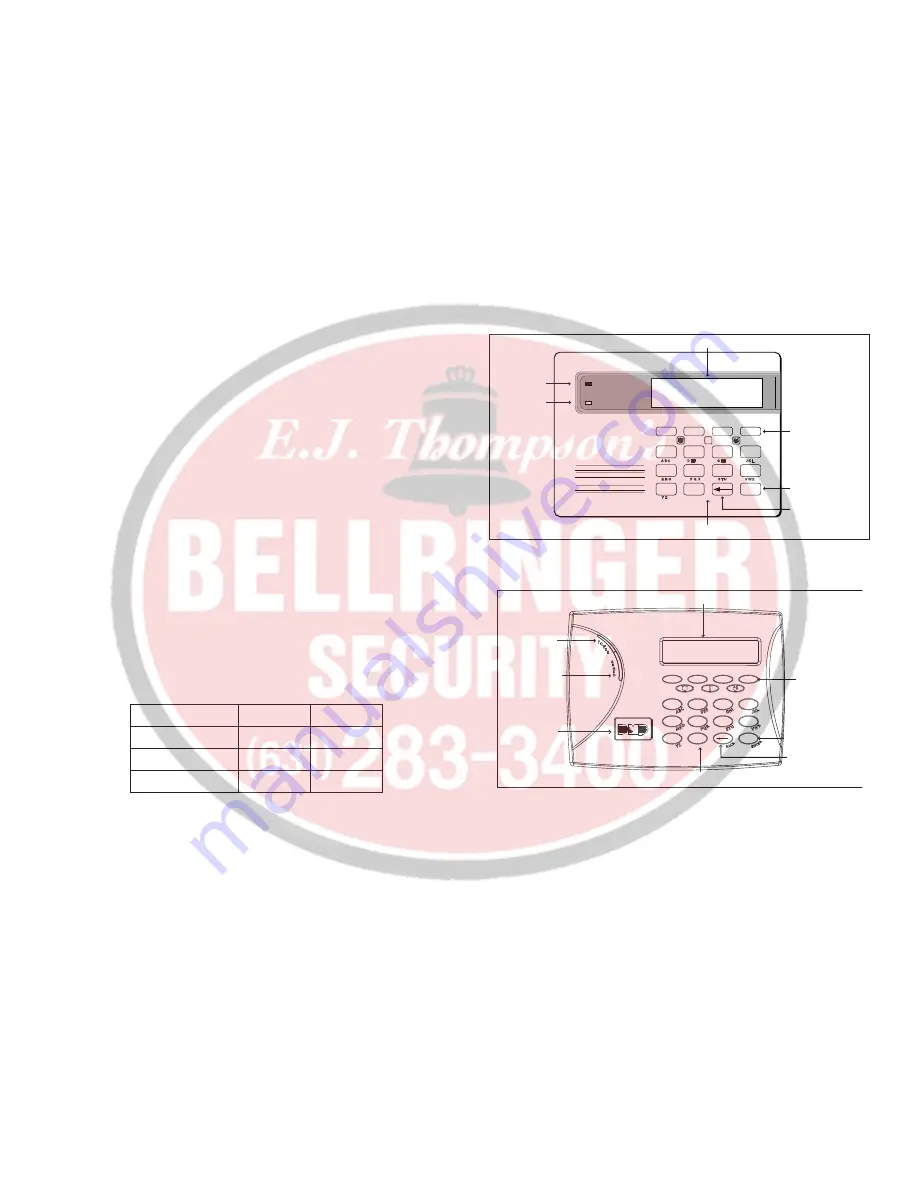
32-Character Display
Armed LED
Power LED
Select Keys
Data Entry Digit keys
COMMAND Key
Back Arrow Key
!
Security Command™ Keypad
32-Character Display
Armed LED
Power LED
Data Entry Digit keys
COMMAND Key
Back Arrow Key
Select Keys
1
2
3
4
9
0
CMD
5
6
7
8
ABC PRINTING
F R I
2 : 51 AM
Backlit Logo
and Proximity
Antenna
Thinline™/Aqualite™ Keypad
DMP Keypads
Your system may have one or more easy to use LCD keypads that
allow you to properly operate the system.
• Security Command™ Keypads
• Thinline™ or Aqualite™ Keypads
• Clear Touch™ Keypads
Security Command™, Thinline™, Aqualite™ Keypads
The Select keys
There are four keys under the display called the Select keys. These
keys are one of the features that make your system so easy to
operate. They allow you to make selections by pressing the Select
key under a choice shown in the display.
Note: For the purposes of this guide, when instructed to press
the first Select key, press the far left Select key; the second
Select key is the second from the left; third Select key is second
from the right; and the fourth Select key is the far right key.
POWER LED
This LED indicates the panel Power status. It is recommended
you contact the service department when the Power LED is off or
blinks.
LED Operation
AC
Battery
ON (Steady)
OK
OK
OFF
Trouble
N/A
BLINKS
OK
Trouble
ARMED LED
This LED is ON steady anytime a burglary protection area is armed
and is OFF when ALL areas are disarmed.
Summary of Contents for XR20
Page 1: ...User s Guide XR20 ...
Page 51: ... This page intentionally left blank ...
Page 52: ...LT 0303 1 01 8341 ...


