


35
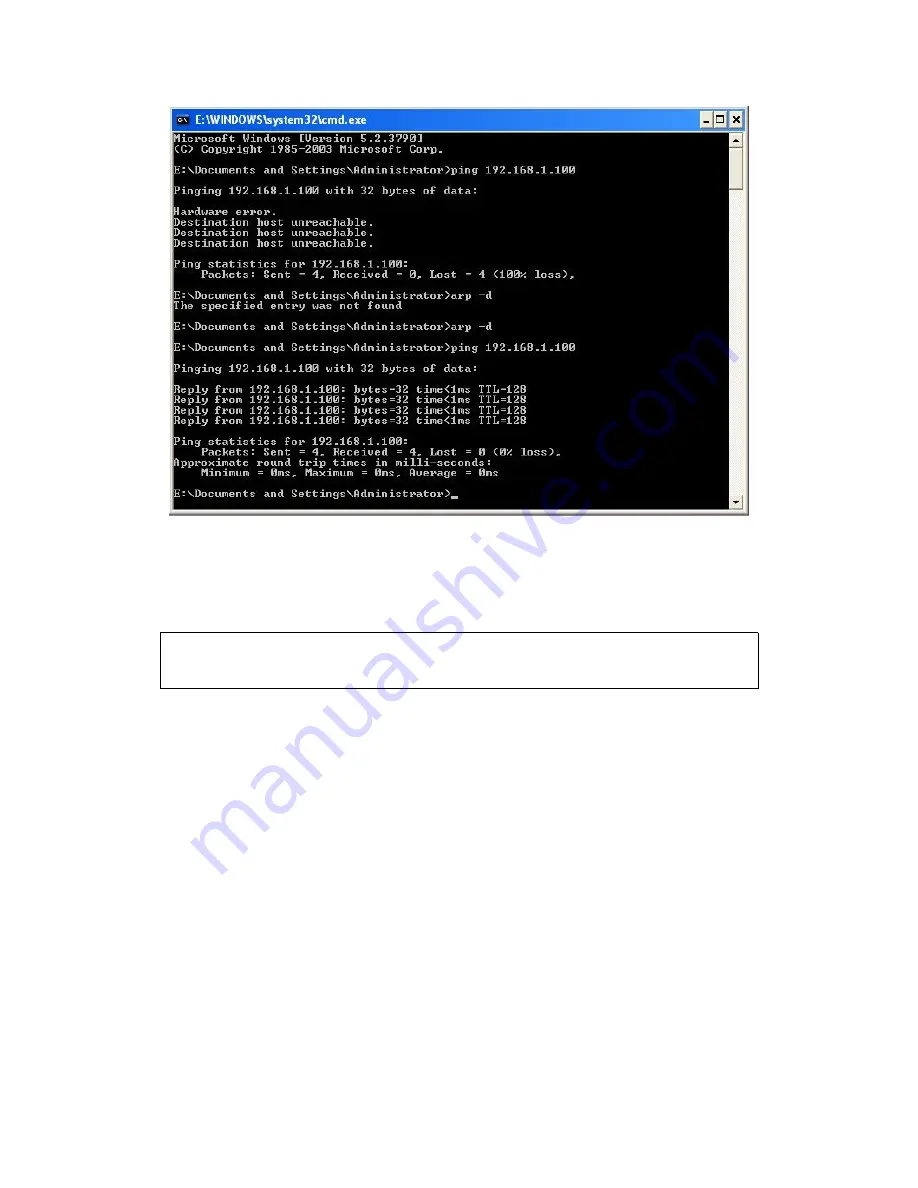
Image 6.10 Test connection
7.WIFI IP Address Setting
The setting parameters of 80 wifi thermal printer through the browser
configured, the steps as below:
1, Plug and switch on the printer.
2,Find the wireless network and link it. Then find the file named
“
HF-A11
”
and link it
–
after successful connection , go to next step.
3, Put the IP address ( 10.10.100.254 ) into the browser address bar, press
enter we can see as below:
Summary of Contents for POS-7650
Page 1: ...80mm Series Thermal Receipt Printer Instruction Manual...
Page 14: ...11 8 Finish the driver installation as below...
Page 15: ...12 5 2 1 USB Port Connection If your desired port is USB 1 Open Properties then choose Ports...
Page 18: ...15 Open Properties then click Ports 2 Select Add Port we can see below jpg...
Page 19: ...16 3 Click Next 4 Next and choose Generic Network Card then click Next...
Page 20: ...17 5 Next 6 Click Finished and we can check the added ports as below jpg...
Page 23: ...20 2 Select COM1 Configure Port default setting as below jpg...
Page 47: ...44 Image 2 3 In Printer X will search BlueTooth Printer Image 3...


