background image


Hardware Installation                


2-9 


Fiber cables should be connected as below:   

Step 1: remove the protective plug from the SFP/XFP fiber transceiver bore; Remove the 

protective cap from one end of the fiber cable. Keep the fiber end clean and neat.   

Step 2: Attach one end of the fiber cable to the SFP/XFP transceiver, and attach the other 

end to the transceiver of the other devices. Note: SFP/XFP transceiver’s TX port should 

be connected to RX port of other device, and SFP/XFP transceiver’s RX port should be 

connected to TX port of other device. 

Step 3: Check the fiber port status indicator, a light LED indicates that the link has been 

established; otherwise the link is not ready and should be examined. 


Caution! 

Please verify the sign above the port to ensure using the other ports. Connecting to wrong 

ports might damage the transceiver or the other ports. When connecting other devices 

through a fiber cable to the switch, the output power of the fiber cable must not exceed the 

maximum received power of the corresponding modules. Otherwise, it will damage the 

fiber transceiver. Do not stare at the fiber bore when the switch is in operation. That may 

hurt your eyes. 

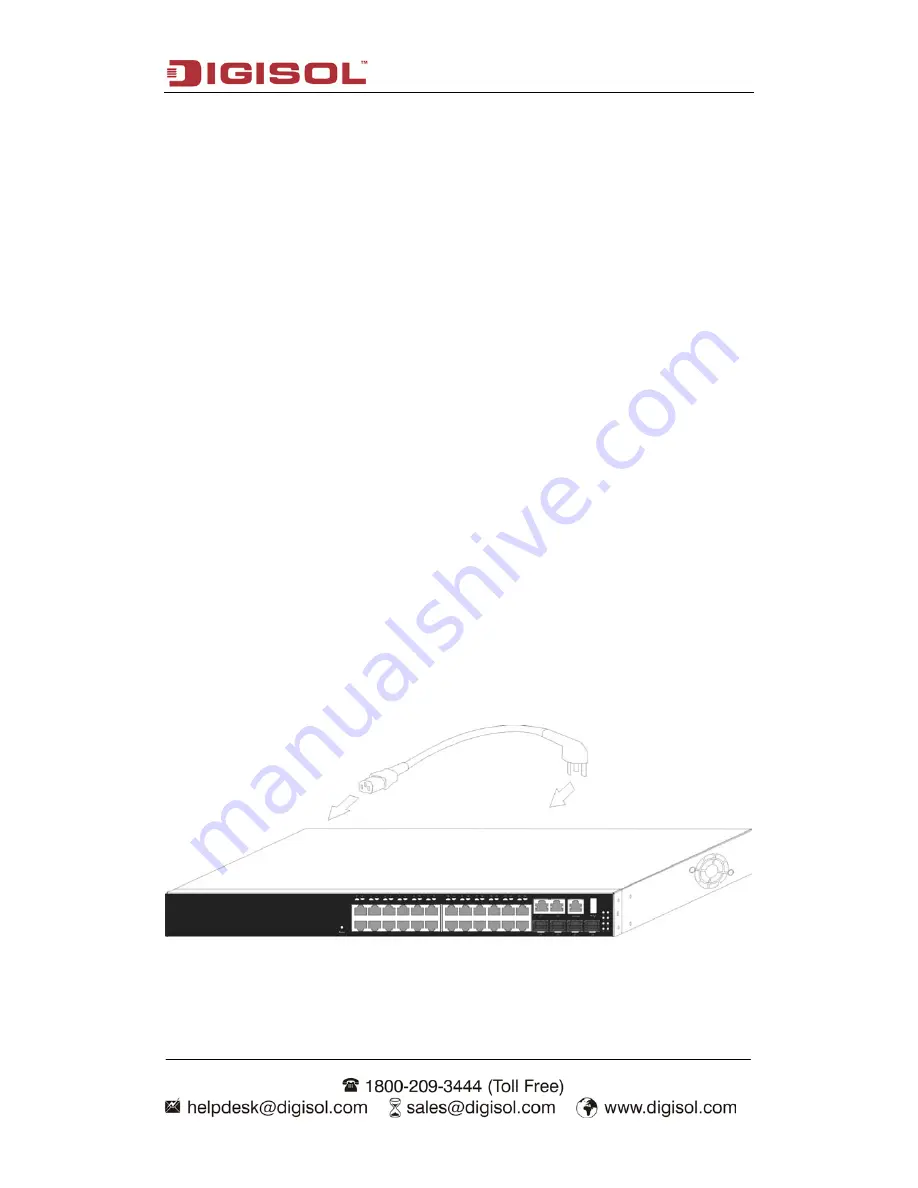
2.3.5 Power Supply Connection 

DG-GS4600 uses 220V AC power. Please read the power input specification for the 

detailed information.   


Power supply connection procedure is described as below:   


Fig 2-4 Attaching power cable to DG-GS4600 


Summary of Contents for DG-GS4600 SERIES

Page 1: ...DG GS4600 SERIES 24 48 PORT ACCESS LAYER 3 SWITCH Installation Guide V1 0 2013 05 22 As our products undergo continuous development the specifications are subject to change without prior notice...

Page 2: ...nstallation 2 1 2 1 Installation Notice 2 1 2 1 1 Environmental Requirements 2 1 2 1 2 Installation Notice 2 4 2 1 3 Security Warnings 2 5 2 2 Installation Preparation 2 5 2 2 1 Verify the Package Con...

Page 3: ...BO ports and 2 1000Mb optical ports DG GS4652 has 52 fixed ports 48 10 100 1000Base T fixed ports and 4 1000Mb optical ports DG GS4628HP has 30 fixed ports 24 10 100 1000Base T fixed ports 2 1000Mb CO...

Page 4: ...rdware release DG GS4628HP Fig 1 3 DG GS4628HP switch DG GS4652 Fig 1 4 DG GS4652 switch 1 2 Physical Specifications Management Port 1 RJ 45 serial console port AC DC Power Input AC 100 240VAC 50 60Hz...

Page 5: ...Combo ports 2 RJ 45 and 2 SFP 1 Console port 1 USB port 14 LEDs and 1 220V AC power socket The front panel of DG GS4610 is shown below Fig 1 5 Front Panel of DG GS4610 DG GS4628 has 24 10 100 1000Base...

Page 6: ...orts and 52 LEDs The front panel of DG GS4652 is shown below Fig 1 8 Front Panel of DG GS4652 1 3 2 Back Panel The back panel of DG GS4610 is shown below Fig 1 9 Back Panel of DG GS4610 DG GS4628 DG G...

Page 7: ...t indications description Panel Symbol Status Description Port1 10 Link Act On Green ports are in successful link state of 10M 100M or 1000M Flash Green ports are in successful link state and receive...

Page 8: ...uccessful link state of 10M 100M or 1000M Flash Green ports are in successful link state and receive send data Off ports are not in link Port25 26 SFP Link Act On Green ports are in successful link st...

Page 9: ...ports are in successful link state and receive send data Off ports are not in link Port25 26 SFP Link Act On Green ports are in successful link state of 100M or 1000M Flash Green ports are in success...

Page 10: ...successful link state of 10M or 100M and receive send data Off ports are not in link GE Port49 52 Link Act On Green ports are in successful link state of 1000M Flash Green ports are in successful link...

Page 11: ...how port POE status Enabled POE status Table 1 7 DG GS4628HP PoE indication description LED Status Description PoE Green Port is in power state Flash Green POE is in maximum power state Off Port power...

Page 12: ...transceiver 9 125um single mode fiber 70km SFP LH 120 L transceiver 9 125um single mode fiber 120km SFP GT SFP GT module 1000Base T SFP interface card module RJ 45 port SFP FX SFP FX 100Base FX SFP i...

Page 13: ...well grounded in order to avoid ESD damage and physical injury of people The switch should avoid the sunlight perpendicular incidence Keep the switch away from heat sources and strong electromagnetic...

Page 14: ...low relative humidity may cause the insulation spacer to contract making the fastening screw insecure Furthermore in dry environments static electricity is liable to be produced and cause harm to int...

Page 15: ...y system The input source for the switch should be reliable and secure a voltage adaptor can be used if necessary The building s circuit protection system should include in the circuit a fuse or circu...

Page 16: ...entilation for the rack Every device in the rack will generate heat during operation therefore vent and fans must be provided for an enclosed rack and devices should not be stacked closely When mounti...

Page 17: ...e switch alone in a dangerous situation Use standard power sockets which have overload and leakage protection Inspect and maintain the site and the switch regularly Have the emergence power switch on...

Page 18: ...lities by themselves 2 3 Installation Guide 2 3 1 Installing the Switch Please mount DG GS4600 series switch as below 1 Attach the 2 brackets on the DG GS4600 series with screws provided in the access...

Page 19: ...tch Do not place anything on top of the switch Do not block the blowholes on the switch to ensure the proper operation of the switch 2 3 2 Connecting Console DG GS4600 series provides a serial RJ45 co...

Page 20: ...snap into place at the bottom of the line card Note the SFP transceiver is hot swappable Caution Do not stare directly at the 2 fiber bore in the SFP transceiver when the switch is in operation other...

Page 21: ...ndicates that the link has been established otherwise the link is not ready and should be examined Caution Please verify the sign above the port to ensure using the other ports Connecting to wrong por...

Page 22: ...djustable for the input voltage As soon as the input voltage is in the range printed on the switch surface the switch can operate correctly 3 When the switch is powered on it executes self test proced...

Reviews: