


18
Operation - TV
P
P
P
i
i
i
c
c
c
t
t
t
u
u
u
r
r
r
e
e
e
-
-
-
I
I
I
n
n
n
-
-
-
P
P
P
i
i
i
c
c
c
t
t
t
u
u
u
r
r
r
e
e
e
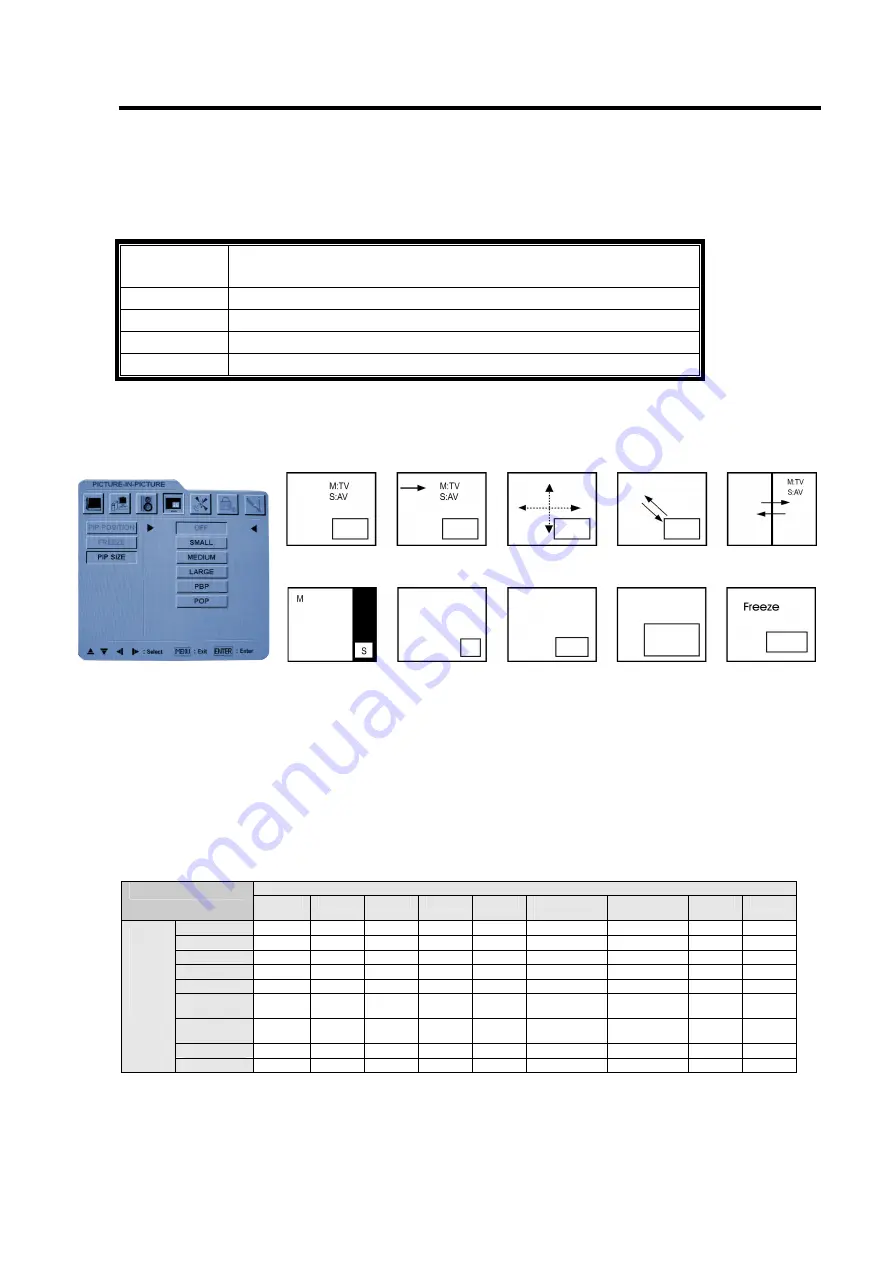
PIP function:
With PIP function you can watch a multi-screen on the Display at the same time.
PIP
To start the PIP function.
Off->PIP(Small) ->PIP(Medium) ->PIP(Large)-> PBP -> POP
SOURCE
To select the sub screen’s source. (see the PIP structure below)
POSITION
To adjust the PIP position.
SWAP
To switch the picture of main screen to sub screen.
Freeze
To freeze the PIP main screen.
[Basic function]
You can control PIP function easily by remote control.
PIP mode PIP source PIP position Swap PIP PBP
source & swap
POP PIP size –small PIP size–medium PIP size–large Freeze the PIP
Source & swap main screen
Note: 1. M: main screen; S: sub-screen
2. The submenu of PIP position can be used to control the position of sub-screen.
3. The control of “SOURCE” for sub-screen, “SWAP”, and “FREEZE” for main-screen
can be enabled via the key- “SOURCE”, “SWAP” and “FREEZE” separately.
PIP structure
Main Screen
PIP
TV
AV1
AV2
AV3
S-Video
Component1
(Y1Cb1Cr1)
Component2
(Y2Pb2Pr2)
VGA
DVI
TV
AV1
AV2
AV3
S-Video
Component1
(Y1Cb1Cr1)
Component2
(Y2Pb2Pr2)
VGA
Sub-
Screen
DVI


