background image

English

   - 18 -

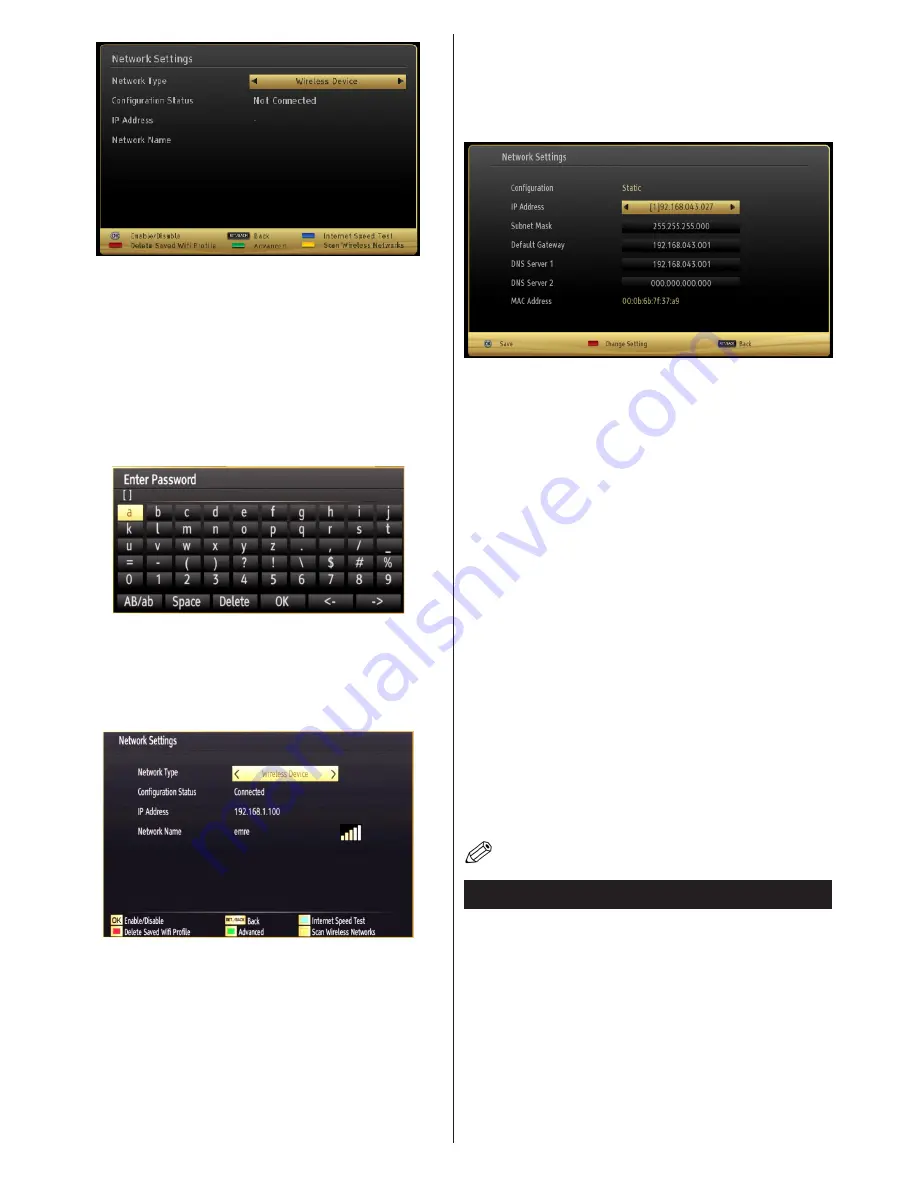
Press 

YELLOW

 button to scan wireless network from 

network settings menu. Afterwards, available network 

list will be displayed. Please select your desired network 

from the list. 
If the selected network is protected with a password, 

please enter the correct key by using the virtual 

keyboard. You can use this keyboard via 

navigation 

buttons

 (Left/Right/Up/Down) and 

OK

 button on the 

remote control. 

Wait until the IP the address is shown on the screen.
This means that the connection is now established. To 

disconnect from a wireless network, you should highlight 

Configuration Status

 and press 

OK

.

You can navigate between menu tabs by pressing left/

right buttons. The help bar on the bottom of the dialog 

shows features that you may use. Press 

BLUE

 button 

to check your internet connection speed.
You can check the signal strenght by using the network 

settings menu for the wireless device mode. 

Information

Configuration Status

: Displays wi-fi status as 

connected or not connected.

IP Address

: Displays the current IP address.

Network Name

: Connected networks’ name will be 

displayed.
Press 

GREEN

 button to switch to advanced mode and 

then press 

OK

 button to edit settings.

Delete Saved Wifi Profiles

Saved profiles will be deleted if you press red button 

while wireless device selection osd is on the screen.

Connecting to your Cell Phone via WiFi 

(Optional)

• If your cell phone has WiFi feature, you can connect 

your cell phone to your TV by using WiFi connection 

via a router, in order to play content from your phone. 

For this, your cell phone must have an appropriate 

sharing software.

• Connect to your router following the steps stated above 

in the Wireless Connection section.

• Afterwards, engage your cell phone with the router 

and then activate sharing software on your cell phone. 

Then, select files that you would like to share with 

your TV.

• If the connection is established correctly, you should 

now access the shared files of your cell phone via the 

Media Browser of your TV.

• Enter Media Browser menu and playback device 

selection OSD will be displayed. Select your cell 

phone’s ident and press 

OK

 to continue.

Note: This feature may not be supported by some cell 

phones.

Connectivity Troubleshooting

Wireless Network Not Available

Ensure that the firewalls of your network allows the TV 

wireless connection. If the wireless network does not 

function properly, try using the wired network in your 

home. Refer to the Wired Connection section for more 

information on the process.
If the Net TV does not function, check the modem (router) 

first. If the router does not have a problem, check the 

internet connection of your modem.
Try searching for wireless networks again, using the 

Network Settings menu screen.

Summary of Contents for 32278hddledcntd

Page 1: ......

Page 2: ...atures and Functions 13 Menu Features and Functions 14 Menu Features and Functions 15 Electronic Programme Guide EPG 16 Connectivity Functions 16 iPlayer Application 20 Specifications 22 Software Upgrade 22 Troubleshooting Tips 22 Internet Connection Not Available DLNA Mode Not Operating 23 Licence Notifications 23 Digital Teletext 23 Appendix A Nero MediaHome İnstallation 24 Appendix B PC Input T...

Page 3: ... ELECTRIC SHOCK DO NOT REMOVE COVER OR BACK NO USER SERVICEABLE PARTS INSIDE REFER SERVICING TO QUALIFIED SERVICE PERSONNEL RISK OF ELECTRIC SHOCK DO NOT OPEN CAUTION CAUTION TO REDUCE THE RISK OF ELECTRIC SHOCK DO NOT REMOVE COVER OR BACK NO USER SERVICEABLE PARTS INSIDE REFER SERVICING TO QUALIFIED SERVICE PERSONNEL PARTS INSIDE REFER SERVICING TO QUALIFIED SERVICE PERSONNEL RISK OF ELECTRIC SHO...

Page 4: ...he TV from the wall socket Do not use liquid or aerosol cleaners Only use a soft dry cloth Environmental Information This television is designed to consume less energy to help save environment You can not only help to save the environment but you can also save money by reducing your electricity bills thanks to the energy efficiency feauture of this TV To reduce energy consumption you should take t...

Page 5: ...indows 7 Game Mode optional Ethernet LAN for Internet connectivity and service Picture Off function 802 11n built in WIFI Support DLNA Accessories included Remote Control Batteries 2 x AAA Instruction Book Side AV Connection Cable Viewing the TV Menu Access Press the MENU button on your remote control to display the main menu screen Use the or buttons to select a menu tab and press the OK button t...

Page 6: ... the volume by pushing the button down To change channel Press the middle of the button the channel information banner will appear on screen Scroll through the stored channels by pushing the button up or down To change source Press the middle of the button twice the source list will appear on screen Scroll through the available sources by pushing the button up or down To turn the TV off Press the ...

Page 7: ...9 Blue button 30 Yellow button 31 Subtitle on off 32 Rapid advance in media browser mode 33 Stop in media browser mode 34 Pause in media browser mode 35 Media browser 36 Launches Youtube 37 Standby button 38 Function LED Using My button 1 Thisbutton smainfunctionistorunYoutubelink However if you want to change this function you can press MY BUTTON 1 for five seconds when on a desired source channe...

Page 8: ...WITCHED OFF You should refer to the module instruction manual for details of the settings Obtain the Conditional Access Module CAM and the viewing card by subscribing to Digiturk or D Smart Insert the CAM and then the viewing card to the slot that is located in the terminal cover at the rear side of the TV The module should be correctly inserted it is impossible to insert fully if reversed The CAM...

Page 9: ...4 Connect the TV to the mains supply switch on and then wait for few moments until the card is activated 5 When no module is inserted No Common Interface module detected message appears on the screen You can refer to the module instruction manual for details of the settings CAM module Standby Notifications If the TV does not receive any input signal e g from an aerial or HDMI source for 5 minutes ...

Page 10: ...witches into standby mode To power down the TV completely unplug the power cord from the mains socket Note When the TV is switched to standby mode the standby LED can blink to indicate that features such as Standby Search Over Air Download or Timer is active The LED can also blink when you switch on the TV from standby mode First Time Installation When turned on for the first time the language sel...

Page 11: ...d back up your files before making any connections to the TV set in order to avoid any possible data loss The Manufacturer will not be responsible for any file damage or data loss It is possible that certain types of USB devices e g MP3 Players or USB hard disk drives memory sticks may not be compatible with this TV The TV supports FAT32 and NTFS disk formatting but recording will not be available...

Page 12: ...ype option from the list by using or and OK buttons Quick Menu The Quick Settings menu allows you to access some options quickly This menu includes Power Save Mode Picture Mode Favourites Sleep Timer FollowMe TV FollowMe TV to DMR CEC RC Passthrough and Information booklet options Press Q MENU button on the remote control to view the quick menu See the following chapters for details of the listed ...

Page 13: ...V via the remote again press and hold the 0 Zero button on the remote control for 3 seconds Or press Q Menu button on the remote highlight the CEC RC Passthrough and set as Off by pressing Left or Right button This feature can also be enabled or disabled under the Settings Other Settings menu The TV supports also ARC Audio Return Channel feature This feature is an audio link meant to replace other...

Page 14: ... Warm or Cool Picture Zoom Sets the picture size to Auto 16 9 Subtitle 14 9 14 9 Zoom 4 3 or Cinema HDMI True Black While watching from a HDMI source this feature will be visible in the Picture Settings menu You can use this feature to enhance the blackness in the picture Film Mode Filmsarerecordedatadifferentnumberofframespersecondtonormaltelevisionprogrammes Turnthis featureonwhenyouarewatchingf...

Page 15: ...e Analogue Searches and stores cable DVB and analogue stations Manual Channel Scan This feature can be used for direct broadcast entry First Time Installation Deletes all stored channels and settings resets TV to factory settings and starts first time installation You can follow the instructions in the First Time Installations section for more information on this process Settings Menu Contents Con...

Page 16: ...available To use Standby search please make sure that you select Standby Search as On If the Standby Search is set to On when the TV is in standby mode available broadcasts will be searched If the TV locates any new or missing broadcasts a menu screen will be displayed asking you whether or not to execute these changes The Channel list will be updated and changed after this process Please activate...

Page 17: ... Connect broadband ISP connection ethernet cable to the ETHERNET INPUT of your modem Ensure that Nero Media Home software is installed to your PC for DLNA function See Appendix G for more information on the installation process Afterwards you should connect your PC to the one of your modem s LAN connectors e g LAN 1 by using a proper LAN cable Use another LAN output of your modem e g LAN 2 to enab...

Page 18: ...ffective differs depending on the usage environment To configure wireless settings please refer wifi section in Settings menu Wireless feature of the TV supports 802 11 a b g n type modems It is highly recommended that you should use IEEE 802 11n communication protocol in order to avoid any possible problems while watching videos You must change your modem s SSID when there are any other modems ar...

Page 19: ...s red button while wireless device selection osd is on the screen Connecting to your Cell Phone via WiFi Optional If your cell phone has WiFi feature you can connect your cell phone to your TV by using WiFi connection via a router in order to play content from your phone For this your cell phone must have an appropriate sharing software Connecttoyour router followingthestepsstated above in the Wir...

Page 20: ...ode To enable folder mode go to Settings tab in the main media browser screen and press OK In the settings options highlight View Style and change to Folder using Left or Right button Please select desired media type and press OK If sharing configurations are set properly the following OSD message will be displayed after selecting the desired media type Select OK to display the selected network or...

Page 21: ...tton on your remote control and portal application options will be displayed Application options will be displayed as the template below Available applications contents may change depending on the application content provider Note on PIP Window If you switch to portal mode while watching TV channels current programme will be displayed on the PIP window You can change channels using P P buttons Cur...

Page 22: ...search keywords by clicking the search button in the address dialog box or another way to navigate to pages is by clicking on links on web pages and these will take you to the appropriate pages When you scroll the pointer down to the middle of the screen the remote control s shortcuts will be shown Use the zoom shortcut buttons or the zoom menu to zoom in or zoom out You can clear cookies or clear...

Page 23: ...e next time the TV powers up it will have the new software version Note If the TV fails to come on after the upgrade unplug the TV for 2 minutes and plug in again Troubleshooting Tips No power If your TV has no power please check the power cord plug is connected to the mains power socket No picture 1 No Picture means that your TV is not receiving a transmission Have you selected the correct button...

Page 24: ...ifications Manufactured under license from Dolby Laboratories TRADEMARK ACKNOWLEDGMENT and the double D symbol are trademarks of Dolby Laboratories DLNA the DLNA Logo and DLNA CERTIFIED are trademarks service marks or certification marks of the Digital Living Network Alliance HDMI the HDMI logo and High Definition Multimedia Interface are trademarks or registered trademarks of HDMI Licensing LLC D...

Page 25: ...ing installation 5 Click the Install button The integrated serial will be displayed Please do not change the displayed serial 6 Click the Next button The License Conditions EULA screen will be displayed Please read the license agreement carefully and select the appropriate check box if you agree to the terms of the agreement Installation is not possible without this agreement 7 Click the Next butt...

Page 26: ...0Hz 28 1360x768 60Hz 29 1280x768 75Hz 30 1280x768 85Hz 31 1280x960 60Hz 32 1280x960 75Hz 33 1280x960 85Hz 34 1280x1024 60Hz 35 1280x1024 75Hz 36 1280x1024 85Hz 37 1400x1050 60Hz 38 1400x1050 75Hz 39 1400x1050 85Hz 40 1440x900 60Hz 41 1440x900 75Hz 42 1600x1200 60Hz 43 1680x1050 60Hz 44 1920x1080 60Hz 45 1920x1200 60Hz Appendix B PC Input Typical Display Modes The display has a maximum resolution o...

Page 27: ...ec mp4 mov MPEG1 2 Layer 3 AAC HEAAC AC3 EAC3 LPCM ADPCM H 264 1080Px2 25fps 1080P 50fps Other 1080P 30fps 50Mbit sec avi MPEG1 2 4 Xvid H 264 VC1 WMV3 Sorenson H 263 Motion JPEG MPEG1 2 Layer 1 2 3 AAC HEAAC AC3 EAC3 LPCM ADPCM WMA H 264 1080Px2 25fps 1080P 50fps Other 1080P 30fps 50Mbit sec flv H 264 Sorenson H 263 MPEG1 2 Layer 3 AAC HEAAC LPCM ADPCM H 264 1080Px2 25fps 1080P 50fps Other 1080P ...

Page 28: ...024 þ þ 1400x1050 þ þ 1440x900 þ þ 1600x1200 þ 1680x1050 þ 1920x1080 þ 1920x1200 þ The Sky Code is 0065 1 Turn your TV on 2 Press TV on your Sky remote control handset 3 Hold down SELECT and the RED button together for about two seconds until the red light on the Sky remote control blinks twice 4 Key in 0065 The light on the Sky remote control should blink twice 5 Press the STANDBY button on your ...

Page 29: ... 1080I 50Hz O 1080I 60Hz O HDMI1 HDMI2 480I 60Hz O 480P 60Hz O 576I 50Hz O 576P 50Hz O 720P 50Hz O 720P 60Hz O 1080I 50Hz O 1080I 60Hz O 1080P 24Hz 25Hz 30Hz 50Hz 60Hz O X Not Available O Available In some cases a signal on the LED TV may not be displayed properly The problem may be an inconsistency with standards from the source equipment DVD Set top box etc If you do experience such a problem pl...

Page 30: ...d green or green and yellow The wire which is coloured blue or black must be connected to the terminal which is marked with the letter N or coloured Black The wire which is coloured brown or red must be connected to the terminal which is marked with the letter L or coloured Red For continued protection against risk of fire replace only with same type and rating of fuse ASTA approved 5A 250VAC fuse...

Page 31: ...278FHDDLEDCNTD E Energy efficiency class A F Visible screen size diagonal approx inch cm 50 inches 127 cm G On mode average power consumption Watt 71 H Annual energy consumption kWh annum 103 I Standby power consumption Watt 0 5 J Off mode power consumption Watt 0 K Display resolution px 1920x1080 ...

Page 32: ......

Reviews: