AO16 Analog Output Card
6
6
Remove the card from its packing material. Hold the card by
its edges.
7
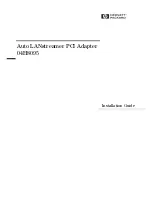
Connect the ribbon cable to the card socket. Make sure the
pins on the socket are correctly aligned with the ribbon cable
connector. The retaining clips on each side of the socket con-
nector automatically close when the cable connector is prop-
erly seated. Check to make sure the ribbon cable is connected
securely.
.
8
Slide the output card into the slot, firmly pressing on both
ends of the card so that it fits snugly in the slot.
9
Secure the card to the rear panel using the four screws you
removed earlier.
Completing and Confirming Installation
To complete and confirm installation:
1
Reconnect the power cable and any other cables to the
SC48.
2
Turn on your SC48.
3
Go to the Options page and click the Devices tab to view
your system hardware status. The newly installed card should
be displayed.
4
Go to the Patchbay page and click the Stage tab to verify
that the output card outputs are available in the patchbay.
5
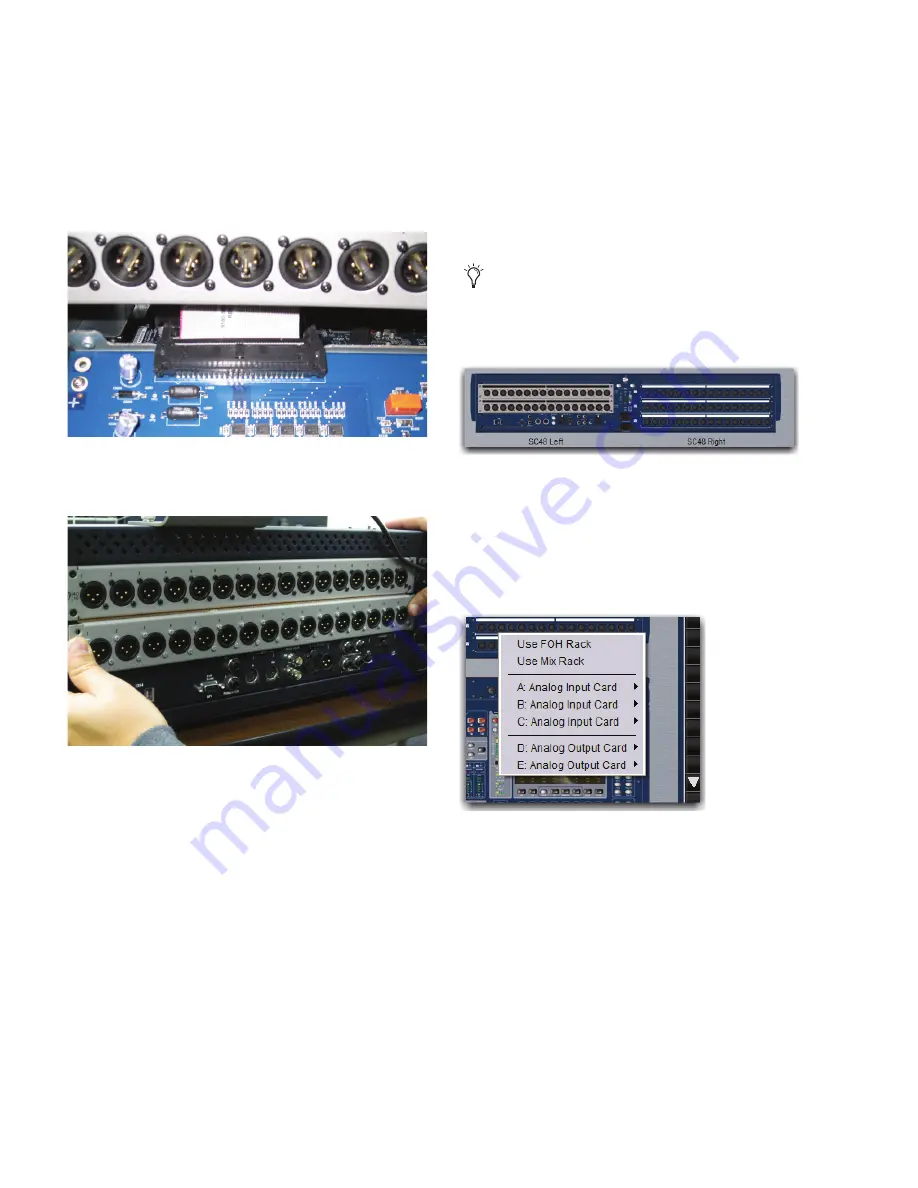
In the standalone software, click the Devices tab on the Op-
tions page. You can right-click the SC48 graphic to see and
modify your SC48’s input and output card configuration.
Connecting the ribbon cable to the card socket
Installing the AO16 Card
If the card does not appear in the graphic, check the ribbon
cable connection. Shut down your system, then disconnect
and reconnect the ribbon cable to the output card, making
sure to seat the connector properly in its card socket.
Detail of Devices tab indicating presence of two AO16 Cards output
slots D and E
Detail of standalone software’s Devices tab pop-up menu showing two
AO16 Cards
Summary of Contents for VENUE AO16
Page 4: ...AO16 Analog Output Card iv ...
Page 12: ...AO16 Expansion Card Guide 8 ...