


iDigi
Gateway
Development
Kit
Getting
Started
Guide
62
3.
At
this
point
in
time,
the
ConnectPort
X4
has
been
added
to
your
iDigi
inventory,
but
the
device
itself
has
not
yet
been
configured
to
establish
a
connection
to
iDigi.
To
configure
the
ConnectPort
X4
to
establish
a
connection
to
iDigi,
follow
the
steps
below.
a.
If
you
know
the
IP
address
of
the
ConnectPort
X4,
connect
to
its
web
UI
by
entering
its
IP
address
in
your
web
browser.
If
you
do
not
know
the
IP
address
of
the
unit,
use
the
Digi
Device
Discovery
tool
in
the
Start
Menu,
and
double
‐
click
on
the
device
to
open
its
web
UI.
b.
Click
the
iDigi
link
to
configure
the
device’s
remote
management
configuration
options.
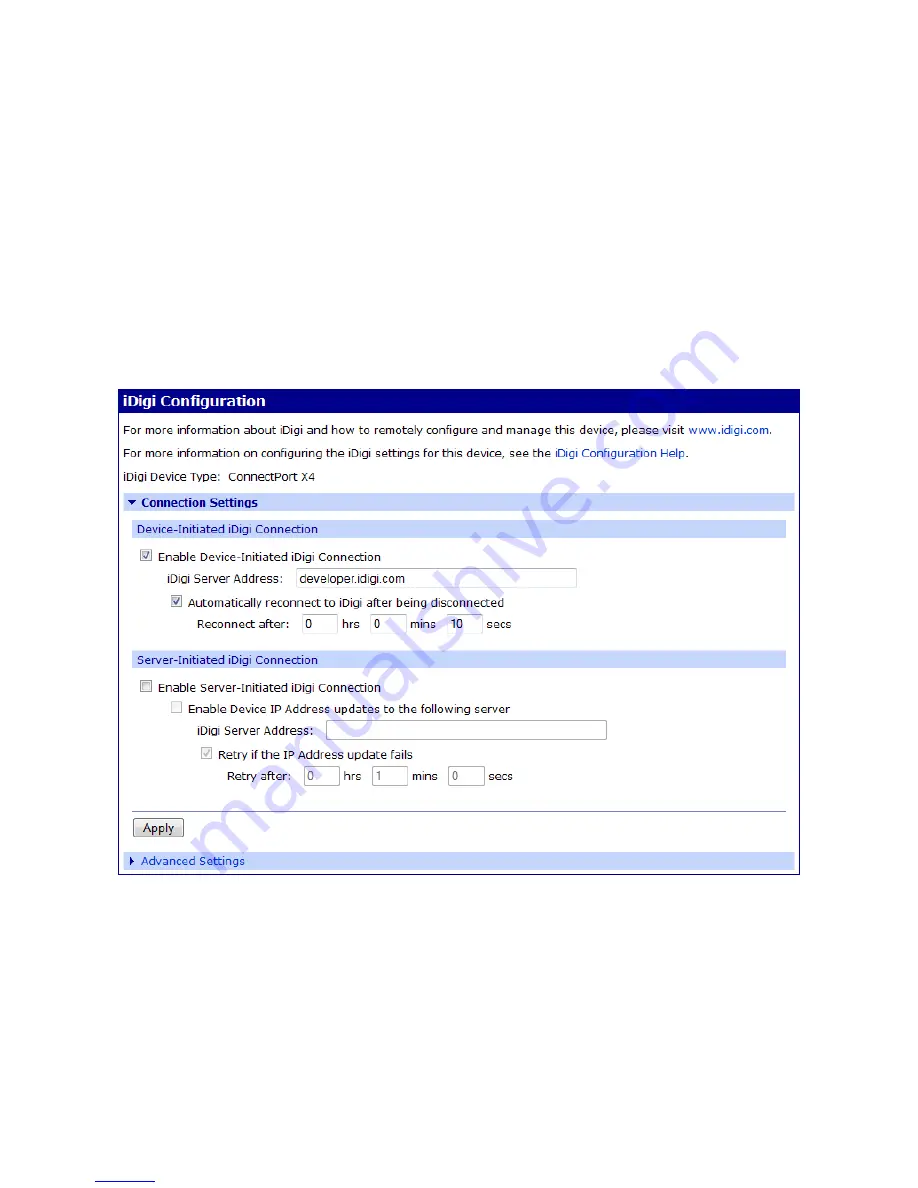
In
the
Digi
configuration
settings
page,
enter
the
DNS
name
of
the
iDigi
platform
(
developer.idigi.com
)
into
the
iDigi
Server
Address
field
under
the
“Enable
Device
‐
Initiated
iDigi
Connection”
section.
c.
Click
the
checkbox
labeled
“Automatically
reconnect
to
iDigi
after
being
disconnected”
then
click
Apply
.
Figure
69:
iDigi
Configuration
Page
The
ConnectPort
X4
will
now
attempt
to
establish
a
connection
with
iDigi,
if
the
device
is
on
a
network
with
Internet
access,
the
connection
should
be
established
in
less
than
a
minute.
With
the
ConnectPort
X4
properly
configured
to
communicate
with
iDigi,
and
with
the
device
added
to
your
iDigi
inventory,
return
to
the
“Add
the
ConnectPort
X4
to
your
iDigi
inventory”
section
and
proceed
with
Step
d
on
page
13.
electronic components distributor


