background image

7

FW:3.1.1

FW:1.2.1

FW:1.2.1

FW:1.4.1

FW:1.3.1

FW:1.1.3

FW:1.1.1

FW:1.0.3

FW:1.0.3

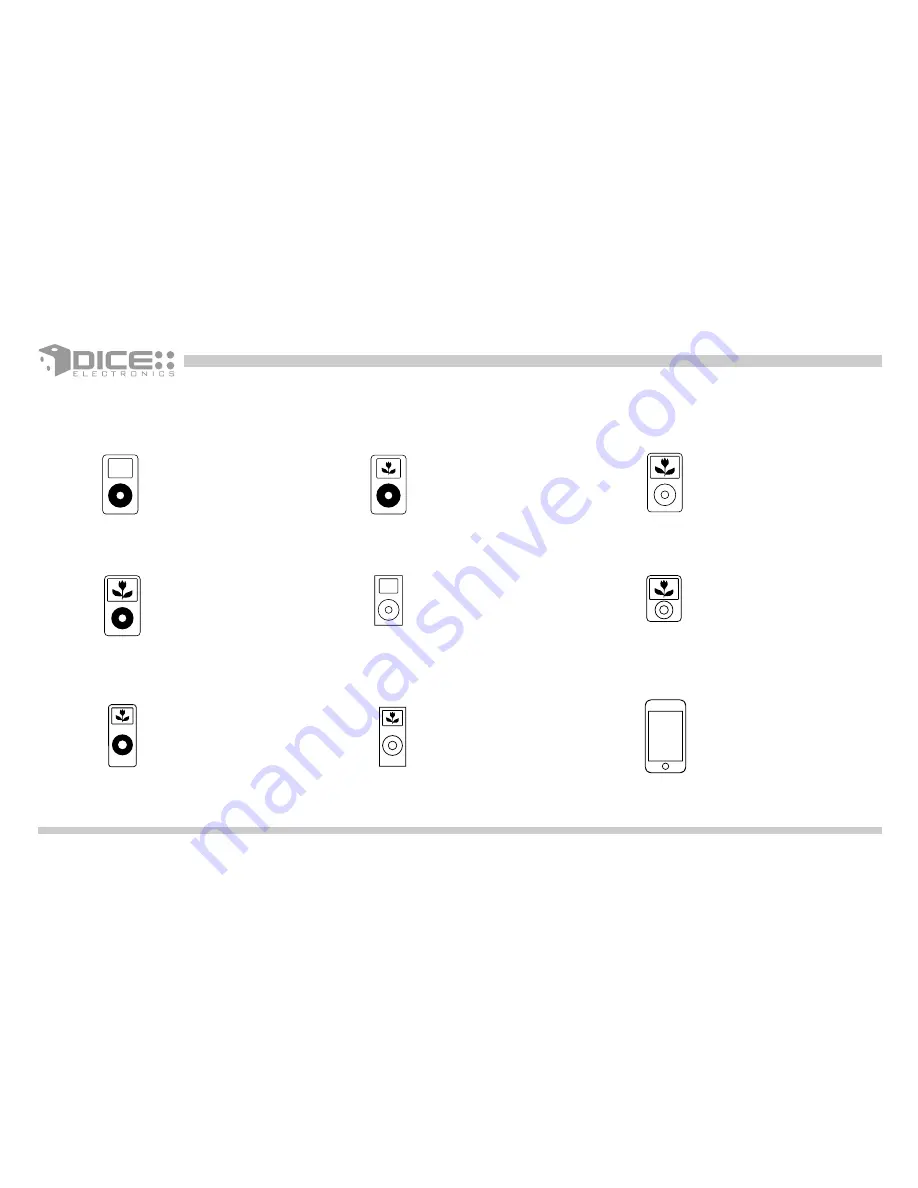
Supported iPod models and firmware version requirements

For the latest firmware versions and models not listed, please contact your authorized dealer or DICE Electronics, LLC.

iPod


4th generation
20GB 40GB

iPod


4th generation color display
20GB 30GB 40GB 60GB

iPod classic


80GB 160GB 

iPod


5

th generation (video)

30GB 60GB 80GB

iPod mini


4GB 6GB 

iPod nano


3

th generation (video)

4GB 8GB 

iPod nano

1st generation 
1GB 2GB 4GB

iPod nano

2nd generation (aluminum) 
2GB 4GB 8GB

iPod touch

8GB 16GB 32GB

Summary of Contents for iPod AUX Interface

Page 1: ...DICE Auxiliary interface for iPod Installation Guide User Manual...

Page 2: ......

Page 3: ...opyrights and Trademarks Copyright 2008 DICE Electronics LLC The DICE Electronics logo is a trademark of DICE Electronics LLC iPod is a trademark of Apple Inc All rights reserved Printed in the U S A...

Page 4: ...of contents 4 Warning and safety 5 Product registration 6 Charging 8 Integration kit contents 9 Gain adjustment 10 Installation 11 Using the AUX integration 14 Troubleshooting 15 Installation notes 1...

Page 5: ...tinsertanythingintothecasing Donotcutortrytoaltercablesinanywayandalwaysusethecorrectconnections Onlyoperateunitwhenstationaryoraskpassengerstooperateitforyou DonotallowtheAppleiPodtodistractyoufromdr...

Page 6: ...r to validate your warranty period and to receive telephone or online support you MUST register your DICE product To register your DICE product please complete the following steps 1 Visit http www dic...

Page 7: ...otlisted pleasecontactyourauthorizeddealerorDICEElectronics LLC iPod 4th generation 20GB 40GB iPod 4th generation color display 20GB 30GB 40GB 60GB iPod classic 80GB 160GB iPod 5th generation video 30...

Page 8: ...od will stop playing and charging However in some vehicles the ACC power is always on and the iPod should be disconnectedtopreventdrainingthevehiclesbattery Battery icon will appear on the upper right...

Page 9: ...nts 1interfaceunit 1auxiliaryaudio powercable 1iPoddockcable 1Usermanual DICE interface for iPod for AUX Installation Guide User Manual iPod dock cable interface unit auxiliary audio power cable user...

Page 10: ...iPod and AUX jack to properly match the radio s input level We recommend setting the AUX module s output level to match the factory CD or AM FM station ssoundlevel iPod gain setting Interface unit 10...

Page 11: ...oservicebay 2 Makesurethattheradiocodeisavailablebeforedisconnectingbattery Disconnectbothbatteryterminals Thesecables mustbedisconnectedduringinstallationtoensureproperinitializationofthemodulewhenit...

Page 12: ...port already has something connected itmustbedisconnected Connectthe 12volt groundandremotewireleadstotheirpropersources 12V REM GND Red wire REM connect to switched power Black wire GND connect to gr...

Page 13: ...ect its audio cable to the 1 8 mini jack Apply cable ties to secure the cables power antenna cable iPod docking cable receptacle receptacle 6 T Verify that all connections have been properly made 7 Re...

Page 14: ...ry source on the radio The charging indicator should appear on the iPod and a selected song will start to play If an additional audio device is connected through the 1 8 mini jack it will becomeactive...

Page 15: ...nitiontoACC ON Verify that the correct buttonisusedtoaccesstheAUXinput iPoddoesnotcharge Check all connections Reset iPod and make sure iPod chargeswhileconnectedtocomputerorwallcharger Musicisdistort...

Page 16: ...16 Installation notes Installedby Installdate Othernotes Illustration...

Page 17: ...17 Notes...

Page 18: ...ECIAL INCIDENTAL OR CONSEQUENTIAL DAMAGES RESULTING FROM THE USE OF THE PRODUCT ITS ACCOMPANYING SOFTWARE OR ITS DOCUMENTATION WarrantyandSupport Productscarrya90daylimitedwarrantythatprotectsyoufromd...

Page 19: ......

Page 20: ...AUX iPod www diceelectronics com AUX iPod 2008 03...

Reviews: