Element Series Manual
Page | 10
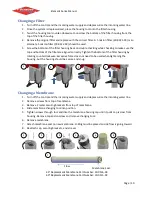
Changing a Filter
1.
Turn off the control and the incoming water supply and depressurize the incoming water line.
2.
Once the system is depressurized, place the housing tool onto the filter housing.
3.
Twist the housing tool counter-clockwise to unscrew the bottom of the filter housing from the
top of the filter housing.
4.
Remove the original filter and replace with the correct filter. A 5 micron filter (30-0021-XX) or an
alternate 5 micron filter (30-0122-XX) should be used.
5.
Screw the bottom of the filter housing back on double checking while checking to make sure the
top and bottom of the filter are aligned correctly. Tighten the bottom of the filter housing by
rotating counterclockwise. Excessive force does not need to be used when tightening the
housing, but the housing should be secure and snug.
Changing a Membrane
1.
Turn off the control and the incoming water supply and depressurize the incoming water line.
2.
Remove screws from top of membrane.
3.
Remove 2 metal securing brackets from top of membrane.
4.
Slide membrane changing tool into position.
5.
Tighten screws through tool and into the membrane housing cap until it pulls cap is clear from
housing. Remove cap and unscrew and remove changing tool.
6.
Remove membrane.
7.
Attach membrane seal on new membrane. O-Ring must be placed on side flow is going toward.
8.
Reattach cap, securing brackets, and screws.
Membrane Seal
2.5
”
Replacement Membrane Part Number: 30-0116-XX
4.0
”
Replacement Membrane Part Number: 30-0115-XX
1
2
4
3
2
3
4
5
6
8
Flow
7
Summary of Contents for Element ELE-1600-LT
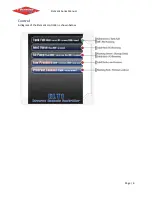
Page 4: ...Element Series Manual Page 4 Control A diagram of the Element controller is shown below...
Page 5: ...Element Series Manual Page 5 Inner Control Box...
Page 6: ...Element Series Manual Page 6 CPU Board Diagram...
Page 7: ...Element Series Manual Page 7 DIP Switch Settings...
Page 8: ...Element Series Manual Page 8 Programming Guide...
Page 9: ...Element Series Manual Page 9 Programming Interface...


