


DSP-100 User Manual
Page 16 of 25
DSP100_MAN_A
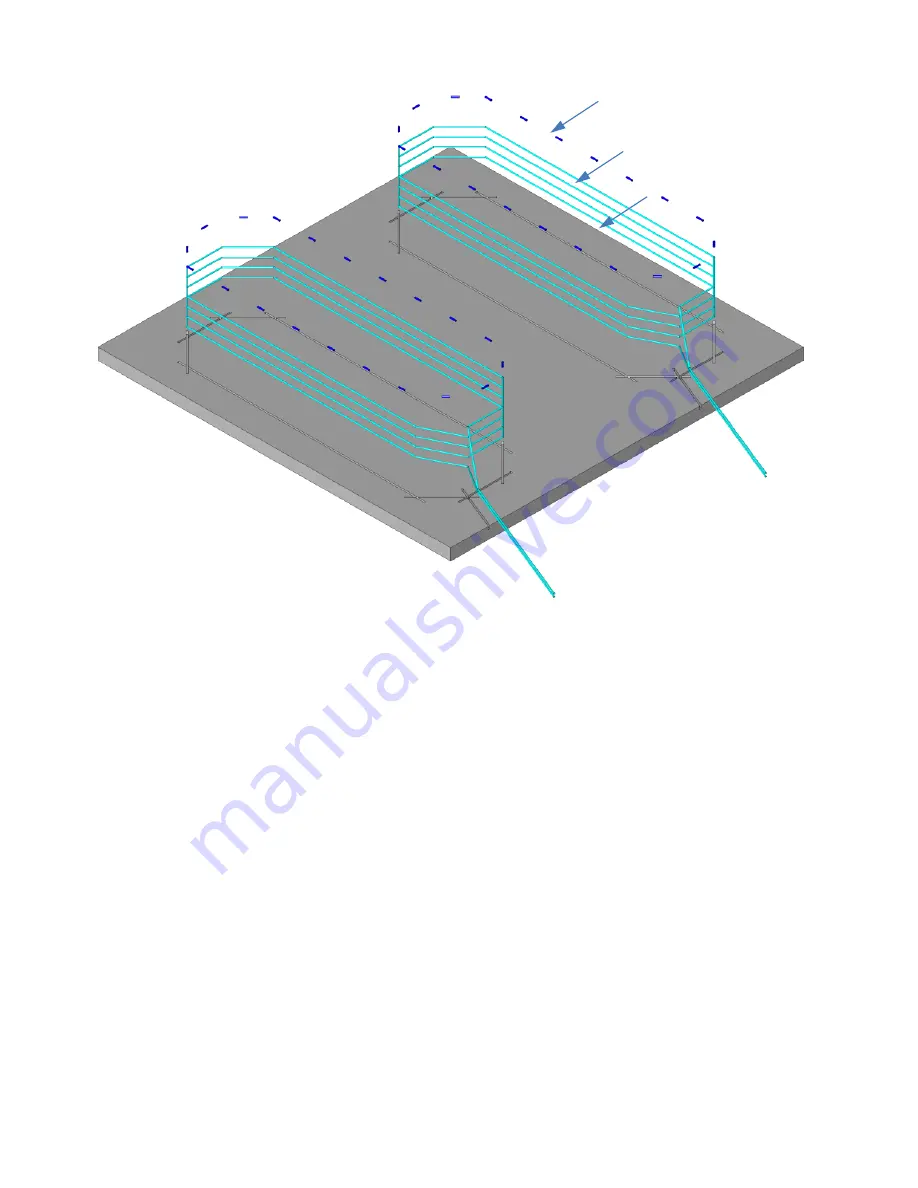
Figure 10: Loop Installation
The corners of the loop should be crosscut at a 45
°
to help prevent damage to the wire insulation during
installation and temperature cycling. The angled cuts should be at least 9” back from where the corner would be.
The saw cuts should not go any further than necessary to ensure that the saw slots are at full depth where they
meet.
Once the saw slot has been cut, the slot should be cleaned of all loose material. High pressure air should be
directed in to the saw slot to remove all debris. This will also help remove dust from the saw cutting operation
from the sides of the saw slot. This will allow better adhesion of the loop sealant to the saw slot.
The loop wire should be installed as a continuous piece of wire from the detector to the loop, all of the turns in
the loop, and back to the detector. Remember to make allowance for shrinkage in the wire length when the
portion of the wire not in the roadway surface is twisted. The twisting is important for dealing with electrical
noise. A splice of the loop wire should never be made in the roadway. If the loop wire needs to be spliced to
another cable to get to the detector, the splice should be done in a junction box and the connections should be
soldered and weatherproofed. Wire nuts should never be used at any point in the loop circuit.
In order to keep the loop wire at the bottom of the saw slot, 1” to 2” pieces of backer rod should be placed in the
saw slot every 1 to 2 feet. The backer rod should be sized such that it fits snugly in the saw slot. Use a blunt object
(not a screwdriver) to press the backer rod pieces down into the saw slot as far as they will go. Keeping the loop
Backer Rod Piece
Saw Cut
Loop Wires