42
2
Hardware Installation
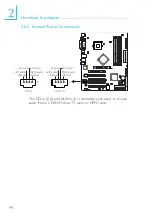
The front audio is disabled.
The rear audio is enabled.
The front audio is enabled.
The rear audio is disabled.
Pins 5-6 and 9-10 short
(default)
Pins 5-6 and 9-10 open
•
Line-out Jack (Lime)
This jack is used to connect external speakers for audio output
from the system board. Using this jack disables the front au-
dio’s line-out function.
Center/Bass and Rear Out Jacks
Center/Bass and Rear Out Jacks (CN22) support 4 audio output
signals: center channel, subwoofer, rear right channel and rear left
channel. These 4 audio output signals together with the line-out
(2-channel) jack support 6-channel audio output.
Front Audio
The front audio connector (J19) allows you to connect to the
line-out and mic-in jacks that are on the FrontX device. Using the
line-out and mic-in jacks will disable the rear audio’s line-out and
mic-in functions. (The FrontX device, which comes with
LANPARTY series products, must be installed into a drive bay of
the chassis.)
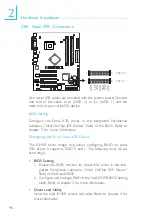
Remove the jumper caps from pins 5-6 and pins 9-10 of J19
prior to connecting the front audio cable connector. Connect the
audio cable connector from FrontX to J19. Make sure pin 1 of
the cable connector is aligned with pin 1 of J19. If you are not
using this connector, make sure to replace the jumper caps back
to their original pin locations.
Driver Installation
Install the “Audio Drivers”. The 3D Audio Configuration software,
which is an audio panel for setting basic audio configurations, will at
the same time be installed into your system. The application program
will allow you to configure 2-channel, 4-channel and 6-channel audio
modes as well as configure the audio effects. Refer to chapter 4 for
more information.

