background image

63

Chapter 8 Supported Software

Chapter 8

www.dfi .com

Adobe Acrobat Reader 9.3

To install the reader, click “Adobe Acrobat Reader 9.3” on the main menu.

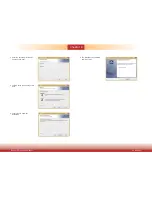
1. Click Next to install or click 

Change Destination Folder to 

select another folder.

2. Click Install to begin installation.

3. Click Finish to exit installation.

2. Status

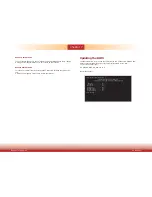
I.  The block of Enable DP Emulator is used to set the present status of the specific DP port. 

Checked means the simulation on the DP port is enabled; unchecked means disabled.

II. When you click the “Default” button, all DP ports will be set to Disabled.

Summary of Contents for DT122-BE

Page 1: ...1 Chapter 1 Introduction DT122 BE Desktop Box PC User s Manual A38800532...

Page 2: ...FCC and DOC Statement on Class A This equipment has been tested and found to comply with the limits for a Class A digital device pursuant to Part 15 of the FCC rules These limits are designed to prov...

Page 3: ...to Power on Select 19 USB Power Select 20 SATA DOM Power Select 20 COM 1 RS232 422 485 Select 21 Digital I O Power Select 22 Digital I O Output State 22 Mini PCIe Signal Select 23 Mini PCIe Power Stat...

Page 4: ...physical damage You must take extra care in han dling them to ensure against electrostatic build up 1 To prevent electrostatic build up leave the system board in its anti static bag until you are rea...

Page 5: ...r cord Danger of explosion if battery incorrectly replaced Replace only with the same or equivalent type recommend by the manufacturer Dispose of used batteries according to local ordinance Keep this...

Page 6: ...Key Features Model Name DT122 BE Processor 2nd Generation AMD Embedded R Series APU FP3 BGA Chipset AMD A77E Fusion Controller Hub LAN 2 LAN ports Displays 4 DP ports support DP USB 4 USB 3 0 ports Au...

Page 7: ...Hub Memory Two 204 pin SODIMM sockets Supports DDR3 DDR3L 1600 1866 2133MHz Supports up to 16GB system memory Supports dual channel memory interface Graphics AMD RadeonTM HD 9000 Series Graphics Disp...

Page 8: ...Rear View DP Ports Used to connect a DP device USB Ports Used to connect USB 3 0 devices LAN Ports Used to connect the system to a local area network Line out Used to connect to a speaker Line in Used...

Page 9: ...s Front View Right View Left View Rear View 300 00 74 00 78 00 217 20 0 00 0 00 33 02 65 35 89 97 98 31 82 83 57 13 10 16 133 83 143 43 92 43 162 07 163 65 170 00 41 25 6 17 36 23 61 23 89 60 117 60 1...

Page 10: ...stem 2 After the memory test the message Press DEL to run setup will appear on the screen Press the Delete key to enter the AMI BIOS setup utility Installing the Operating System Most operating system...

Page 11: ...he sides of the system are used to secure the cover to the chassis Remove these screws and then put them in a safe place for later use Mounting screw Mounting screw 4 After removing these mounting scr...

Page 12: ...ab Ejector tab 3 Note how the module is keyed to the socket Notch 2 Push the ejector tabs which are at the ends of the socket to the side Key 4 Seat the module vertically pressing it down firmly until...

Page 13: ...ard until it slips down into the slot The contact fingers on the edge of the card will almost completely disappear inside the slot 2 The system board is equipped with 1 Mini PCIe slot The Mini PCIe sl...

Page 14: ...HDD brackets to the drive bay Mounting screw Mounting screw Mounting screw Drive bay Drive bay 3 Align the mounting holes of the SATA drive with the mounting holes on the HDD bracket and then use the...

Page 15: ...TA drive with the HDD onto the drive bay Mounting screw Drive bay Mounting screw 5 Place the SATA drive bay assembly into the chassis Secure the SATA drive bay with the mounting screws you removed in...

Page 16: ...ce the drive bay into the chassis Secure the drive bay with the mounting screws you removed in step 1 Mounting screw Drive bay Mounting screw Mounting screw Mounting screw 6 Connect the SATA data cabl...

Page 17: ...Mounting bracket and mounting screw 1 The PCIe x16 on the motherboard is used to insert a T200 1P or T200 1E riser card To install the expansion card you need to remove the mounting bracket and the mo...

Page 18: ...slot that is on the riser card Replace the screw you removed in step 1 to secure the bracket in place Mounting bracket and mounting screw PCIe x16 Bracket Expansion card Rear view Note The Expansion...

Page 19: ...set JP1 back to its default setting pins 1 and 2 On 3 Now plug the power cord and power on the system 2 3 On Clear CMOS Data 1 2 On Normal default JP1 1 3 2 1 3 2 Auto Power on Select JP15 is used to...

Page 20: ...the 5V_standby power source of your power supply must support 1 5A For 3 or more USB ports the 5V_standby power source of your power supply must support 2A 1 3 2 1 3 2 2 3 On 5V_standby 1 2 On 5V defa...

Page 21: ...2 4 6 1 3 2 4 On RS232 default 3 5 4 6 On RS422 Full Duplex RS485 Note When COM 1 RS232 422 485 is selected JP4 and JP5 must be set in accordance to JP3 1 3 5 2 4 6 JP3 RS485 COM 1 1 2 On RS232 defaul...

Page 22: ...l JP12 3 1 2 3 1 2 Digital I O Output State Based on the power level of DIO Digital I O selected on JP12 JP13 DIO pin 0 3 and JP14 DIO pin 4 7 are used to select the state of DIO output pull high or p...

Page 23: ...to select the Mini PCIe signal PCIe or mSATA JP6 2 5 8 11 3 6 9 12 On mSATA 1 4 7 10 2 5 8 11 On PCIe default 12 10 3 1 12 10 3 1 Mini PCIe Power Select JP7 1 3 2 1 3 2 JP7 is used to select the powe...

Page 24: ...in Line in Line out DP 2 3 USB 3 0 USB 3 0 LAN 1 2 DP 0 1 Graphics Interfaces DP Port The DP port is a digital display interface used to connect a display device such as a computer monitor It is used...

Page 25: ...e between your computer and a wide range of simultane ously accessible external Plug and Play peripherals The system board is equipped with four onboard USB 3 0 ports USB 0 1 2 3 and one vertical USB...

Page 26: ...dio 1 Mic2 L Line2 R GND GND NC Key 2 10 Mic2 JD Line2 JD 9 Mic2 R Line2 L Front Audio Line out Line in Mic in Rear audio Rear Audio The system board is equipped with 3 audio jacks A jack is a one hol...

Page 27: ...ting Configure the Serial ATA drives in the Advanced menu SATA Configuration submenu of the BIOS Refer to the chapter 7 for more information Features Note SATA port 0 provides adequate space for SATA...

Page 28: ...are used to configure the Serial COM port 1 to pure RS232 RS422 Full Duplex or RS485 Refer to COM 1 RS232 422 485 Select in this chapter for more information The serial ports are asynchronous communi...

Page 29: ...tem is in the S1 POS Power On Suspend state it will blink every second When the system is in the S3 STR Suspend To RAM state it will blink every 4 seconds Pin Pin Assignment Pin Pin Assignment HDD LED...

Page 30: ...uate power is provided we strongly recom mend that you use a minimum of 400Watt or greater power supply Important Insufficient power supplied to the system may result in instability or the add in boar...

Page 31: ...aphics card in place Mini PCI Express Slot The Mini PCIe socket is used to install a Mini PCIe card Mini PCIe card is a small form factor PCI card with the same signal protocol electrical definitions...

Page 32: ...RST 4 LAD0 5 FRAME 6 VCC_ 3V 7 LAD3 8 GND 9 LAD2 10 x 11 SERIRQ 12 48MHz LPC Connector 1211 LPC Standby Power LED This LED will lit red when the system is in the standby mode It indicates that there...

Page 33: ...l time clock and CMOS memory It is an auxiliary source of power when the main power is shut off Safety Measures Danger of explosion if battery incorrectly replaced Replace only with the same or equiva...

Page 34: ...system please remove them first Mounting screw Mounting screw 2 At the sides of the system use the mounting screws removed in step 1 to secure the wall mount brackets on each side of the system Mount...

Page 35: ...The 4 mounting holes on the sides of the system are used to mount the type B wall mount bracket 2 Use the provided mounting screws to secure the type B wall mount brackets on each side of the system...

Page 36: ...u power up the system the BIOS message appears on the screen and the memory count begins After the memory test the message Press DEL to run setup will appear on the screen If the message disappears be...

Page 37: ...o 59 Choose the system default language Aptio Setup Utility Copyright C 2015 American Megatrends Inc Save Exit Chipset Version 2 17 1246 Copyright C 2015 American Megatrends Inc Select Screen Select I...

Page 38: ...t the system will enter when the Suspend button is pressed S3 STR Enable the Suspend to RAM function Select Screen Select Item Enter Select Change Opt F1 General Help F2 Previous Values F3 Optimized D...

Page 39: ...opyright C 2015 American Megatrends Inc Version 2 17 1246 Copyright C 2015 American Megatrends Inc CPU Configuration NX Mode SVM Mode Node 0 Information Advanced Enabled Enabled Select Screen Select I...

Page 40: ...lts F4 Save Changes and Reset ESC Exit DDR3 Voltage Setting Select the DDR3 Voltage Setting The options are Auto 1 5V 1 35V and 1 25V IDE Configuration This section is used to configure the IDE device...

Page 41: ...nds Inc Management Component Transport Protocol MCTP Configuration Realtek LAN card DASH function Enabled MCTP Support Disabled Advanced Select Screen Select Item Enter Select Change Opt F1 General He...

Page 42: ...t Item Enter Select Change Opt F1 General Help F2 Previous Values F3 Optimized Defaults F4 Save Changes and Reset ESC Exit Enable or Disable Serial Port COM Aptio Setup Utility Copyright C 2015 Americ...

Page 43: ...gs Change Settings Advanced Enabled IO 3E8h IRQ 10 Auto Select Screen Select Item Enter Select Change Opt F1 General Help F2 Previous Values F3 Optimized Defaults F4 Save Changes and Reset ESC Exit En...

Page 44: ...temperature CpuFan Temp Target Enter the value for the CPU fan target temperature CpuFan Temp Tolerance Enter the value for the CPU fan tolerance temperature Smart Fan Moe Select Select Screen Select...

Page 45: ...figure the console redirection of serial COM port 1 Console Redirection En able or Disable Aptio Setup Utility Copyright C 2015 American Megatrends Inc Version 2 17 1246 Copyright C 2015 American Mega...

Page 46: ...setting is 1 stop bit Communication with slow devices may require more than 1 stop bit Flow Control Flow control can prevent the data losss from the buffer overflow When sending data if the receiving...

Page 47: ...an Megatrends Inc Version 2 17 1246 Copyright C 2015 American Megatrends Inc Network Stack Ipv4 PXE Support Ipv6 PXE Support PXE boot wait time Media detect time Advanced Enabled Enabled Enabled 0 0 S...

Page 48: ...t BIOS will Use To For Output Select Screen Select Item Enter Select Change Opt F1 General Help F2 Previous Values F3 Optimized Defaults F4 Save Changes and Reset ESC Exit Primary Video Device Select...

Page 49: ...Optimized Defaults F4 Save Changes and Reset ESC Exit SB SATA Configuration Aptio Setup Utility Copyright C 2015 American Megatrends Inc Version 2 17 1246 Copyright C 2015 American Megatrends Inc OnCh...

Page 50: ...ous Values F3 Optimized Defaults F4 Save Changes and Reset ESC Exit Enabled North Bridge Aptio Setup Utility Copyright C 2015 American Megatrends Inc Version 2 17 1246 Copyright C 2015 American Megatr...

Page 51: ...rein the function of the numeric keypad is the number keys When set to Off the function of the numeric keypad is the arrow keys Quiet Boot Enable or disable the quiet boot function CSM Parameters Apti...

Page 52: ...s Aptio Setup Utility Copyright C 2015 American Megatrends Inc Version 2 17 1246 Copyright C 2015 American Megatrends Inc Save Changes and Reset Discard Changes and Reset Save Options Save Changes Dis...

Page 53: ...restore user default Updating the BIOS To update the BIOS you will need the new BIOS file and a flash utility AFUDOS EXE Please contact technical support or your sales representative for the files To...

Page 54: ...tions required to enhance the performance of the system board Insert the CD into a CD ROM drive The autorun screen Mainboard Utility CD will appear If after inserting the CD Autorun did not automatica...

Page 55: ...Installation Utility To install the driver click AMD Embedded GPU and Chipset Software Installation Utility on the main menu 1 Select the language you would like the installation to display and then...

Page 56: ...install the driver click Intel LAN Driver on the main menu 2 Click I accept the terms in the li cense agreement then click Next 1 Setup is now ready to install the LAN driver Click Next 4 Click Instal...

Page 57: ...rs To install the driver click Realtek LAN Drivers on the main menu 3 Click Install to begin the instal lation 4 After completing installation click Finish 1 Setup is ready to install the driver Click...

Page 58: ...3 Click I accept the terms in the license agreement and then click Next 1 Setup is now ready to install the audio driver Click Next 2 Follow the remainder of the steps on the screen clicking Next eac...

Page 59: ...ed Software Chapter 8 www dfi com 8 The installation is completed and click Finish 4 Enter the necessary information and then click Next 5 Select a setup type and then click Next 6 Click Install to be...

Page 60: ...ext HW Utility HW Utility provides information about the board HW Health Watchdog and DIO To access the utility click HW Utility on the main menu 2 Click I accept the terms in the license agreement an...

Page 61: ...61 Chapter 8 Supported Software Chapter 8 www dfi com WatchDog HW Health Set The DFI Utility icon will appear on the desktop Double click the icon to open the utility Information HW Health...

Page 62: ...lation works on the specific DP port the signal will be simulated Even though the DP port is disconnected to the screen the system still detects the connection between them II If you use more than one...

Page 63: ...Change Destination Folder to select another folder 2 Click Install to begin installation 3 Click Finish to exit installation 2 Status I The block of Enable DP Emulator is used to set the present stat...

Page 64: ...reads from this register reflect the value that is in the flip flop contolling the output selection not the actual pin value BIT O 7 O 6 O 5 O 4 O 3 O 2 O 1 O 0 DEFAULT 1 1 1 1 1 1 1 1 Register 0 Inp...

Page 65: ...Data if Mode 1 SetBit Data TempPinNum Input else ClrBit Data TempPinNum Output I2C_WriteByte SLAVE_ADDR CONFIG_PORT Data return 1 GPIO Output Process define SLAVE_ADDR define INPUT_PORT define OUTPUT_...

Page 66: ...WDT Control WDT timer MOV DX 4EH MOV AL 07H Ready to Program Logical Device OUT DX AL MOV DX 4FH MOV AL 08H Select Logical Device 8 OUT DX AL MOV DX 4EH MOV AL F1H Select watchdog timer register OUT...

Page 67: ...which setting is correct either turn off the system and change the jumper or enter Setup and change the VIDEO selection FLOPPY DISK S fail 80 Unable to reset floppy subsystem FLOPPY DISK S fail 40 Fl...

Page 68: ...at the video input cable is properly attached to the monitor and the system s dis play adapter 4 Adjust the brightness of the display by turning the monitor s brightness control knob The picture seems...

Page 69: ...ks by attaching it to a serial port that is working and configured correctly If the serial device does not work either the cable or the serial device has a problem If the serial device works the probl...

Reviews: