background image

5

Step 4. Establish communication

 between the receiver

and the mouse (select identification codes).

„

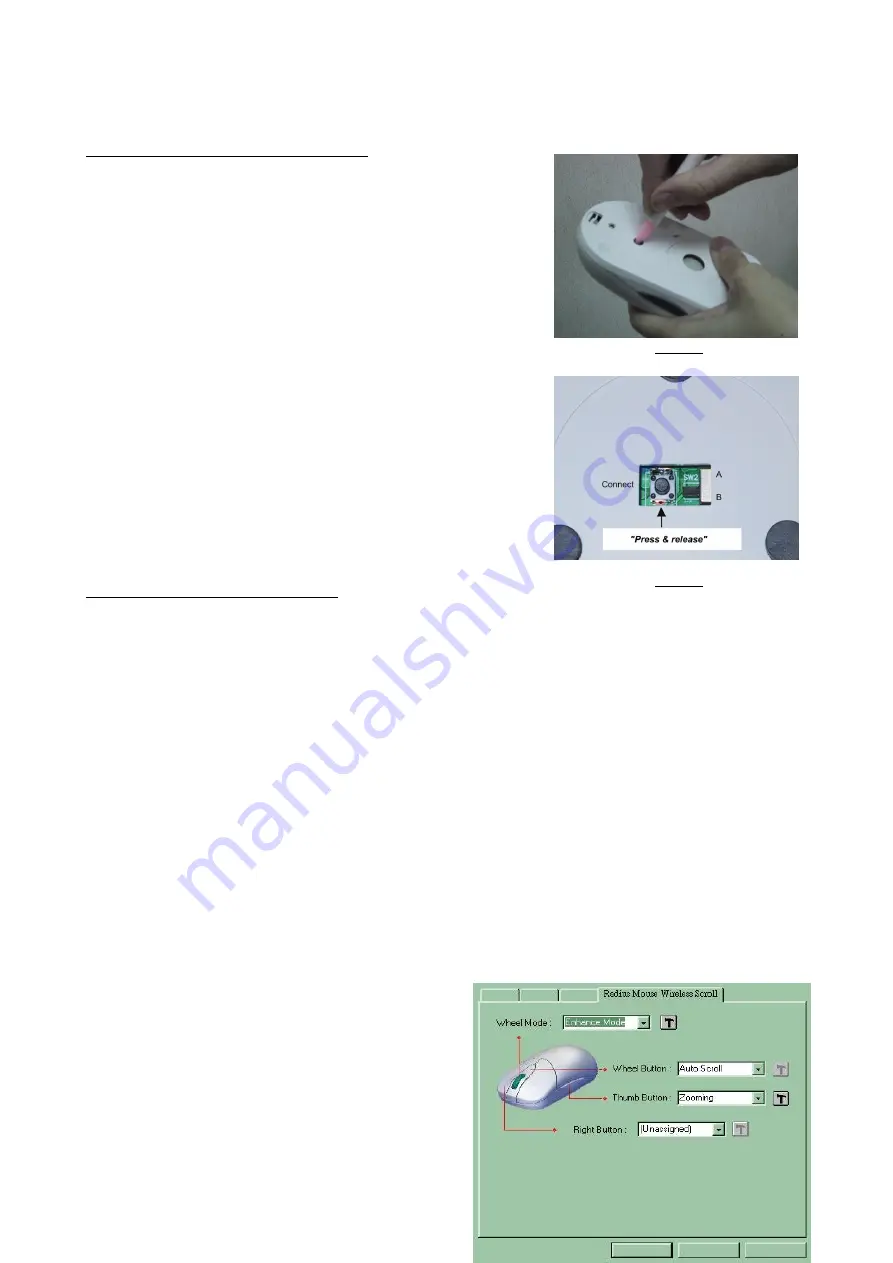
  Press and release the connect button on bottom

of the wireless mouse (refer to Fig-3.1).

„

  Use a pen or pencil to press and release the

connect button on the receiver (refer to Fig-3.2).

„

  The "connect" light on the top dome of receiver

will flash while the same ID is selected on both
of the receiver and the mouse.

Battery Warning!

When replace the batteries, use alkaline. You may use
other heavy-duty NiMH batteries, but do not mix then with
alkaline. Do not mix used and new batteries together!

Step 4.Installing the Software

To install the software, please follow the steps below to finish:

If the package contains a floppy disk

1.  Insert the floppy disk into floppy driver, then type "A:\setup" from RUN, START, Click OK

or press ENTER.

2. Choose the Radius Mouse Wireless Scroll
3. The setup program will guide you to finish the installation step by step

If the package contains a CD-ROM

1. Insert the Auto-Run CD-ROM onto CD-ROM driver, the installation menu
    will be executed automatically. (If not, Type "D:\autorun" (or "E:\autorun"

)

    from RUN, START, Click OK or press ENTER)
2. Choose the Radius Mouse Wireless Scroll
3. The setup program will guide you to finish the installation step by step
   
After you finish the installation, select "Restart"
to reboot your system and
active multimedia hot keys and wheel scrolling
functions.

Fig-3.2

Fig-3.1

Summary of Contents for MW1053

Page 1: ...1 RF WIRELESS MULTIMEDIA MOUSE USER S MANUAL Model MW1053...

Page 2: ...rms and wrists are straight z Avoid resting your wrists on sharp edges Before you begin z Keep this installation guide for future reference It contains Important Troubleshooting Information z Keep you...

Page 3: ...computer first PS 2 version If you are purchasing a PS 2 version there is a small icon on the molding head of the cable so you can easily recognize the mouse cable Refer Fig 1 PS 2 mouse cable connect...

Page 4: ...r B positions Make sure the switches have the same setting as the receiver refer the right Fig 2 4 it is pre set at factory Step 3 Installing the Batteries This RF wireless mouse uses 2 AA batteries T...

Page 5: ...oftware To install the software please follow the steps below to finish If the package contains a floppy disk 1 Insert the floppy disk into floppy driver then type A setup from RUN START Click OK or p...

Page 6: ...6 ID selections for your options to prevent interruption z 4 buttons design for multimedia purpose to immediately play z video audio sources or get into Internet with a single click z The Second Third...

Page 7: ...is firmly attached to the computer mouse port Check the channel selection of both receiver and mouse are the same Check if the batteries are properly connecting The and on the batteries must match the...

Page 8: ...eset identification codes Normally the effective transmit distance is about 4 to 6 feet depending on the environment If the effective distance between the mouse and the receiver is bad try to change t...

Reviews: