ENGLISH
2
• Never modify or alter sprayer from original
condition. Never heat or alter the hose, hose nut, or
barb. Doing so could weaken the components and/
or connections.
• Use only replacement parts from original
manufacturer. Other replacement parts are not
compatible with this sprayer.
• Never pressurize the sprayer with any device
other than the pump supplied by the original
manufacturer. Use of an air compressor or other
non-standard device to pressurize the tank could
exceed the safe working pressure of the sprayer.
• Do not lift, carry, or pull the sprayer by the hose,
shutoff valve, or wand extension. Doing so could
weaken the components and/or connections. Carry
by the pump handle only, making sure the handle is
properly locked in place before lifting.
ASSEMBLY INSTRUCTIONS
WARNING:
RISK OF PERSONAL INJURY AND/OR
PROPERTY DAMAGE DUE TO CHEMICAL EXPOSURE.
After initial assembly, always inspect the sprayer for
damage, and test it with plain water to check for
proper function. Ensure all connections are secure
and leak free, and the hose is free from damage, prior
to using the sprayer with chemical.
WARNING:
Do not attempt to heat or alter hose, hose
nut or barb adapter prior to assembly.
It is recommended to test the sprayer using plain tap water
before spraying chemicals. Test all connections for possible
leaks. Use proper eye protection while testing. If sprayer
does not pass the water test, call our Customer Service
Center before using sprayer with chemicals. Make sure hose
is not cracked or frayed and does not show signs of swelling.
Make sure hose is securely connected to sprayer. DO NOT
USE TOOLS TO TIGHTEN HOSE NUT.
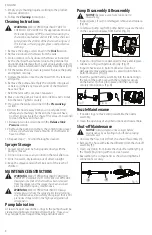
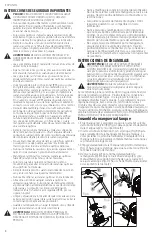
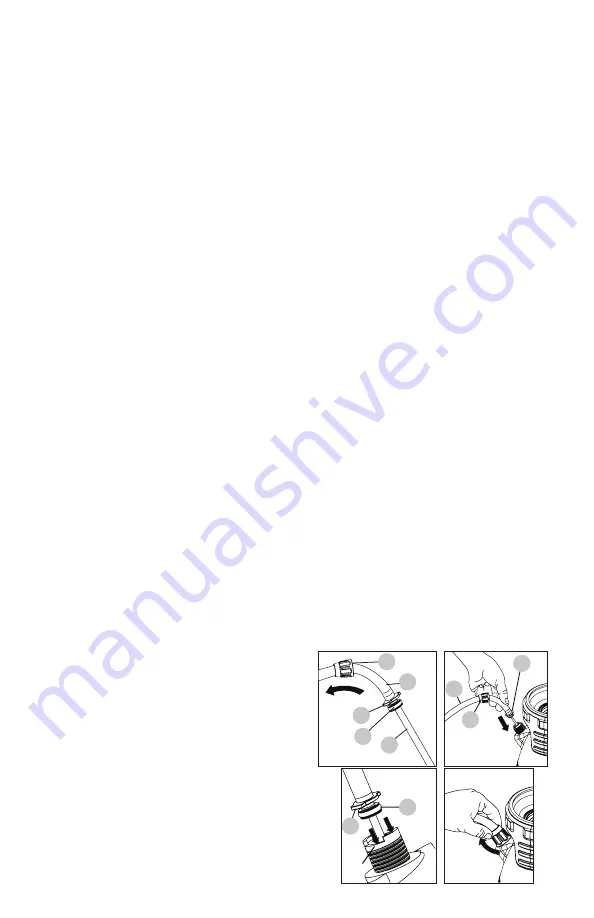
Assemble Hose to Tank
1. On the hose (1), ensure the nut (2) is pulled back away
from the dip tube (3) (Fig. A) to expose the hose barb
adapter (4) and o-ring (5).
2. Insert the dip tube (3) into the tank, (Fig. B) until the
hose barb adapter (4) reaches the tank. If these tabs are
not properly aligned, the hose barb adapter (4) will not
insert fully into the tank, and an air leak will result.
3. Push the hose barb adapter (4) into the tank (Fig. C)
until it stops, so the o-ring (5) seals inside to tank
connection.
4. Slide the nut (2) down over the hose barb adapter (4).
Push down on the nut (2) and turn clockwise by hand
until the nut (2) tightens to the tank (Fig. D). Do not use
tools to over-tighten the nut (2).
IMPORTANT SAFETY INSTRUCTIONS
DANGER:
RISK OF DEATH, SEVERE PERSONAL INJURY
AND/OR PROPERTY DAMAGE FROM IMPROPER
CHEMICAL USE OR MIXTURE.
• Never use flammable or combustible chemicals in
this sprayer. Spraying flammable or combustible
chemicals can create combustible fumes that could
be ignited, causing an explosion.
• Use only chemicals indicated for spraying
applications. Some chemicals may create a toxic or
other hazardous atmosphere when sprayed.
• Always refer to chemical manufacturer’s instructions
and/or the chemical Safety Data Sheet (SDS) for
proper mixture and safe application.
WARNING:
RISK OF PERSONAL INJURY AND/OR
PROPERTY DAMAGE DUE TO CHEMICAL EXPOSURE.
• Read and understand the entire instruction manual
before using this sprayer.
• Follow all instructions and precautions in the
instruction manual when using this sprayer.
• Read and follow all instructions and precautions on
chemical manufacturer’s label of chemicals used in
this sprayer.
• Use the appropriate Personal Protective Equipment
(PPE) as recommended by the chemical
manufacturer and/or refer to the chemical Safety
Data Sheet (SDS) of the chemical being used. This
includes at least goggles, gloves, and protective
clothing. Failure to use appropriate PPE could result
in chemical exposure through skin contact, eye
contact, inhalation, or other means.
• After initial assembly, extended storage, or any
possibly damaging event, such as a fall, always
inspect the sprayer for damage, and test it with
plain water to check for proper function. Ensure all
connections are secure and leak free, and the hose
is free from damage, prior to using the sprayer with
chemical.
• Always inspect the hose and all connections before
each use. A damaged hose or loose connections
could result in an uncontrolled high pressure
discharge of chemical.
• Do not spray near open flame, hot surfaces, or
anything that could vaporize the spray. Doing so
could create a dangerous chemical atmosphere.
• Never use caustics, bleach, acids, hot water, or
pressure producing chemicals in this sprayer.
• Keep the sprayer and all chemicals out of the reach
of children and pets.
• Only spray when the air is calm (no wind or air
movement) to prevent chemical spray from drifting
onto non-targeted surfaces.
• Always release pressure when sprayer is not in use
and before removing the pump from the tank.
• Never store chemicals in the sprayer.
• Store or dispose of any unused chemicals as
instructed by the chemical manufacturer due to the
potential for environmental damage from a spill or
leak, and/or refer to the disposal criteria referenced
in the Safety Data Sheet (SDS).
• Clean and rinse the sprayer after each use to
avoid unintended chemical exposure and prevent
contamination of subsequent applications.
• Store Sprayer in a warm, dry, dust-free location out
of direct sunlight.
WARNING:
RISK OF PERSONAL INJURY AND/OR
PROPERTY DAMAGE DUE TO RUPTURE AND/OR
UNCONTROLLED HIGH PRESSURE DISCHARGE OF
LIQUID CHEMICAL.
Slot
5
4
3
5
4
1
2
1
2
3
Fig. A
Fig. B
Fig. C
Fig. D


