Prevention of False Alarms
The majority of alarms that occur are false. These situations
happen every day due to user error, incorrect installation or
improper maintenance of the system. False alarms will limit
the responsiveness to the system and become a general
inconvenience. As the number of false alarms increases,
authorities have become less apt to respond to alarm systems
due to this problem. Many of these situations can be avoided by
following some very simple practices.
• Ensure all users are properly trained on the operation of the system.
• Always Disarm the DS600 Mobilelock™ before entering
protected area.
• Check that premises are cleared and assets secured before
Arming the system.
• Know how to cancel an alarm or turn off the system before activating.
• Test the system on a monthly basis to ensure proper functioning
• Check cellular signal, power supply, and that sensors are
secured on a daily basis.
Recommended Locations
• Secure product off the ground above 3 feet (.91m) to ensure
better communication with the DS600 Mobilelock™
• Recommended for use on mobile equipment, containers,
gates and remote assets.
• Secure assets by wrapping the cable through equipment,
tools, materials or other assets.
• Replacement cables of 6' (1.83m), 12' (3.66m) and 24' (7.32m)
are available at additional cost.
Installing & Changing Battery
This wireless sensor requires a non-rechargeable CR-123 3.0
Volt Lithium battery. If this Cable Lock is newly purchased skip
to
Device Registration
below as a battery is already installed.
TO CHANGE AND INSTALL A BATTERY
1. Remove five screws from the outer housing (C).
2. Separate housings.
3. Carefully remove the old discharged battery. Dispose of the
battery according to local regulations.
4. Install new battery using the polarity (+ and -) markings on
the battery and equipment. Do not use excessive force. If
the battery does not fit, ensure that it matches the polarity
markings.
5. Press the reset button (E) on the device.
6. Rejoin housings.
7. Reinsert the five screws into the outer housing and tighten.
Securing Equipment
The DS630 has a cable that is impregnated with a heavy-duty
urethane jacket over stainless steel braiding. As the cable ends
are disconnected, the system will be notified of an unsecured
device. Also, if for any reason the circuit is broken (i.e., cable
is cut), the Cable Lock will be considered unsecured and will
send an alarm notification. The Cable Lock needs to be removed
before operating the attached equipment.
TO SECURE
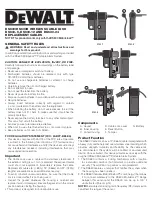
1. Rotate the cable lock lever (D) counterclockwise 90° to open
and wrap cable around equipment.
2. Insert the small cable end (J) as shown in Figure 3.
3. Align the slot (K) on the cable end with the tab (L) on inner
housing (Fig. 2).
4. Rotate the cable lock lever clockwise 90° back to its original
position as shown in Figure 1.
NOTE:
A padlock (not included) is recommended for additional security.
TO UNSECURE
1. Rotate the cable lock lever (D) counterclockwise 90° to open.
2. Disconnect small cable end (J) and remove cable from equipment.
3. Rotate the cable lock lever clockwise 90° back to its original
position.
Replacing/Changing Cable
The system must be disarmed prior to any changes.
1. Rotate the cable lock lever (D) counterclockwise 90° to open.
2. Remove five screws from the outer housing (C).
3. Separate housings.
4. Push the large end (M) of the cable through the large hole in
the outer housing until all of the cable is through.
5. Insert the small end (J) of the new cable through the large
hole in the case from the inside and feed the cable through
until the large cable end is stopped by the outer housing.
6. Vertically align the rectangular end to fit into the inner case
receptacle and pull to tighten. -
7. Insert the small cable end into the inner housing, aligning the
slot (K) and tab (L). Rotate the cable lock lever back to its
original position.
8. Rejoin the housings.
9. Reinsert the five screws into the outer housing and tighten.
10. The Cable Lock is ready for use (see Securing Equipment).
Device Registration
To activate this sensor, it must first be assigned to your DS600
Mobilelock™ Device. Instructions for assigning your sensor can
be found within your online Mobilelock™ account.
NOTE:
This sensor can be assigned to only one DS600
Mobilelock™ device at a time.
1. Log into your online Mobilelock™ account.
2. Select the Mobilelock™ device you wish to pair this sensor to
and go to the Configure Units page.
3. Click the link titled “Manage Bluetooth
®
” in the Sensors section.
4. Click to “Enable” Bluetooth
®
.
5. After the Mobilelock™ device’s Bluetooth
®
is confirmed
“Enabled”, click “Add Sensor”. Then hold the Cable Lock
close to the DS600 and click “Scan for available sensors”.
6. When the website shows the sensor, click on it to confirm
your selection.
7. Then configure the sensor: Give it a name (“Front Gate”).
8. Select any optional alerts desired and click “Save and Close”.
9. Make sure the sensor is selected as “Enabled”.
10. After registration, Arm the DS600 Mobilelock™ and test the
sensor.
TEST
With the DS600 Armed open up the DS630 Cable Lock. Check
to see that the Cable Lock alarm was received in the Event
History for the DS600 Mobilelock™ on the Configure Units page
and also that notification of the alarm was received as per the
settings on the Alarm Contacts page.


