Installing and Removing the
A
FIG. 3
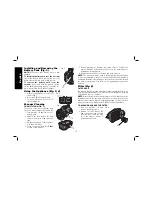
Battery Pack (Fig. 3)
NOTE:
Make sure your battery pack is fully
charged.
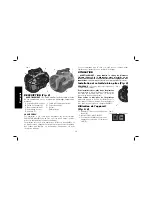
To install the battery pack into the vaccum
,
insert/slide battery pack into battery port (A).
Make sure the battery pack is fully seated.
To remove the battery pack from the
vacuum
, press and hold the battery release
on the battery pack and remove. To charge the
pack, insert it into your D
E
WALT charger.
Using the Appliance (Fig. 2, 4)
1 Attach the appropriate accessory to
FIG. 4
the hose (B).
2. Insert the D
E
WALT battery pack.
3. To turn machine on, press the I/O
(on/off) button (C).
Vacuum Cleaning
TO EMPTY TANK (FIG. 5)
The sound of the motor changes and
FIG. 5
E
D
suction is reduced when the tank is full.
1. Turn machine off and remove the
battery pack.
2. Unlatch the tank latches (D) and
remove the power head from the
tank.
3. Empty the contents of the tank into
a suitable container.
4. Clean or change filters. See
Filter
section of this manual.
5. Inspect machine for damage by foreign objects. Contact the
nearest D
E
WALT authorized service center for replacement of
damaged or missing parts.
6. Replace power head onto the tank and latch securely.
NOTE:
The machine must be used in the upright position at all times
to prevent unwanted actuation of the Automatic Vacuum Shutoff. If
unwanted actuation should happen, turn off the motor and wait until
the motor stops turning. Turn the motor on again and suction will be
restored.
Filter (Fig. 6)
FILTER CARE
The wet/dry filter (E) included with this vacuum is a long life filter. To be
effective in minimizing dust recirculation the filters MUST be installed
correctly and in good condition.
NOTE:
Never operate without a filter in place. A clean filter is the most
important factor in the operation and efficiency of any vacuum. If the
filter becomes clogged beyond cleaning, damaged, or fails to operate
properly, replace only with genuine D
E
WALT replacement filters.
TO CLEAN OR CHANGE THE FILTER
1.
Turn the machine off and
FIG. 6
E
remove the battery pack.
2. Unlatch the tank latches (D)
and remove the power head
from the tank. Twist the filter
(E) to the right to remove it
from the power head.
English
10
Summary of Contents for DCV580
Page 2: ......


