background image

7

Connecting the Computer and Copier

7-2

NC-5

7.2

Setting Up the Network Connections

7.2.1

Peer-to-Peer Printing

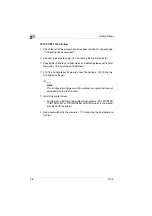
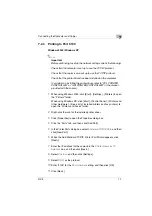
Windows 95 (OSR 2.5)/ Windows 98/ Windows 98 SE/ Windows ME

Important

Before continuing to set up the network settings, check the following: 

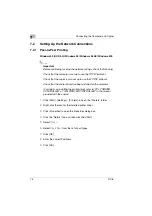
Check that the computer is set up to use the TCP/IP protocol. 

Check that the copier is also set up to use the TCP/IP protocol. 

Check that the printer driver has been installed on the computer. 

(For details on installing the printer driver, refer to “PCL PRINTER 
CONTROLLER” or “GDI PRINTER CONTROLLER” in the manual 
provided with the copier.)

1

Click [Start] - [Settings] - [Printers] to open the “Printers” folder.

2

Right-click the icon for the installed printer driver.

3

Click [Properties] to open the Properties dialog box. 

4

Click the “Details” tab, and then click [Add Port].

5

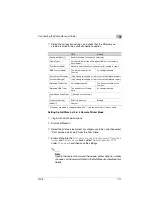
Select 

Other

.

6

Select 

Peer2Peer

 from the list of port types.

7

Click [OK].

8

Enter the copier IP address.

9

Click [OK] .

Summary of Contents for NC-5

Page 1: ...Network Interface Card NC 5 4980 7762 02 User Manual ...

Page 2: ...ws Client 2 6 Supported Environments 2 6 2 2 Checking the Setup Procedures 2 7 Peer to Peer Printing 2 7 LPR PORT 9100 Printing 2 8 IPP Printing 2 9 NetWare Server Client except NDPS 2 10 NetWare Server Client NDPS 2 10 3 Checking the Accessories 3 1 Accessories 3 1 4 Connecting the Network Cable 4 1 Types of Cable That Can Be Used 4 1 4 2 Connecting the Network Cable 4 1 5 Assigning an IP Address...

Page 3: ...PP Print Connection 7 9 7 2 5 Connecting a Copier to the NetWare Server 7 10 Supported Environments 7 10 Setting Up NetWare 4 x 5 x 6 Print Server Mode 7 10 Setting Up NetWare 4 x 5 x 6 Remote Printer Mode 7 11 Setting Up NetWare 5 x 6 Novell Distributed Print Service NDPS 7 13 Creating an NDPS Printer Agent 7 13 Setting Up the Windows Computer for the NetWare Client 7 14 8 Using Printer Managemen...

Page 4: ...NC 5 iii 9 Appendix 9 1 Product Specifications 9 1 9 2 Troubleshooting 9 2 ...

Page 5: ...t the interference at his own expense WARNING The design and production of this unit conform to FCC regulations and any changes or modifications must be registered with the FCC and are subject to FCC control Any changes made by purchaser or user without first contacting the manufacturer will be subject to penalty under FCC regulations This device must be used with shielded interface cables The use...

Page 6: ...mmunications and is prohibited under CISPR 22 rules and local rules WARNING This is a Class A product In a domestic environment this product may cause radio interference in which case the user may be required to take adequate measures This device must be used with shielded interface cables The use of non shielded cables is likely to result in interference with radio communications and is prohibite...

Page 7: ...vi NC 5 ...

Page 8: ...ns refer to the manual provided with the copier Store this manual and the enclosed CD ROM in a safe location for future reference Note No part of this manual may be copied or reproduced either in part or in whole without prior permission The contents of this manual are subject to change without notice No part of the manual may be reproduced or modified without prior permission Screen images used i...

Page 9: ...r product names are trademarks or registered trademarks of their respective holders 1 2 About Printer Management Utility If a network interface card NIC is installed you can use the Printer Management Utility network utility Printer Management Utility is a network utility that allows you to modify network and other settings over the network instead of from the device itself All you need in order t...

Page 10: ...by all users This chapter is designed to make it easier to find the information and procedures required for your setup 1 First select the most suitable network printing method for your system Selecting the Network Print Method on page 2 2 2 Next check the procedures required to perform network printing operations that meet your needs Checking the Setup Procedures on page 2 7 ...

Page 11: ... computer to the same network G The Peer to Peer Utility is automatically installed when you install the printer driver G The TCP IP protocol is used Network Setup Printing G Using the Network Setup utility you can connect a copier and computer to the same network G The Network Setup utility is included on the Management Utility CD ROM provided G The TCP IP protocol is used Note For instructions o...

Page 12: ...T 4 0 LPR Printing G You can connect a copier and computer via the LPR Print Service G The LPR Print Service is available with a standard installation of the operating system G The TCP IP protocol is used Windows NT 4 0 TCP IP protocol LPR ...

Page 13: ...ting system G HTTP Hyper Text Transfer Protocol which is part of the TCP IP protocol is used Businesses and organizations may have a firewall set up to prevent unauthorized access however it should normally be possible to traverse an HTTP firewall This allows you to print to network printers beyond the firewall via an IPP connection Printing to Port 9100 G You can connect a copier and computer via...

Page 14: ...esses and organizations may have a firewall set up to prevent unauthorized access however it should normally be possible to traverse an HTTP firewall This allows you to print to network printers beyond the firewall via an IPP connection Printing to Port 9100 G You can connect a copier and computer via the Port 9100 Print Service G The Port 9100 Print Service is available with a standard installati...

Page 15: ...a copier via a NetWare server Supported Environments The controller supports the system environments described below NetWare version Protocol Emulation Service mode NetWare 4 x IPX NDS Bindery PServer NPrinter NetWare 5 x 6 IPX NDS Bindery PServer NPrinter TCP IP NDPS lpr NetWare client PC Windows computer TCP IP protocol or IPX SPX protocol NetWare server ...

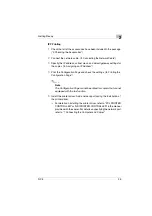
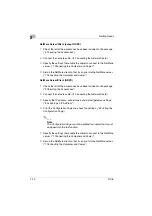
Page 16: ...t mask and default gateway settings for the copier 5 Assigning an IP Address 4 Print the Configuration Page and check the settings 6 Printing the Configuration Page Note The Configuration Page cannot be printed for copiers that are not equipped with the fax function 5 Install the printer driver The Peer to Peer Utility is installed when you install the printer driver For details on installing the ...

Page 17: ...r the copier 5 Assigning an IP Address 4 Print the Configuration Page and check the settings 6 Printing the Configuration Page Note The Configuration Page cannot be printed for copiers that are not equipped with the fax function 5 Install the printer driver For details on installing the printer driver refer to PCL PRINTER CONTROLLER or GDI PRINTER CONTROLLER in the manual provided with the copier ...

Page 18: ...t the Configuration Page and check the settings 6 Printing the Configuration Page Note The Configuration Page cannot be printed for copiers that are not equipped with the fax function 5 Install the printer driver Add a network port during the installation of the printer driver For details on installing the printer driver refer to PCL PRINTER CONTROLLER or GDI PRINTER CONTROLLER in the manual provi...

Page 19: ...DPS 1 Check that all of the accessories have been included in the package 3 Checking the Accessories 2 Connect the network cable 4 Connecting the Network Cable 3 Specify the IP address subnet mask and default gateway settings 5 Assigning an IP Address 4 Print the Configuration Page and check the settings 6 Printing the Configuration Page Note The Configuration Page cannot be printed for copiers th...

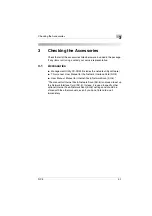
Page 20: ...D ROM Includes the network utility software G This manual User Manual for the Network Interface Card NC 5 G User Manual Manual for Internet Fax Network Scan SU 6 The manual for Internet Fax Network Scan SU 6 is not used to set up the Network Interface Card NC 5 Instead it is used to specify other optional Internet Fax Network Scan SU 6 settings and should be stored with the other manuals even if y...

Page 21: ...3 Checking the Accessories 3 2 NC 5 ...

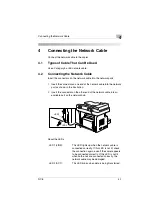
Page 22: ...e network cable into the network port as shown in the illustration 2 Insert the connector on the other end of the network cable into an available port on the network hub About the LEDs LED1 LED2 LED1 LINK This LED lights up when the network cable is connected correctly If this LED is not lit check the connection again even if the copier appears to be connected correctly If this LED is not lit when...

Page 23: ...4 Connecting the Network Cable 4 2 NC 5 ...

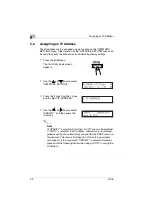
Page 24: ...n an IP address only after consulting your network administrator 5 1 Entering the IP Address From the Control Panel Use the 10 key pad on the control panel to enter the IP address Example To enter 192 168 0 10 Note If an element of the number is less than three digits press the key to move the cursor into the area to the right of the current element ...

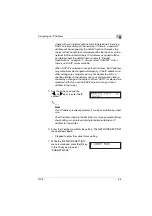
Page 25: ... to select NETWORK SETTING 3 Press the 1 key from the 10 key pad to select IP ADDRESS 4 Use the and keys to select SPECIFY and then press the Yes key Note If SPECIFY is selected in this step AUTO can also be selected If AUTO is selected the IP address subnet mask and default gateway setting are automatically assigned by the DHCP server on the network This means that they do not have to be assigned...

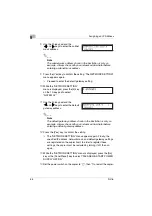
Page 26: ... the IP address and other settings are changed you may not be able to print to a specified printer on the network due to a communication failure caused by a change in the address When AUTO is selected we recommend that you set the DHCP server to assign a fixed address to the copier 5 Use the 10 key pad and the and keys to enter the IP address Note If an IP address is already entered it can be over...

Page 27: ...nd the and keys to enter the default gateway address Note The default gateway address shown in the illustration is only an example Always check with your network administrator before entering a default gateway address 12 Press the Yes key to confirm the setting The NETWORK SETTING menu appears again Finally the specified IP address network mask and default gateway settings are registered on the co...

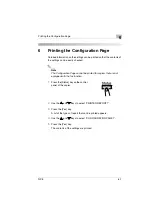
Page 28: ...Note The Configuration Page cannot be printed for copiers that are not equipped with the fax function 1 Press the Status key on the control panel of the copier 2 Use the and keys to select PRINTER REPORT 3 Press the Yes key A list of the types of report that can be printed appears 4 Use the and keys to select CONFIGURATION PAGE 5 Press the Yes key The contents of the settings are printed ...

Page 29: ...6 Printing the Configuration Page 6 2 NC 5 ...

Page 30: ...cribed in this chapter are as follows G Peer to Peer Printing Windows 95 OSR 2 5 Windows 98 Windows 98 SE Windows ME G LPR Printing Windows 2000 Windows NT 4 0 G Printing to Port 9100 Windows 2000 Windows XP G IPP Printing Windows 2000 Windows XP G Connecting a Copier to the NetWare Server Setting up NetWare 4 x 5 x 6 Print Server Mode Setting up NetWare 4 x 5 x 6 Remote Printer Mode Setting up Ne...

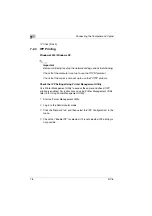
Page 31: ...e TCP IP protocol Check that the printer driver has been installed on the computer For details on installing the printer driver refer to PCL PRINTER CONTROLLER or GDI PRINTER CONTROLLER in the manual provided with the copier 1 Click Start Settings Printers to open the Printers folder 2 Right click the icon for the installed printer driver 3 Click Properties to open the Properties dialog box 4 Clic...

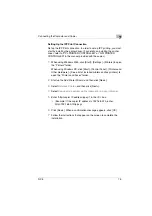
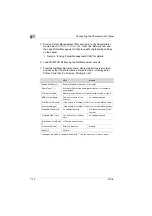
Page 32: ...tart Settings Printers to open the Printers folder 2 Right click the icon for the installed printer driver 3 Click Properties to open the Properties dialog box 4 Click the Ports tab and then click Add Port 5 In the Printer Ports dialog box select Standard TCP IP Port and then click New Port 6 When the Add Standard TCP IP Printer Port Wizard appears click Next 7 Enter the IP address for the copier ...

Page 33: ...7 Connecting the Computer and Copier 7 4 NC 5 11 Click Finish ...

Page 34: ...l provided with the copier Install the Microsoft TCP IP Printing Service 1 Click Start Settings Control Panel to open the Control Panel folder 2 Double click Network 3 Click the Services tab click Add and then install the Microsoft TCP IP print service Setting Up the LPR Connection 1 Click Start Settings Printers to open the Printers folder 2 Right click the icon for the installed printer driver 3...

Page 35: ...e copier IP address in the Name or address of server providing lpd services box and then click OK Enter the name of the print queue in the Name of printer or print queue on that server box Example print 7 Follow the instructions that appear on the screen to complete the installation for an LPR compatible printer ...

Page 36: ...gs Printers to open the Printers folder When using Windows XP click Start Control Panel Printers and Other Hardware See a list of installed printers and fax printers to open the Printers and Faxes folder 2 Right click the icon for the installed printer driver 3 Click Properties to open the Properties dialog box 4 Click the Ports tab and then click Add Port 5 In the Printer Ports dialog box select ...

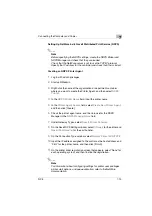
Page 37: ...e TCP IP protocol Check the IPP Settings Using Printer Management Utility Use Printer Management Utility to access the copier and check if IPP printing is enabled For instructions on using Printer Management Utility refer to 8 Using Printer Management Utility 1 Start up Printer Management Utility 2 Log in to the Administrator mode 3 Click the Network tab and then select the IPP Configuration in th...

Page 38: ...rs folder When using Windows XP click Start Control Panel Printers and Other Hardware See a list of installed printers and fax printers to open the Printers and Faxes folder 2 Start up the Add Printer Wizard and then click Next 3 Select Network Printer and then click Next 4 Select Connect to a printer on the internet or on your intranet 5 Enter http copier IP address ipp cgi in the URL box Example...

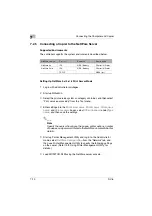
Page 39: ... name boxes select Other Unknown under Type name and then save the settings Note Specify the users who can use the queue printer options number of queues and password Refer to the NetWare documentation for details 5 Start up Printer Management Utility and log in to the Administrator mode select NetWare Configuration from the Network tab and then use Printer Management Utility to specify the follow...

Page 40: ... users who can use the queue printer options number of queues and password Refer to the NetWare documentation for details NDS Bindery Enable NetWare Enable Enabled if checkbox is selected Frame Type Auto detect Select the frame type suitable for your network environment Print Server Name Manually enter the name of the print server created in step 4 NDS Context Name The context name for the Pserver...

Page 41: ...ettings marked with turn the machine off then on again NDS Bindery Enable NetWare Enable Enabled if check box is selected Frame Type Auto detect Select the frame type suitable for your network environment Print Server Name Manually enter the name of the print server created in step 4 NDS Context Name The context name for the Pserver No settings required Print Server Password Only specify this sett...

Page 42: ...er name 5 In the Printer Agent Source field select Create New Printer Agent and then click Create 6 Check the printer agent name and then browse for the NDPS Manager in the NDPS Manager Name field 7 Under Gateway Types select Novell Printer Gateway 8 On the Novell DPS Settings window select None for the printer and Novell Port Handler for the port handler 9 On the Connection Type window select Rem...

Page 43: ...ngs Printer and then double click the Add Printer icon 2 For the printer port browse the network and specify the name of the queue or the name of the NDPS printer that you created 3 On the printer model list select the printer driver on the CD ROM 4 Follow the instructions provided by the Wizard to complete the procedure ...

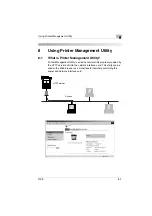
Page 44: ...inter Management Utility Printer Management Utility is a device control utility program provided by the HTTP server built into the network interface card This utility can be used with a Web browser as an interface for remotely controlling the copier and network interface card HTTP server Access ...

Page 45: ... that support PCL functions G Remote Status Monitoring Check the details of copier trays information about consumables or the total number of prints Check the status of jobs that are being printed or held in the print queue Jobs can also be deleted if you have logged in to the Administrator mode G Maintenance Reset the network card NIC or print controller Initialize the print controller Update the...

Page 46: ...ss is 192 168 0 10 enter http 192 168 0 10 3 The Printer Management Utility screen appears Note In order to access Printer Management Utility an IP address must be assigned to the copier 8 4 Using Printer Management Utility Printer Management Utility is used in the same way as other Internet Web pages Click on links in the page to jump to that page and use the Back and Next buttons to navigate thr...

Page 47: ...re also subject to change without notice 1 Status display Displays the current status of the copier 2 Administrator password Enter the administrator password to log in to the Administrator mode 3 Tabs These are used to select the various categories of settings 4 Menu This is used to select various setting items or display information 5 Information settings display Displays the details for the item...

Page 48: ...ge the administrator password before using Administrator mode Note The copier cannot be used while you are logged into Printer Management Utility with Administrator mode 8 7 About the File Download Function If the copier you are using supports PCL printing the File Download screen will appear when you click File Download on the menu in the Job tab Select the file in the File Name box and then clic...

Page 49: ...8 Using Printer Management Utility 8 6 NC 5 ...

Page 50: ...OM 2 AutoIP is a function that allows the network interface card to automatically assign IP addresses that begin with 169 254 and use a subnet mask setting of 255 255 0 0 If there are two or more devices on the same network that use AutoIP function these devices can communicate with each other Interface Ethernet 10 100Base T TX RJ 45 TCP IP Services ARP BootP 1 DHCP DNS IPP lpr lpd Raw Socket HTTP...

Page 51: ...spond when a ping test is sent to the controller Yes The port number setting is wrong Correct the port number setting A computer malfunction has occured Restart the computer The driver has not been installed correctly Uninstall the driver software and then reinstall it according to the instructions No A copier malfunction has occured Restart the copier The network cable has become disconnected or ...

Page 52: ... to change without notice to incorporate improvements made on the product or products the manual covers DEVELOP GmbH Minoltaring 11 D 30855 Langenhagen Telefon 0511 53345 0 Telefax 0511 53345 305 P N 91164C016H020 Copyright 2003 DEVELOP Printed in China ...

Reviews: