


Original User Manual | Groove 2.0
19
NO
SYMBOL
FUNCTION
BUTTON PUSH
11
S E T
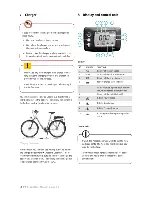
a) Switch the
ront and rear
light on/of
b) Change the
indication (VEL,
ODO, or DST)
c) (in the Set-
tings menu)
a) 2 seconds
b) 1 second
c) 1 second
12
M O D E
a) Change mode
b) (in the Set-
tings menu)
a) 1 second
b) 1 second
13
Switch the sys-
tem on/of
2 seconds
12 + 13
M O D E
+
Clear the DST
(trip distance)
2 seconds
11 + 12
M O D E
+
S E T
Change the
back-lighting of
the display
3 seconds
8.1
Switching on and of
8.1.1 Switching on
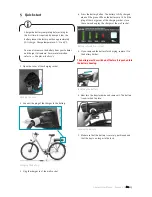
1. Switch the battery on.
Battery switch
2. Hold the button down for two seconds.
8.1.2 Switching of
1. Hold the button down for two seconds.
2. Switch the battery of.
8.2
Assist mode
MODE
ASSISTANCE
RECOMMENDATION
Assistance up to at
most 25 km/h
Use for small climbs
(bridges etc.).
Assistance up to at
most 20 km/h
Assistance up to at
most 15 km/h
For a high range
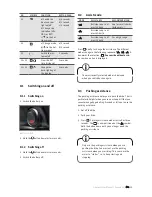
Press
M O D E
briely to change the assistance. The diferent
modes change in the following sequence:
,
,
. A
box marks the selection:
You can ride without assis-
You can ride without assis-
tance when no box is displayed.
The most recently selected mode is displayed
when you switch back on again.
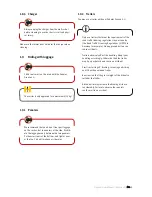
8.3
Pushing assistance
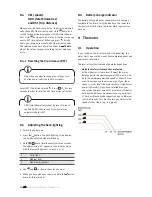
The pushing assistance helps you to push the bike. That is
particularly helpul when you are on a steep hill that you
cannot manage by pedalling. Proceed as follows to use the
pushing assistance:
1. Get of the bike.
2. Push your bike.
3. Press
M O D E
. Pushing assistance mode starts ater three
seconds. The
is now positioned at the
symbol.
Hold the button down until you no longer need the
pushing assistance.
Only use the pushing assistance when you are
pushing the bike. You must not use the pushing
assistance when you are riding! This can cause the
motor to "stutter", i.e. to keep starting and
stopping.
Summary of Contents for Pedelec Groove 2.0
Page 1: ...Original User Manual Version 1 01 07 2014 Pedelec Groove 2 0 English Item no 1973K0015013 ...
Page 11: ......
Page 18: ......