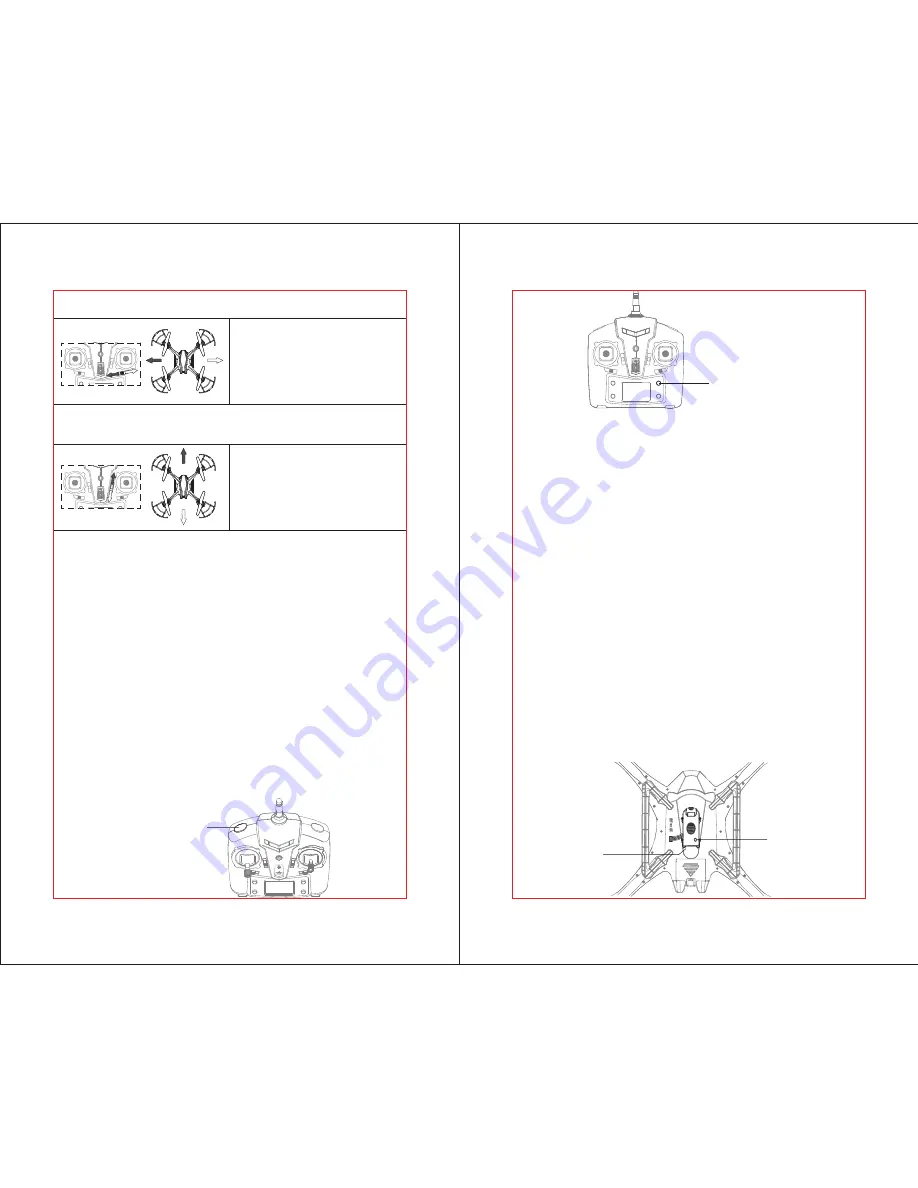
To do an instant flip simply press the 360° Eversion button on the front of the controller,
the drone will flip forward 360°.
Warning: Do not perform a 360° flip unless the drone has enough space for safety.
Left Trigger
360° Eversion button
VIDEO AND CAMERA OPERATION
ENG-9
ENG-10
Camera
State LED
Micro-SD
Storage Card
Press the Mode button on lower right of the controller to switch between Flight
Mode 1 (maximum Gyro-stability) and Mode 2 (3D expert control). The LCD screen will
indicate the current mode.
Mode 1 automatically uses the 6-Axis Gyro (3 gyroscopes and 3 accelerometers) to its
full capabilities for stable, level flight. Use this mode for beginners, or to hover for
movies and snapshots.
Mode 2 tilts the drone more sharply (stronger pitch and roll), for faster acceleration.
Use this mode for racing and 3D maneuvers.
The drone can easily flip in an entire 360° circle. The drone will quickly stabilize and
level out, but will lose some altitude, so first make sure the drone is flying high above
the ground.
To flip in the direction you choose, first press the LEFT TRIGGER. The controller will
start beeping and enter 360° Flip Mode. Push the RIGHT STICK to flip in the desired
direction (forward, backward, left, or right) and return to normal flight. When the battery
runs low, the transmitter will activated a “di, di” sound alarm, the LED lights on the
drone will flash and the flip action will be auto turn off.
If the drone drifts to the side when
the stick is centered, click this switch
left or right until the drone is stable.
6. Adjust Left/Right Trim (Roll)
FLIGHT MODES
360° FLIPS
If the drone drifts forward or back
when the stick is centered, click this
switch forward or backward until
the drone is stable.
7. Adjust Forward/Backward Trim (Pitch)
1. If a storage card is not already installed, install a micro-SD ( “not included”) storage
card in the camera underneath the drone. See the small sketch on the camera itself,
which shows how to orient the chip correctly. Press the chip in until it clicks and stays.
2. To take a photograph, press the Camera Button on the front of the controller.The red
Camera State LED underneath the drone will blink on for about 2 seconds then off
indicating that the drone has taken a single, still photo.
3. To record video, press the Video Button on the front of the controller to start
recording. The red Camera State LED underneath the drone will come on to show
that video is being recorded. Press the Video Button against to stop recording.
Note: Always remember to stop the video recording with the controller before
shutting down. If the drone is switched off while still recording, the AVI file
being stored on the micro-SD card might not be “closed” or stored properly.
4. To quickly retrieve your videos and photos, connect the micro SD card reader
(included) to your computer. Optionally, you have remove the micro-SD storage card
and access the card directly with your computer. The data on the micro-SD card will
appear in folders as JPEG files and AVI files, which you can move to your computer.


