Denios TOOL 2+2 Manual Download Page 4


KST-Allzweckwagen 

Seite 4 von 6 Seiten 

Ausgabe 10/2008 

180039, 180040 


General Instructions 

No modifications or alterations can be made to the product without authorisation from the manufacturer, in the 
event of this, the guarantee will be invalidated.

 National standards and safety regulations must be observed. 

Safety instructions 

Before the product is used, it is to be checked for correct functioning. Should any defects appear, it must not be 
used! 

Only use for the intended purpose!   
Do not use on uneven ground 
The bearing capacity given must not be exceeded! 

Use and intended purpose 

General purpose trolleys TOOL are intended for the in-works transporting and storing of warehouse goods.   

Assembly 

First of all attach the push handle (5) to the upper floor (4). To do this use the washers (7) and screws (6).   

Then the drawer element (10) with the help of the screws (11) and the washers (12) is attached to the underside of 
the upper floor (4)

.


Then attach the 4 wheels (8) together with the washers (9) to the lower floor (1). 

Now put 4 pipes (2) on the corners of the lower floor (1). If you have a model with 3 levels, put the middle floor on 
the pipes (3) and 4 more pipes (2) on the corners of the middle floor.   

Then put the upper floor with the push handles on the pipes (2). 

For secure support it is necessary to secure the connections (floors and support pipes) by tapping them lightly 
with a rubber hammer.   

Please do not use a metal hammer under any circumstances.   


Specifications 

See type label. 
 

Maintenance and servicing 

Check the rollers for ease of movement and if necessary grease with commercial grease. 
Check at regular intervals for any damage. In case of damage, that could influence the carrying capacity, the 
product must not be further used! 
 

English 

Summary of Contents for TOOL 2+2

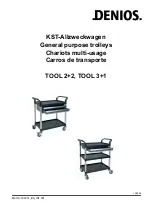
Page 1: ...KST Allzweckwagen General purpose trolleys Chariots multi usage Carros de transporte TOOL 2 2 TOOL 3 1 10 2008 Mat Nr 182331_BA_INT 001 ...

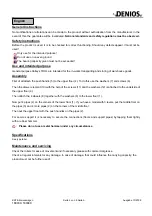
Page 2: ...r 1 5 Schiebebügel 2 Push brace 2 Guidon 2 Estribo de desplazamiento 2 6 Schraube 4 Screw 4 Vis 4 Tornillo 4 7 Scheibe 4 Washer 4 Rondelle 4 Arandela 4 8 Rolle 2 2 Castor 2 2 Roue 2 2 Rodillo 2 2 9 Scheibe 4 Washer 4 Rondelle 4 Arandela 4 10 Schubladeneinheit 1 Drawer unit 1 Unité de tiroir 1 Unidad de cajón 1 11 Schrauben für Schubladeneinheit 6 Screws for drawer unit 6 Vis pour unité de tiroir 6...

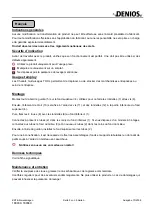
Page 3: ... den oberen Boden 4 Verwenden Sie dazu die Scheiben 7 und die Schrauben 6 Danach wird das Schubladenelement 10 mit Hilfe der Schrauben 11 und der Scheiben 12 an der Unterseite des oberen Bodens 4 befestigt Anschließend befestigen Sie die 4 Rollen 8 samt Scheiben 9 am unteren Boden 1 Stecken Sie nun 4 Rohre 2 auf die Ecken des unteren Bodens 1 Wenn Sie ein Modell mit 3 Etagen haben stecken Sie auf ...

Page 4: ... this use the washers 7 and screws 6 Then the drawer element 10 with the help of the screws 11 and the washers 12 is attached to the underside of the upper floor 4 Then attach the 4 wheels 8 together with the washers 9 to the lower floor 1 Now put 4 pipes 2 on the corners of the lower floor 1 If you have a model with 3 levels put the middle floor on the pipes 3 and 4 more pipes 2 on the corners of...

Page 5: ... abord le guidon 5 sur le fond supérieur 4 Utilisez pour ce faire les rondelles 7 et les vis 6 Ensuite l élément de tiroir 10 sera fixé à l aide des vis 11 et des rondelles 12 à la partie inférieure du fond supérieur 4 Puis fixez les 4 roues 8 avec les rondelles 9 au fond inférieur 1 Connectez à présent 4 tubes 2 dans les coins du fond inférieur 1 Si vous disposez d un modèle à 3 étages connectez ...

Page 6: ... superior 4 Para ello utilice las arandelas 7 y los tornillos 6 Luego se fijará el elemento de cajón 10 en la parte inferior de la superficie superior 4 con ayuda de los tornillos 11 y de las arandelas 12 A continuación fije los 4 rodillos 8 junto con las arandelas 9 en la superficie inferior 1 Coloque ahora 4 tubos 2 en las esquinas de la superficie inferior 1 Si dispone de un modelo de 3 niveles...

Reviews: