background image

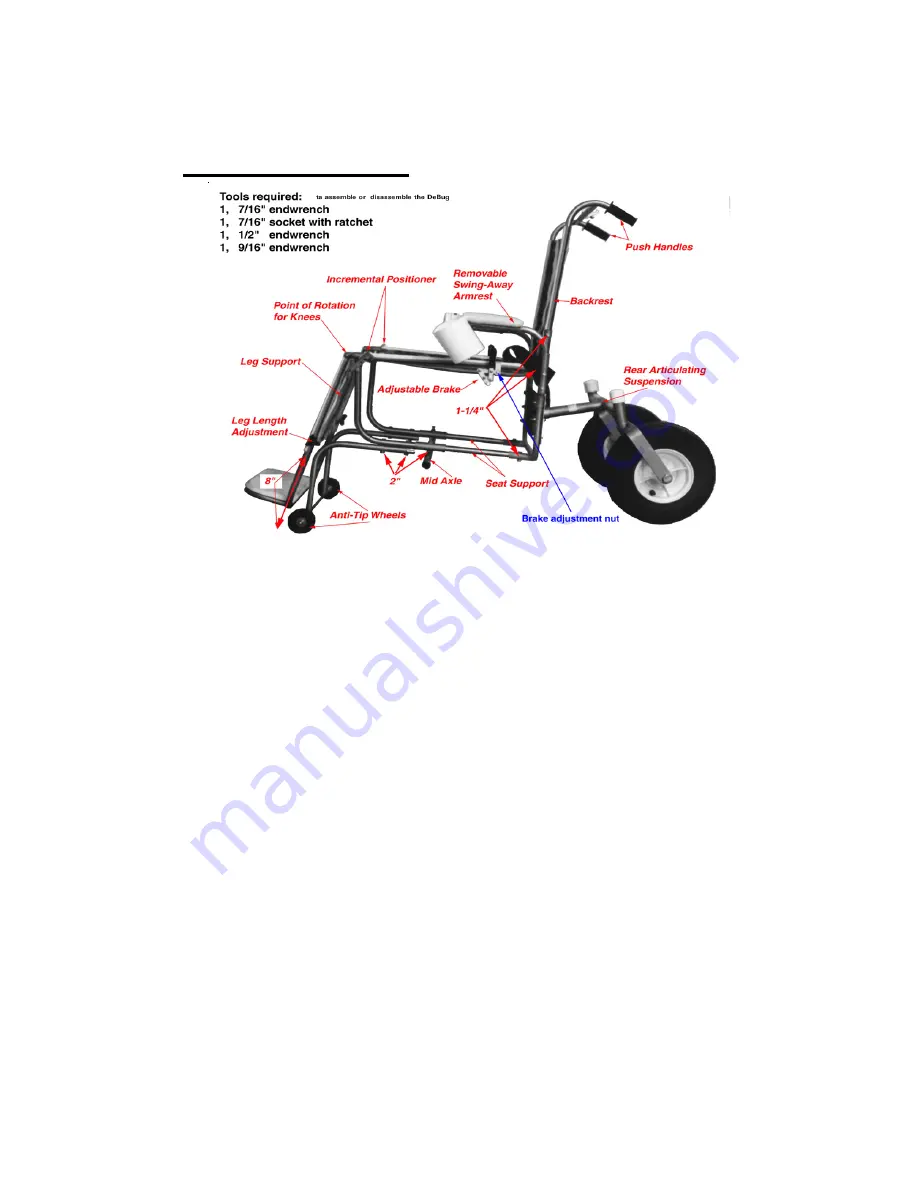
To disassemble the De-Bug

1

.

Loosen the Leg Length Adjustment knobs and slide out the footplate.

2. Slide off the Leg Support Sling, and remove the two 1/4-20 nuts at the
point of rotation of the knees.
3. To remove the Anti tip Wheels, loosen the four attaching 1/4-20 bolts and
remove the wheelie bar.
4. To remove the Mid Axle, loosen the two attaching 1/4-20 bolts.
5. To remove the Backrest, remove the two attaching 1/4-20 bolts and slide up on the
Backrest.
6. The Rear Suspension Tension may be detached by removing the Rear Suspension
Tension bolt. This bolt should be tight during use.

The chair may be further disassembled by removing the remaining 1/4-20 bolts as
required.

To Assemble the De-Bug

1. Slide on the Leg Support Sling, and insert the two 1/4-20 nuts at the point of rotation

of the knees.

2. Slide on the foot plate, and tighten the Leg Length Adjustment knobs
3. Attach the Anti tip Wheels and then the wheelie bar. Tighten the four attaching 1/4-

20 bolts

4. Install the Mid Axle, tighten the two attaching 1/4-20 bolts.
5. To install the Backrest, slide the backrest down on the chair frame and
attach using the two 1/4-20 bolts
6. The Rear Suspension Tension may be attached by inserting the Rear Suspension
Tension bolt. This bolt should be tight during use.

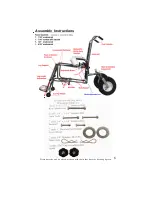
Assembly Instructions

* Anti-tip Wheels are on Elevating legrest chairs only!

Summary of Contents for De-Bug

Page 1: ...DESIGNS 1090 Cobblestone Dr Pensacola FL 32514 850 478 5765 850 476 3361 fax www beachwheelchair com kmdeming aol com De Bug Beach Wheelchair ASSEMBLY OPERATION SAFETY INSTRUCTIONS AND WARRANTY INFOR...

Page 2: ...rest Operation 3 Recining Backrest and Tlt N Space Operation 4 Ratchet Operation 5 Ratchet Assembly 6 Chair Assembly Instructions 7 Available Options 8 Maintenance Instructions 9 Warranty Information...

Page 3: ...kes De Bug considerably easier to propel in very soft sand On trails and more compact surfaces the tire air pressure should be adjusted back to 5 P S I The armrests should be removed before performing...

Page 4: ...e foot rest to the desired position and then release the notched regulator locking the footrest iin postion Figure 3 shows the legrest raised to the first increment Figure 4 demonstrates the leg exten...

Page 5: ...backrest pull up on the backrest cable until the locking mechanism is released then raise the backrest to the desired position Re lease the cable when that position has been reached Be sure the chair...

Page 6: ...ight during use The chair may be further disassembled by removing the remaining 1 4 20 bolts as required To Assemble the De Bug 1 Slide on the Leg Support Sling and insert the two 1 4 20 nuts at the p...

Page 7: ...Assembly Instructions Please note the anti tip wheels are used with chairs that have the elevating legrests 6...

Page 8: ...th headrest and powder coated blue The armrests are in the reversed position Tilt in Space Chair Shown with elevating leg rest head rest and powder coated blue Tilt N Space Reclining Combination Shown...

Page 9: ...ult chair Chair width is 33 5 inches to access a 36 inch doorway and is 27 inches wide with the optional interchangeable pool wheels Chair design is patented in the U S 380 991 30 DAY Money Back Guara...

Page 10: ...UNDER THIS LIMITEDWARRANTYFAILS TO DELIVER NOTICE OF THE ALLEGEDDEFECTTO DEMING DESIGNSWITHINSIXTYMONTHS FROMTHEDATE OFORIGINAL PURCHASEFROMDEMINGDESIGNSORWITHINTHIRTYDAYSAFTERTHEDEFECTWASORREA SONAB...

Page 11: ...ing and sent back within 30 days to the address we will tell you Customer is responsible for all shipping related charges We will refund your payment less a 10 restocking fee and less shipping charges...

Reviews: