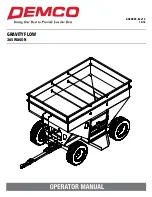
Demco 365 WAGON Operator'S Manual Download Page 8

Page 8

AG20003

  -     Reduce speed prior to turns to avoid risk of overturning.

  -     Always keep tractor or towing vehicle in gear to provide engine braking when going downhill.  Do not coast.

  -    Do not drink and drive!

•  Comply with state and local laws governing highway safety and movement of farm machinery on public roads.

•  Use approved accessory lighting, flags and necessary warning devices to protect operators of other vehicles on 

  highway during  transport. Various safety lights and devices are available from your dealer.

•  Use of flashing amber lights is acceptable in most localities. However, some localities prohibit their use. Local 

  laws should be checked for all highway lighting and marking requirements.

•  When driving tractor and equipment on road under 20 m.p.h. (40 kph) at night or during  day, use flashing    

  amber warning lights and a slow moving vehicle (SMV) identification emblem.

•  Plan your route to avoid heavy traffic.

•  Be a safe and courteous driver. Always yield to oncoming traffic in all situations, including narrow bridges, 

  intersections, etc.

•  Be observant of bridge load ratings. Do not cross bridges rated lower than gross weight at which you are  


  operating.

•  Watch for obstructions overhead and side to side while transporting.

•  Always operate equipment in a position to provide maximum visibility. Make allowances for increased length 

  and weight of equipment when making turns, stopping unit, etc.

PERFoRMiNG MAiNtENANCE

•  Good maintenance is your responsibility. Poor maintenance is an invitation to trouble.

•  Make sure there is plenty of ventilation. Never operate engine of towing vehicle in a closed building. Exhaust fumes 

may cause asphyxiation.

•  Before working on this machine, stop towing vehicle, set brakes, shut off engine and 

remove ignition key

.


Always use safety support and block wheels. Never use a jack to support machine.

•  Always use proper tools or equipment for job at hand.

•  Use extreme caution when making adjustments.

•  Follow torque chart in owners manual when tightening bolts and nuts.

•  Never use your hands to locate a hydraulic leak on attachments. Use a small piece of cardboard or wood. Hydraulic 

fluid escaping under pressure can penetrate skin.

•  Openings in skin and minor cuts are susceptible to infection from hydraulic fluid.

  Without immediate medical treatment, serious infection and reactions can occur.

•   When disconnecting hydraulic lines, shut off hydraulic supply and relieve all hydraulic pressure.

•  Replace 

all shields

 and 

guards

 after servicing and before moving.

•  After servicing, be sure all tools, parts and service equipment are removed.

•  Do not allow grease or oil to build up on any steps or platform.

•  When replacing bolts, refer to owners manual.

•  Refer to bolt torque chart in owners manual for head identification marking.

•  Where replacement parts are necessary for periodic maintenance and servicing, genuine factory replacement 

parts must be used to restore your equipment to original specifications. Manufacturer will not claim responsibility 

for use of unapproved parts or accessories and other damages as a result of their use.

•  If equipment has been altered in any way from original design, manufacturer does not accept any liability for injury 

or warranty.

•  A fire extinguisher and first aid kit should be kept readily accessible while performing maintenance on this equip

-

ment

SAFEty

Summary of Contents for 365 WAGON

Page 1: ...AG20003 Rev 12 10 18 Gravity Flow 365 WAGON...

Page 2: ...co Gravity Flow Wagon We feel you have made a wise choice and hope you are completely satisfied with your new piece of equipment Proper care and use will result in many years of service Go online to w...

Page 3: ...are used in each step This unit must be assembled in proper sequence or complications will result Warranty Policy Registration 2 General Information Warranty Policy Registration 3 Safety Signal Words...

Page 4: ...on that if not avoided could result in death or serious injury and includes hazards that are exposed when guards are removed It may also be used to alert against unsafe practices caution Indicates a p...

Page 5: ...erve all safety signs and practice instructions on them Never exceed limits of a piece of machinery If its ability to do a job or to do so safely is in question don t try it Lighting and marking It is...

Page 6: ...inspection for any loose bolts worn parts or cracked welds and make necessary repairs Follow maintenance safety instructions included in this manual Be sure there are no tools lying on or in equipment...

Page 7: ...rs of operation Correct all problems Follow maintenance safety procedures Following operation Following operation or when unhitching stop tractor or towing vehicle set brakes shut off engine and remov...

Page 8: ...ate engine of towing vehicle in a closed building Exhaust fumes may cause asphyxiation Before working on this machine stop towing vehicle set brakes shut off engine and remove ignition key Always use...

Page 9: ...ls are not shown to scale 3 AG21067 4 Back Amber Reflective Sticker 04508 Front 6 3 1 5 2 Red Reflective Sticker 04804 4 4 NOTICE Keep wheel lug nuts or bolts tightened to specified torque IMPORTANT A...

Page 10: ...elements increase torque values by 5 GRADE or CLASS value for bolts and capscrews are identified by their head markings BOLT TORQUE DATA FOR STANDARD NUTS BOLTS AND CAPSCREWS Tighten all bolts to torq...

Page 11: ...olt 24 01922 1 Special 1 1 2 12UNC Nut 25 01923 1 1 4 x 1 4 Socket Set Screw 26 00083 12 1 2 13 UNC Nut 27 00545 2 1 2v 13 UNC x 6v Full Thread Bolt 28 00085 2 1 2 Flat Washers 29 00306 30 2 Spring w...

Page 12: ...akdown 4 13 40 30 31 31 33 2 35 2 3 4 1 Assembled Door Opener 37 35 11 4 Part 5732 3 36 3 2 8 39 38 17 19 17 19 42 10 Red 20 Green 44 8 35 35 47 35 46 45 4 3 11 4 See Door Lift Assembly Breakdown 3 4...

Page 13: ...and nuts to ensure proper tension or torque 5732 Door Lift Assembly 3 00523 1 3 8 16UNC x 1 1 4 Hex Head Bolt Gr 5 4 02592 6 3 8 16UNC Nylon Insert Locknut 5 00179 1 3 8 16UNC Center punch Locknut 6 0...

Page 14: ...o running gear aligning the center fulcrum holes with holes in front axle of the running gear Secure using four 1 2 x 1 1 2 bolts 3 and four 1 2 nylon locknuts 5 Secure rear of gravity flow box using...

Page 15: ...e to the left turning marker light Green wire to the right turning marker light and White wire to the ground 4 When connecting the wire harness 4 to the rear box plug 5 match the wire colors with the...

Page 16: ...of opening 2 Remove the protective sheeting from both sides of the plastic window 3 Slide window into groove in molding Use a flat blade screwdriver to get molding seated correctly Using soapy water...

Reviews: