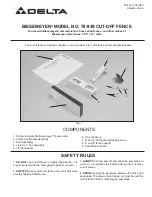
Fig. 6
Fig. 7
Fig. 8
Fig. 9
FOR ALL FENCES
8. Using a 1/8” drill bit, drill two 1/8” pilot holes 1/2” deep at
the two marked locations on the back of cut-off fence board
(F) Figs. 5 and 6.
NOTE: Mark the drill bit with masking
tape to act as a depth gage to prevent drilling through
fence board.
9. Align two holes (G) Fig. 6, with drilled holes (H) and
fasten cut-off fence support (C) to cut-off fence board (F)
using two #10 x 3/4” flat head screws (J).
10. Align hole (K) Fig. 7, in clamp and bracket assembly
(L) with the appropriate thru-hole (M) or (N) in cut-off fence
support (C) and fasten using the 1” long hex head bolt (P),
flat washer (R) and lockwasher (S).
NOTE: Thru-hole (M)
Fig. 7, is used for Biesemeyer
®
commercial fences, or
fences which are approximately 4” wide, and thru-hole
(N) is used for Biesemeyer
®
home shop fences, or
fences that are approximately 3-1/2” wide. Also, bolt
(P) Fig. 7, is to be inserted from the bottom with the
flat washer (R) and lock nut (S) located on top.
CAUTION: Do not tighten lock nut (S) Fig. 7,
completely, for clamp and bracket assembly (L) Fig. 8,
needs to move freely.
11. Fig. 8 illustrates clamp and bracket assembly (L)
properly fastened to cut-off fence support (C), for use with
a Biesemeyer
®
commercial fence. Assembly to
Biesemeyer
®
home shop-style fences is similar.
12. Thread knob (T) into threaded hole (W) of clamp and
bracket assembly (L) approximately four complete turns.
13. Place entire cut-off fence assembly (X) Fig. 9, so it
straddles the saw fence (D) as shown, and tighten knob
(T) until cut-off fence assembly (X) is firmly clamped to
the saw fence (D). Then secure saw fence (D) in place by
pushing down on handle (H).
14. Using a square (Y) Fig. 9, determine if cut-off fence
board is 90 degrees to saw table. If an adjustment is
necessary, loosen knob (T) slightly and turn adjustment
screw (Z) accordingly. Then tighten knob (T) and recheck
squareness. Repeat adjustment if necessary.
3
Y
F
Z
X
T
D
C
L
T
W
S
C
L
K
M
N
S
R
P
H
G
C
F
J
H


